.. after unsuccessful attempts.
The last rides in 2025 on my old rubber cow were interrupted by carburator problems. One cylinder just stopped working. I had to open the floating chamber and clean the nozzles. It turned out that small rust particles clogged them. This happened several times on a single trip. The tank is more than 50 years old, I had it repainted in 2005, but only on the outside. So the inside obviously needed some care. The gasoline in the Philippines has between 5-10% alcohol contents, which is not really helpful since alcohol absorbs water from the air that enters the tank trough tank breathing caused by temperature changes.
I did not like the idea of restoring the inside of the tank myself. The normal way is to first de-rust the tank inside by filling it with sharp objects like spax screws and then putting it inside a concrete mixer. Letting that run for several hours for the sharp parts remove the rust and loose paint mechanically. I don’t have a concrete mixer and when asking around, the cheapest one for hire was 30k Pesos for three days minimum. A good second-hand tank for the /5 series is between 600-1,000 Euro in Germany, and then I would still have a tank that might also be rusty inside.
Fist attempt.
I gave the tank to a friend who said he knows how to do it. He restores vintage motorbikes and said he is not using one of the commercial tank sealing products, but a two component primer. For de-rusting he would tie the tank to a car wheel, jack the car up and then run the engine in gear for the wheel to turn. Sounded sort of OK, so I decided to give it a try.
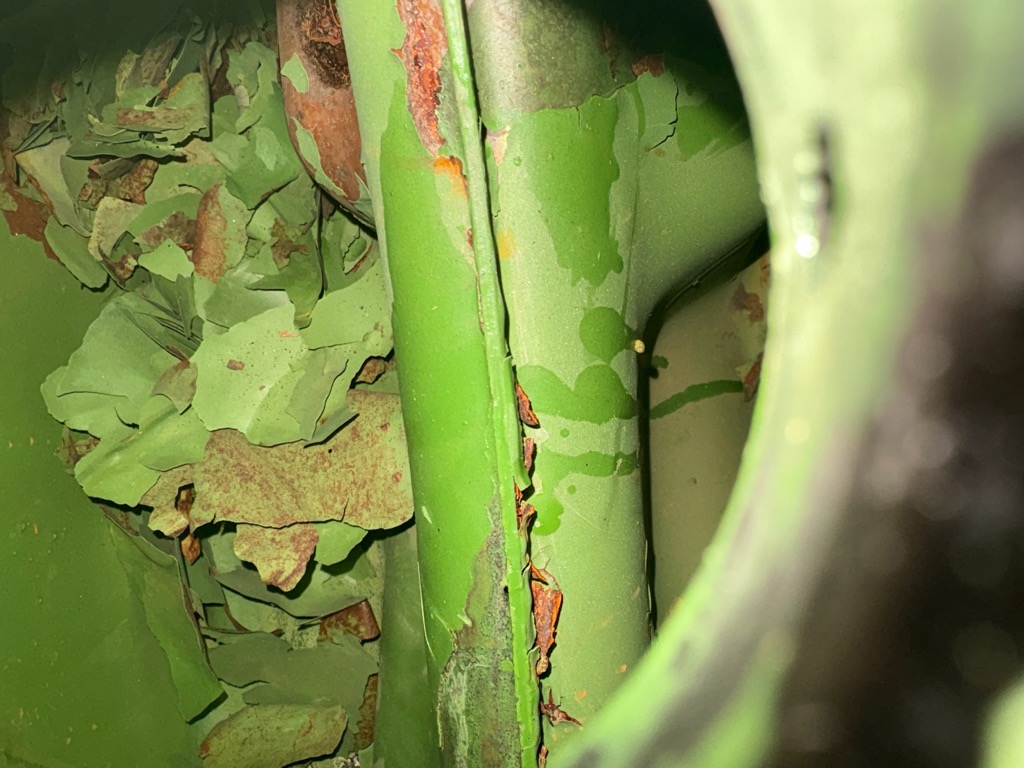
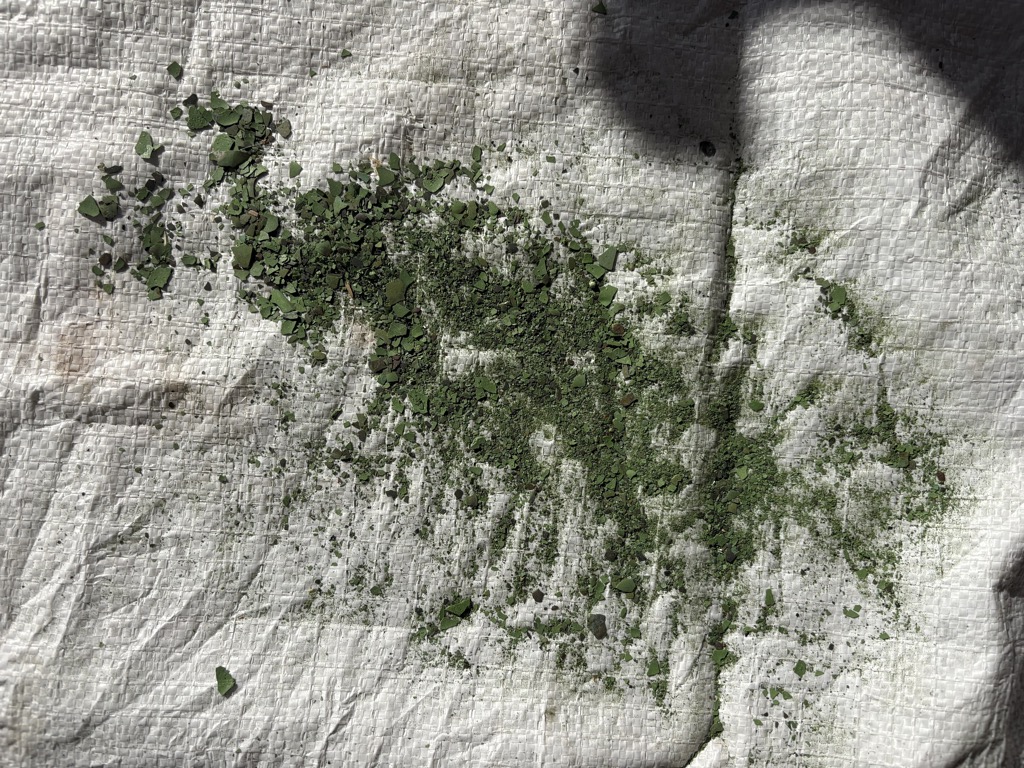
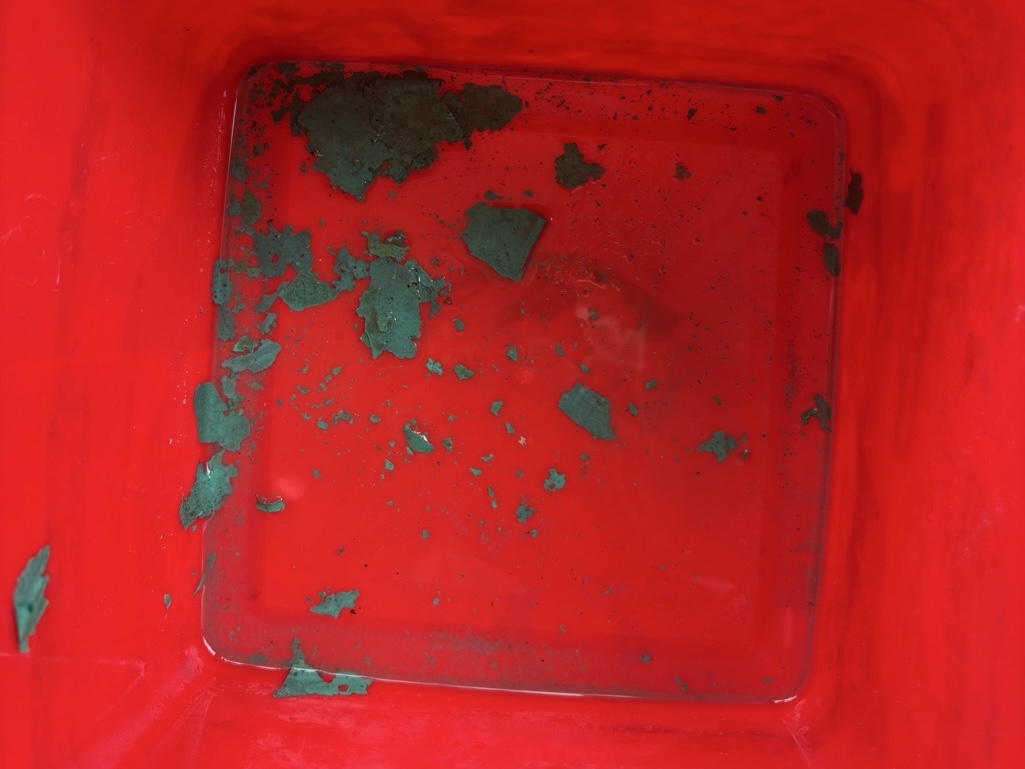
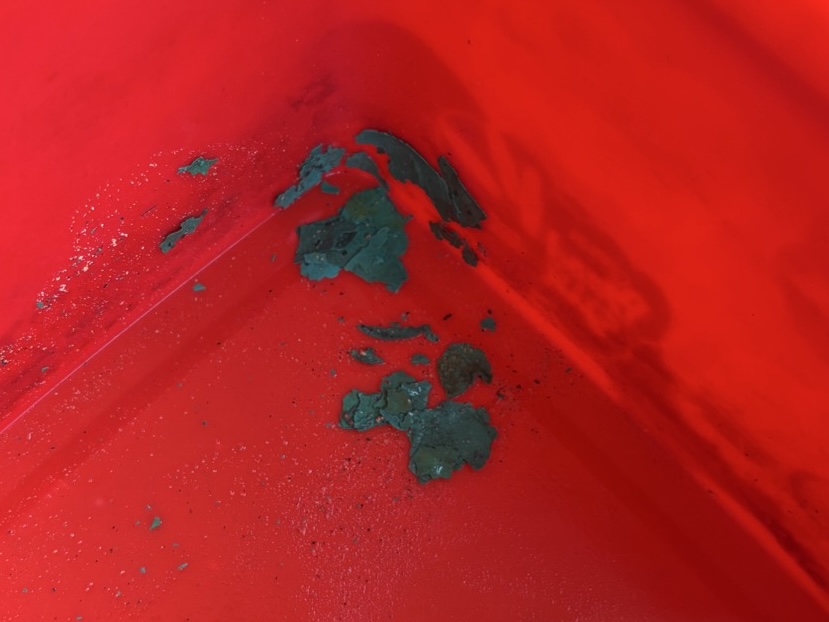
Unfortunately the (green) primer started to peel off in big flakes after only two weeks of usage. So I was back to the original problem, even worse, because now I had the remaining primer still inside the tank. I never seem to learn – I should do all the work on the old cow myself, I end up having to re-do it. And usually then it is a lot more work than I had saved by subcontracting.
Market research
There are various tank sealers in the markets, in Germany and internationally. I spent half day to do an online assessment of the avialiable products. It’s complicated, and there is a lot of frustration around about tank sealing. The key points to be considered are:
- There are four steps needed: 1.) Removing the loose rust, paint and other stuff that accumulated inside the tank, e.g. residues of oil, in particular in tanks of motorbike with two stroke engines. This step is usually done mechanically, e.g. by using the abovementioned concrete mixer. 2.) Derusting chemically to remove the fine rust still inside. 3.) Degreasing / removing grease and oils. and 4.) Sealing the cleaned surfaces.
- Motorcycle tanks are difficult because you can not easily reach all locations inside for the mechanical de-rusting, also for the cleaning and sealing liquids to reach all surfaces. So this needs to be done very carefully at highest quality standard.
- Motorcycle tanks are exposed to huge temperture differences. When parked in the sun the tank temperature can reach 60° Celsius, in winter even minus degrees. As a result the metal expands and shrinks significantly. The sealer therefore needs to be quite flexible, even when cured, becaue otherwise it would crack and expose the surface underneath to the fuel / water again. Two component sealers are more rigid, and therefore more prone to cracking than once component sealers.
For the above reasons I decided to use a one component sealer from Wagner Classic Oil, a German family business, which has developed and improved the product over more than 30 years. They have different sets consisting of the de-ruster liquid and the tank sealer for different tank sizes, Since the BMW R75/5 tank has a volume of 20 liters I had to buy the set for 30 liter tanks for around 50 Euro. Not cheap but I had spent more for the previous unsuccesfull attempt, including the labor.
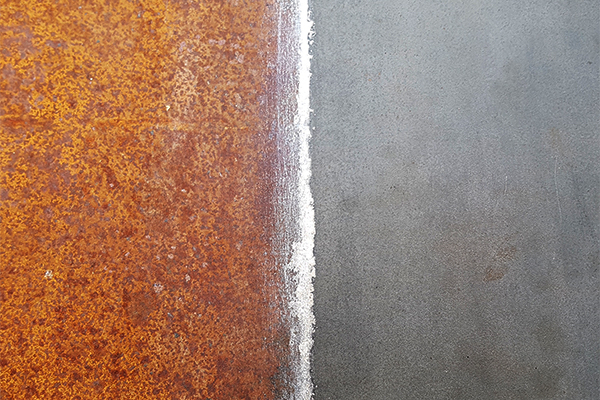
The de-ruster “RostFix” removes the rust and also bonderizes the metal, adding a protective layer. The set comes with a concentrate that needs to be diluted 1:30 to 1:60 and needs to be applied for a few days by filling the whole tank with the solution. The picture below (credit Wagner) shows the effect..
The one component tank sealant resin “TankFix” is then applied after cleaning the de-rusted tank with acetone.
Mechanical de-rusting
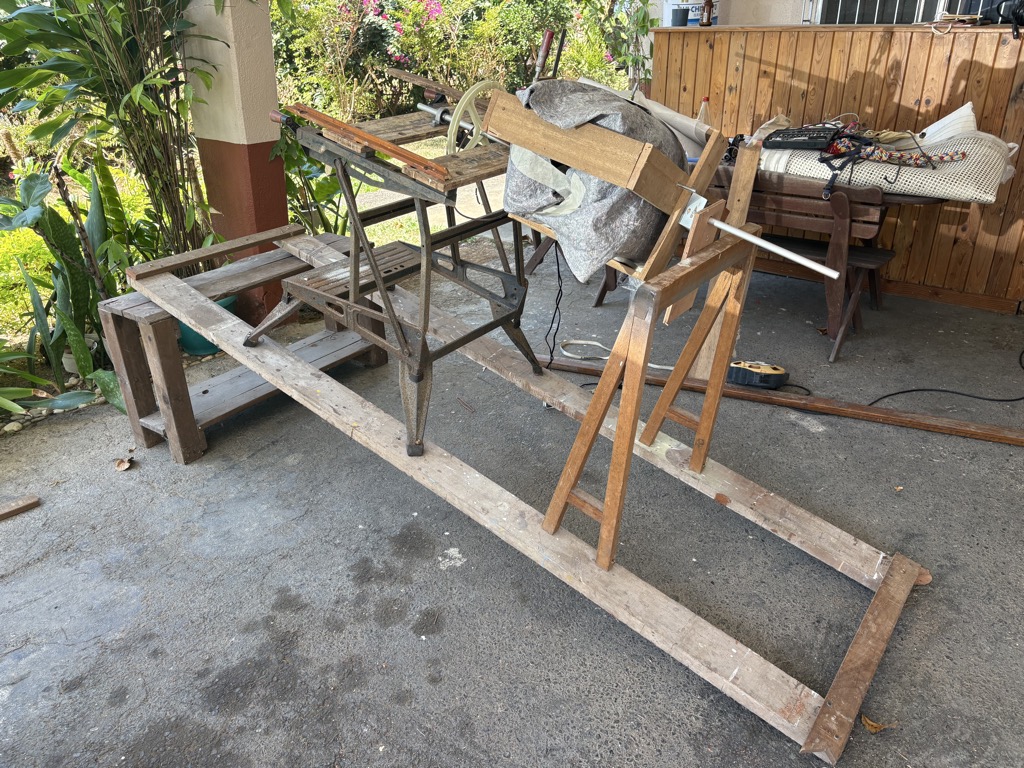
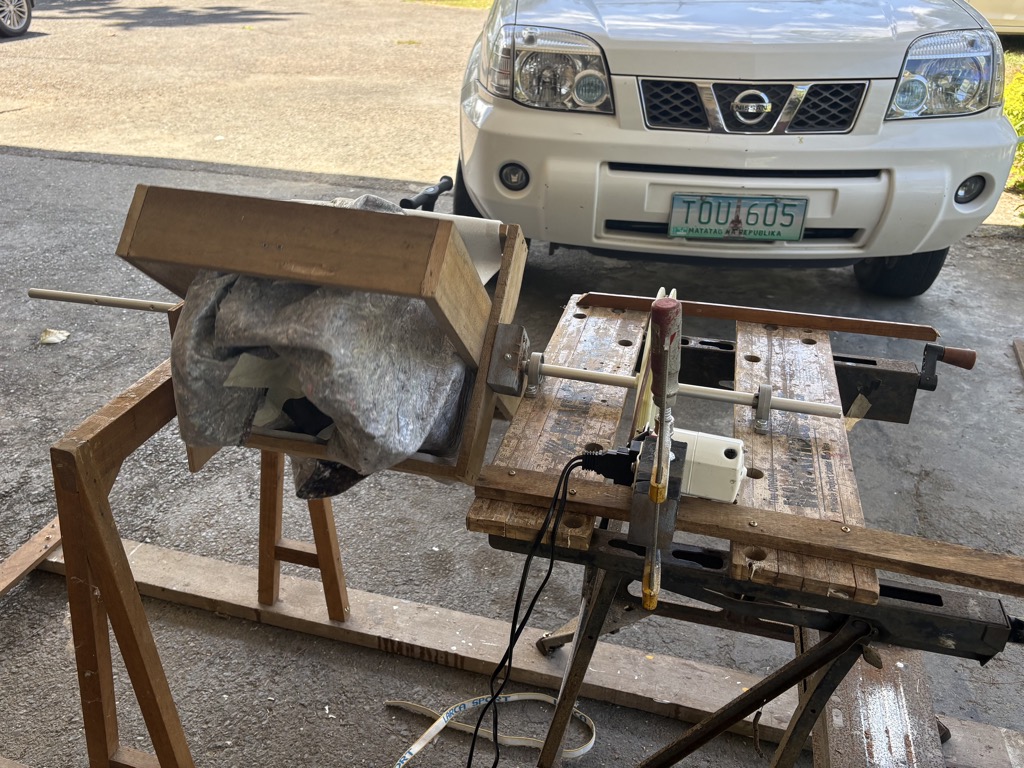
I could not find a reasonably priced concrete mixer for rent. Tying the tank to the front wheel of a jacked up car did also not sound like a good idea. So I had to find another way to mechanically remove loose rust and paint. I built a wooden frame holding the tank with two axles on both sides. With my old B&D portable work bench, two wooden beams that served as the helling for building Lemony, two ball bearings and a sewing machine motor I built a structure to hold the wooden frame so that the tank could spin around the axles. The whole structure could be tilted so that the sides of the tank could also be reached.
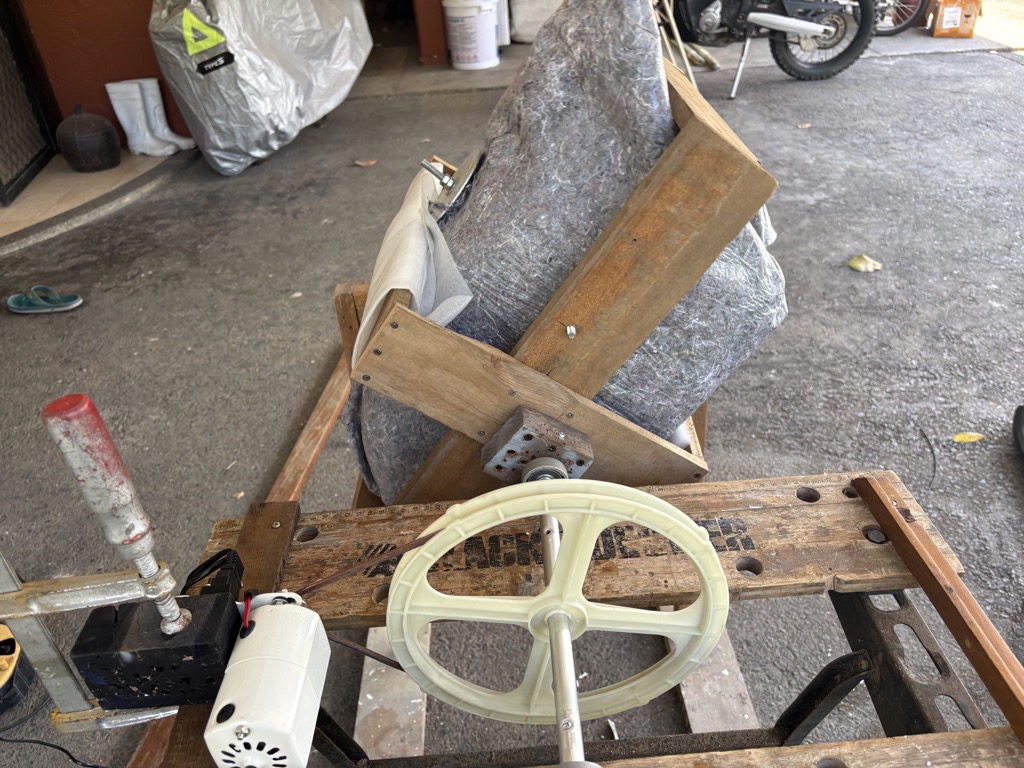
Filled with sharp nails and screws the set-up worked quite well. I had taken out the loose paint chips wiht a vacuum cleaner before, after several hours of mechanical impact a lot of the additional loose rust and more paint could be removed, again using the vacuum cleaner since the tank opening has a notch leading inside and the openings for the fuel cock are too small.

Testing the Water Tightness
I then filled the tank with water to make sure that the fuel cock connections and the inlet are watertight. The derusting liquid needs to stay inside for at least two days, and it would spoil the paint if it spilled on it.
De-Rusting and Bonderizing
The RostFix concentrate needs to be dilluted with water in the ratio 1:30 to 1:60 when used on tanks. I had two bottles with a total of 500ml and mixed those with 20 liters of water resulting in a 1:40 mixture. I filled the tank with the solution to the top. A small air bubble remained on the top.
First day: I left the tank upside down with the inlet open.
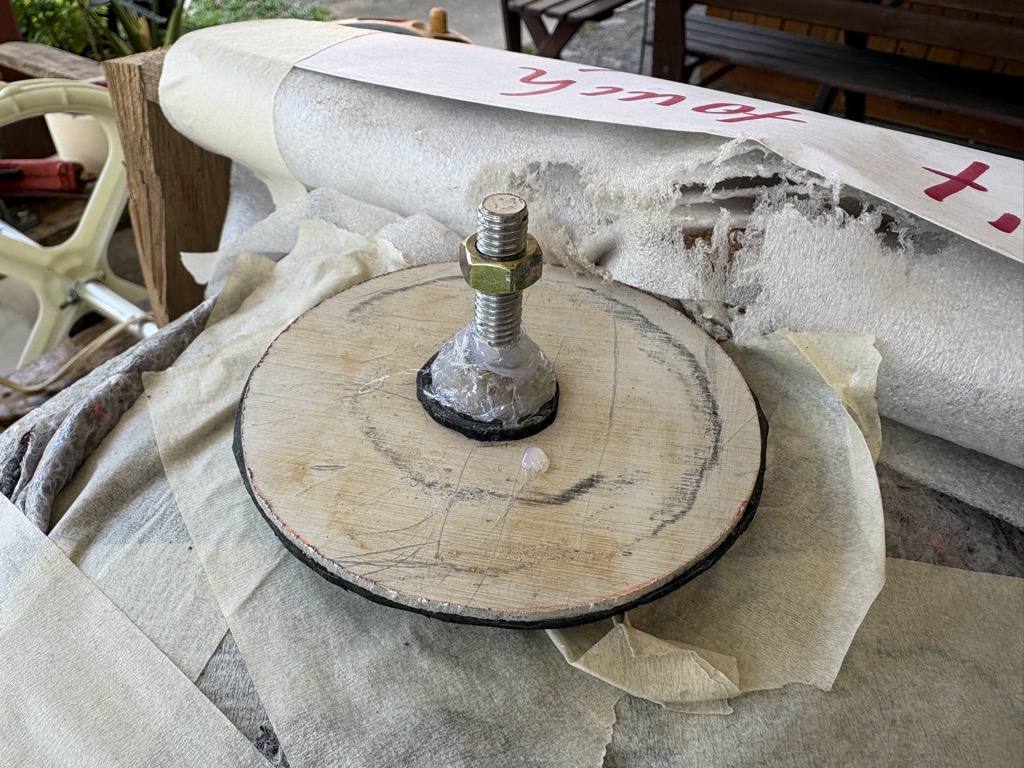
Second day: I sealed the tank inlet with the cover shown below. It is made from an aluminium plate with rubber from a inner tube glued on it for sealing. The bolt and the whole are sealed with heat glue before turning the tank upside down. Pressure builds up quickly inside the tank, either from the high daylight temperature or from the chemical process, so one of the fuel cocks needs to be opened to release the pressure once the tank is turned upside down. You can hear the pressure releasing through the opended fuel cock. Wagner also recommends not to seal the tank while de-rusting.
I have a few more days before the acetone for cleaning the tank inside after the process arrives after online order, so there is sufficient time for the solution to work.
There is some primer paint left inside but it seems to be well attached to the metal and there is no way to mechanically remove it. So I thought, since the resin for sealing the tank inside basically creates a second plastic tank inside, maybe I can just leave that primer underneath.
It turned out to be more difficult
Step 1: When I drained the RostFix solution three days later and flushed it out with acetone, I found that a lot more paint had chipped off the metal and was hanging inside, still attached to the metal. I dried the inside overnight in our dry room using a small 12V blower blowing air into it through the tank opening. Then I did another round of mechanical de-painting with the screws. A lot of small paint particles came loose again. I took out the screws and dirt with the vacuum cleaner.
Then I then filled up the tank again with the Rostfix Solution.
Step 2: Two more days later I did a second attempt. Again, more paint had come off. Another round with the screws, followed by the attempt to mechanically remove the remaining paint using a small wire brush connected to the electric drill with a very long fixed axle. It was not flexible enough to reach most parts of the inside. An industrial endoscope connected to the iPhone and attached to a aluminium bar was a bit useful to remove loose paint chips inside. After removing those withe vacuum cleaner I filled the tank again with the RostFix Solution to remove rust from the newly exposed metal.
Anticipating that maybe more paint becomes loose after de-rusting I ordered a spray paint stripper online to aid the process. Also a flexible shaft for the electric drill to be able to reach inside better with a wire brush.
Step 3 to 5: One day later the same procedure, removed additional paint chips mechanically with the aluminium / endoscope bar. Then filled the tank again.
When flushing with acetone each time some more paint flakes came out with the liquid.
And so it went on and on.. in the meantime the flexible shaft for my Proxxon tool had arrived and I had also glued a small rotary sander to a long aluminium tube and used that with the electric drill. Both helped to remove the remaining primer.
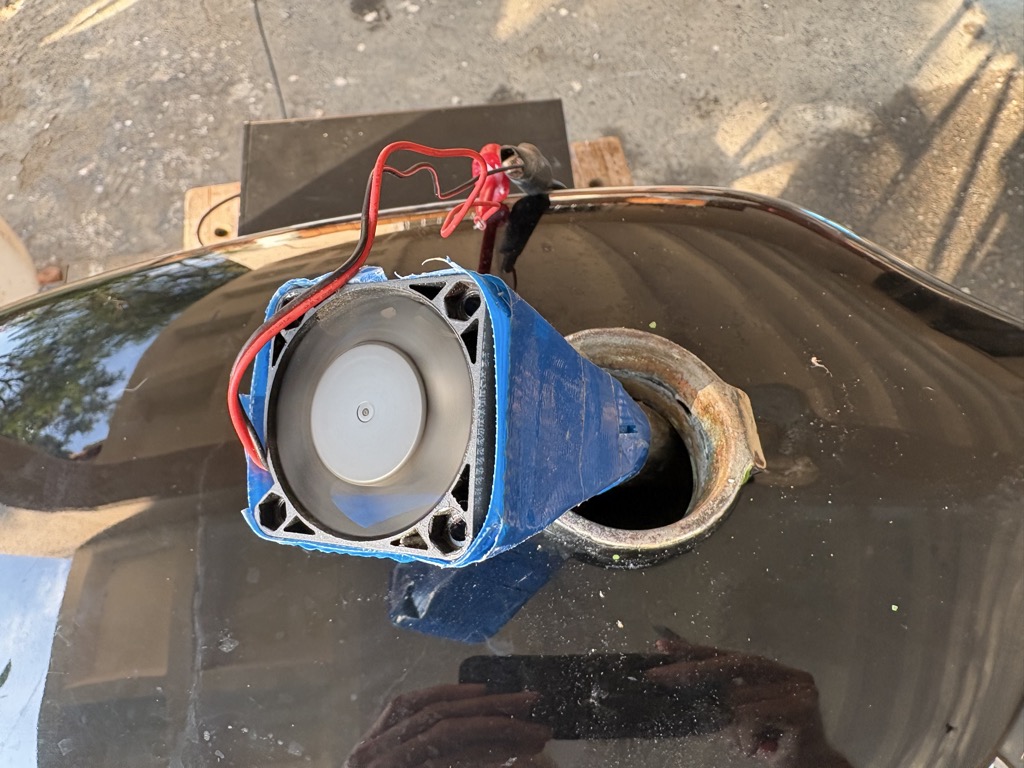
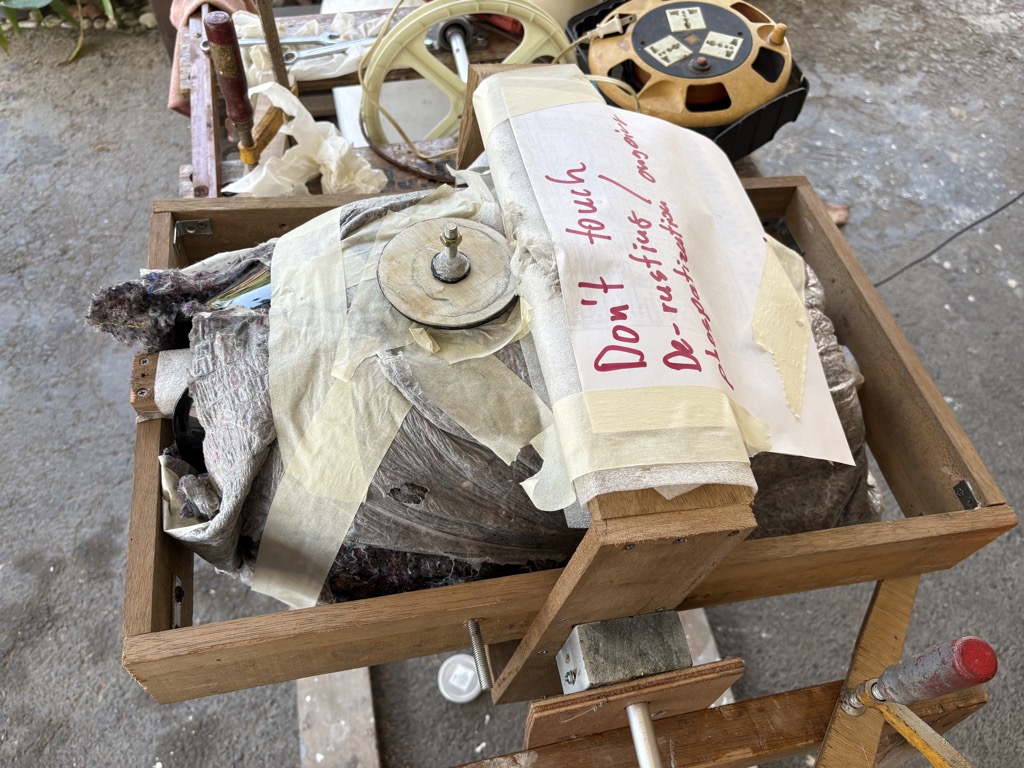
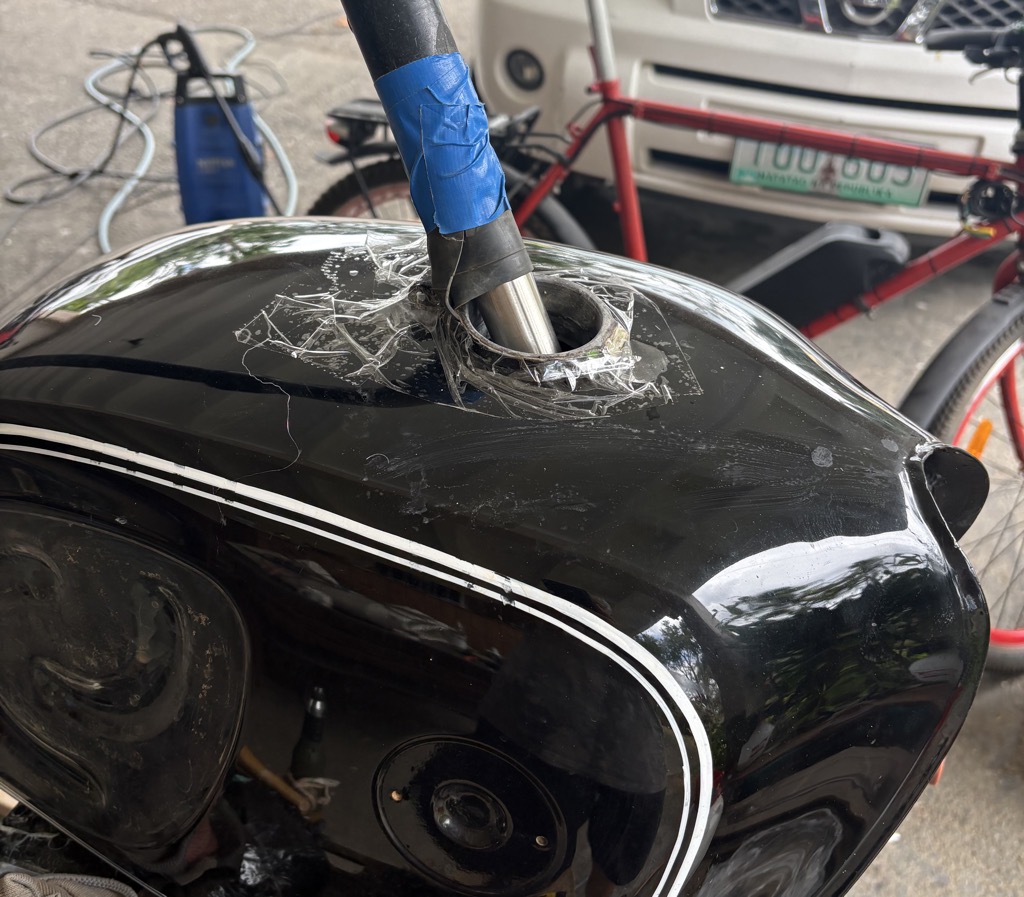
It took around 5 times filling the tank (I stopped counting after the third time) and approximately four weeks to get the tank inside free of paint and rust. One last flushing with acetone to remove the remaining particles and chemicals, speeding up the drying with a vacuum cleaner (picture) and then the sealing could finally begin.
I applied TankFix two times. The second time 20 hours after the first time, it is recommended not to wait longer than 24 hours because than the first layer is dried so much that the second one does not bond with it anymore. After the second time there was supposed to be some leftover flowing out but in my case it did not. Maybe because of the high temperatures in the tropics it cured faster than usual. Just to be sure I placed the tank upside down for 24 hours to make sure that any excess is at the top and not like a puddle in the bottom.
The tank then went into our storage room for the seal’s complete curing. It is supposed to take around a week. Since I am busy wiht the boat now it will be a lot longer. For moving air through the tank faster than through natural convection I attached a tube to a small computer cooling fan operated with 12V.