2025-2026
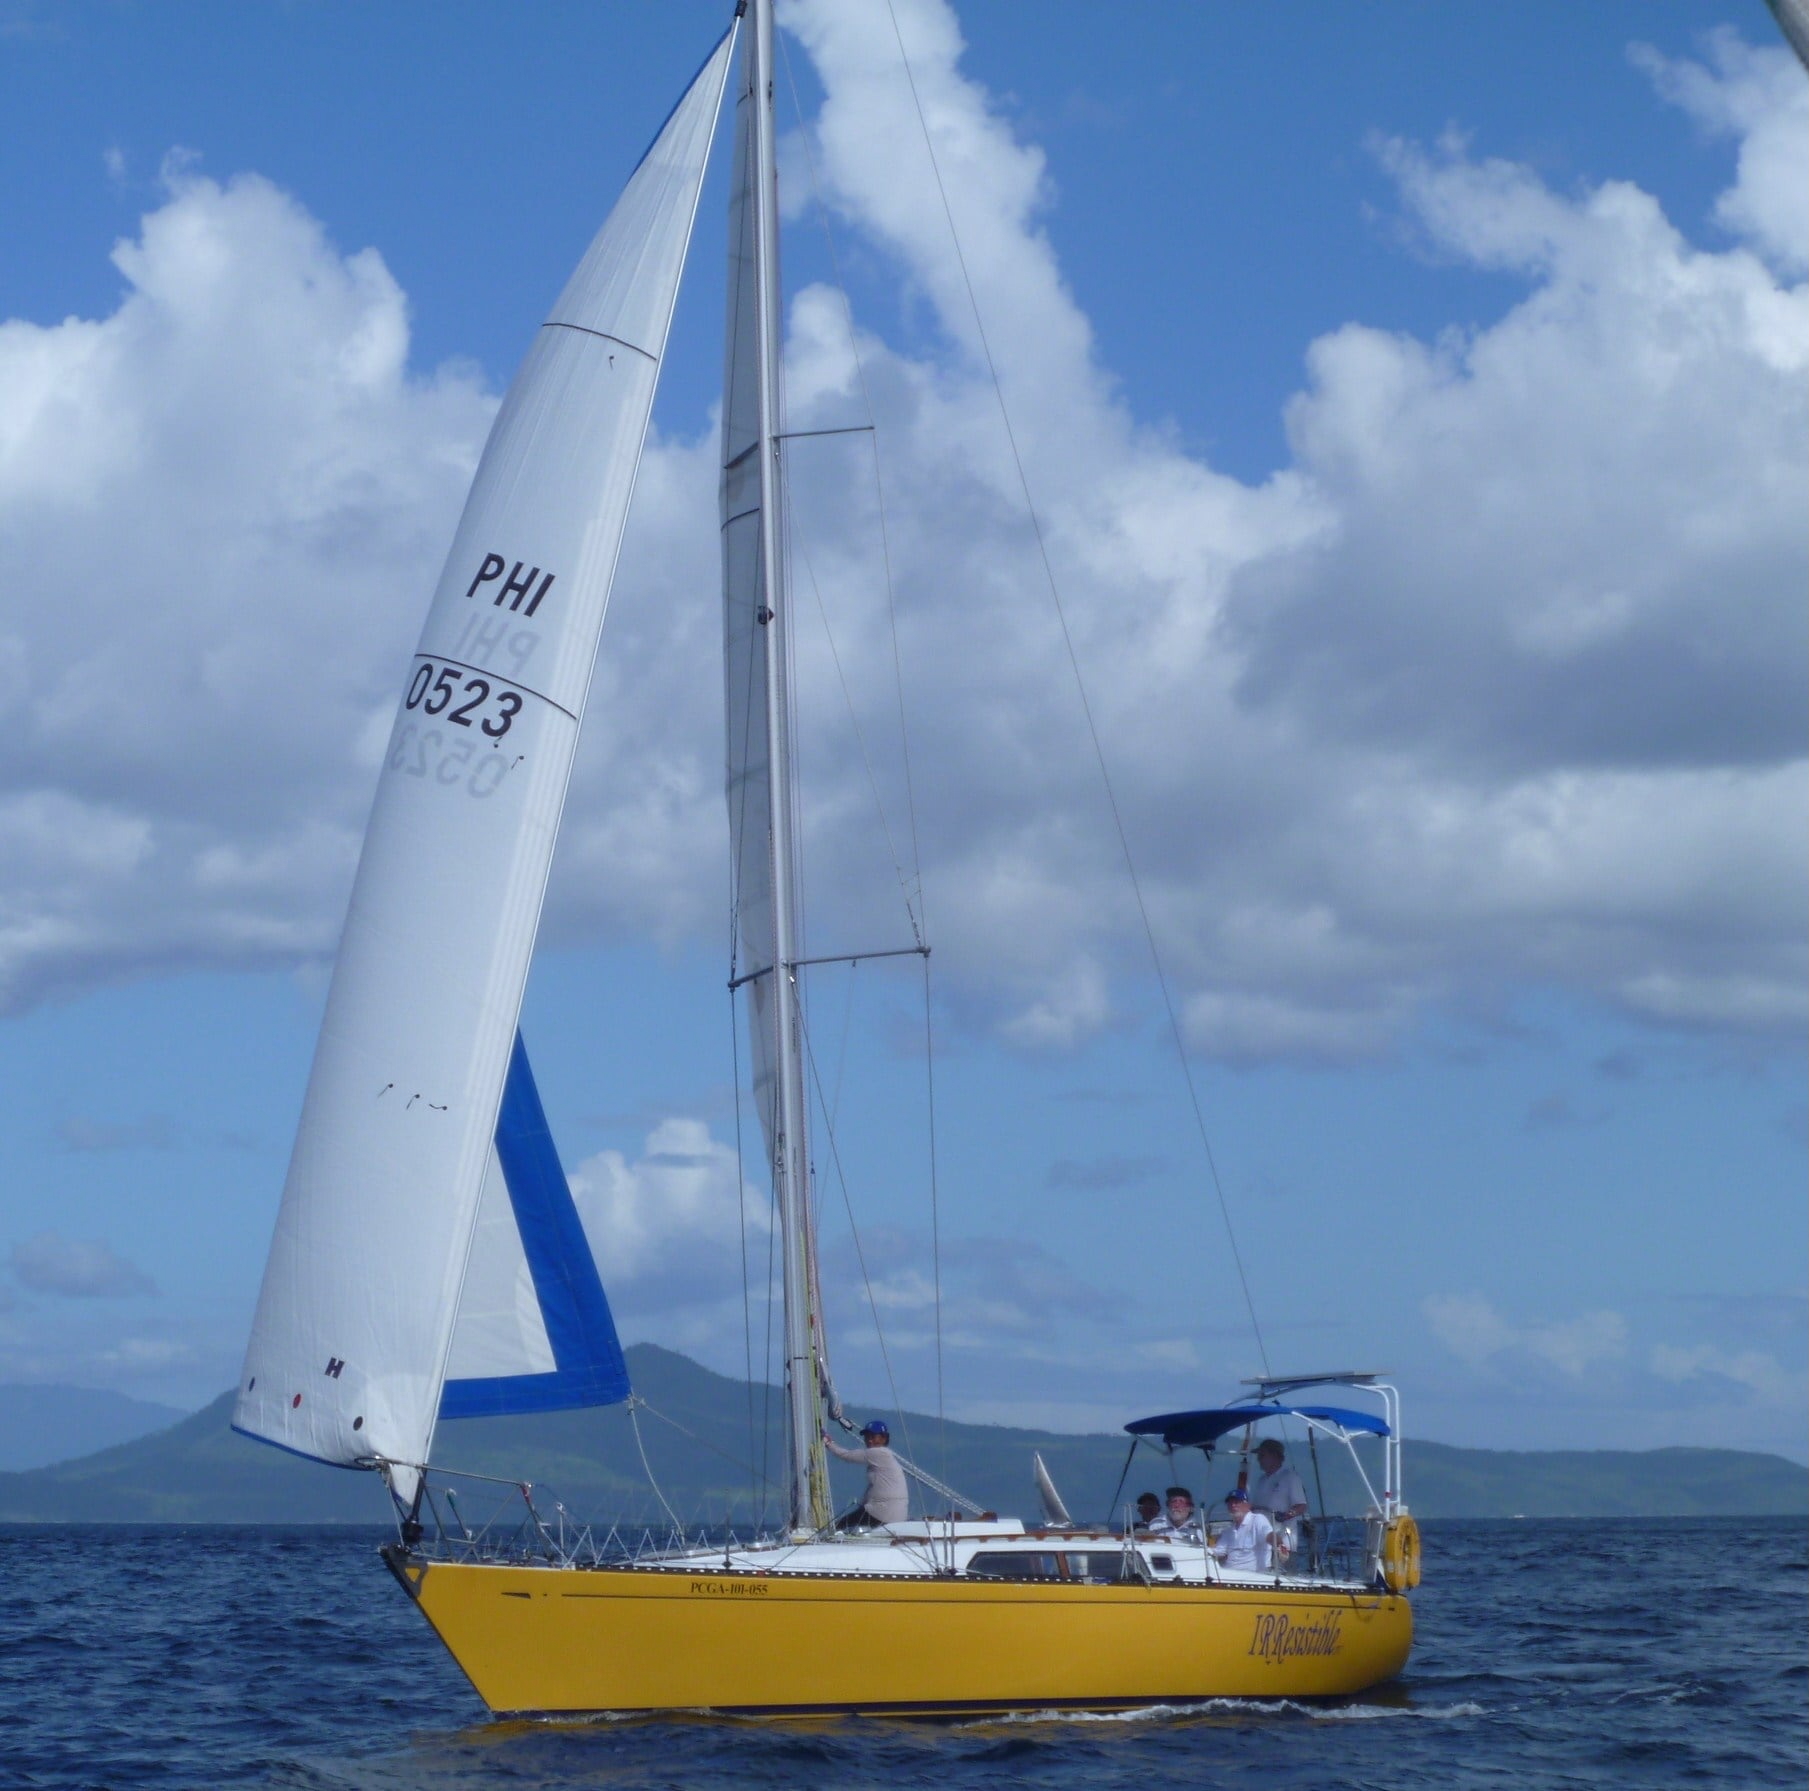
The following is a list of the major work we have done on IRResistible 4 during the period of January to October 2026. This included a haulout at Watercraft and work on the pier after re-launch. Details are covered in separate password protected pages. Also see the Before and After page.
Why?
When we bought the 40 year old boat, it was in reasonable condition for sailing, since it had been used for regatta sailing the previous years. However, inside it was a mess with the electrical system and plumming broken, three bulkheads and the floor having rotten sections, and water leaking in everywhere. The boat had also not been out of the water for some years and there was a good chance that it might have developed osmosis in some areas. Our original plan was to spend two months to haulout the boat, do the underwatership and the most urgent repairs, and then sail, repair a bit more, sail, repair – repeat. However, when sailing to Sablayan over Christmas and New Year we faced so many problems that the two months planned repair became 10 months restauration.
Repair, Restore, or Purchase?
Guiding principles for the restauration were: 1.) Restore the cruise ability of the boat that was recently only used for regatta sailing and day tours with guests; 2.) As much as possible maintain the original character of the boat, but don’t stick to it religiously; 3.) Recycle / repair as much as possbile to protect the environment: 4.) Be cost effective; and, given the latest political developments, 4.) Buy non-American products whereever possible, avoid Amazon and other platforms of the tech oligarchs by all means.
Removing Things
- Leftovers of aircon, repurposed inlet, seacock and strainer for sea water faucet in galley
- Washdown pump in the cockpit locker (220V)
- Broken massive inverter. Not sure what that was used for, the aircon? Wash down pump?
- Removed all flairs, they expired 10-15 years ago.
- Removed all life jackets, they all had disintegrated, not a single one worked.
- Removed the broken instruments.
Underwater ship
- Removed the corral reef ecosystem that had grown on the hull surface during the years in the water. This was done by volunteer divers at Pandan Island Resort.
- Haulout at Watercraft – removed all antifouling leftovers and primer.
- Repaired several smaller mechanical damages of the hull.
- Repaired two small osmosis spots.
- Replaced all through-hull fittings.
- Anti corrosion treatment of the sail drive.
- New anodes for the saildrive.
- The diaphragm could not be changed because the Yanmar part did not arrive in time.
- Removed old speed and depth sensors, fitted new Raymarine log and depth sensors.
- Applied 3 layers of primer.
- Applied 2 layers of anti fouling.
Rudder
- Checked the wobbly rudder.
- Tightened the loose rudder bearing frame.
Fresh Water System
- Ripped out all heavily corroded and partially leaking through-hull fittings and sea cocks. Replaced them with new ones imported from SVB Germany.
- Replaced the plastic and corroded steel faucets in Head and Galley with rebuilt ones from Costa Rica.
- Installed new wash basin and wash table surface in Head.
- Cleaned and rennovated wash basins in Galley. One is corroded through, fixed it with fiberglass, it will have to be replaced if the same size can be found.
- Cleaned and re-built fresh water pump and repaired electric conections.
- Ripped out old deck shower and made a simplified one with a separate cock to shut it off.
- Replaced most hoses and all hose clamps. Two 316 stainless steel hose clamps at each connection.
- Ripped out old broken electric toilet. ordered a new manual one from SVB, Germany. (in Balikbayan box).
Motor and Saildrive
The motor with saildrive was replaced in 2008, so it is not 40 years old. However, the saildive diaphragm had not been renewed, in fact the top one was missing the hose clamp, so if the lower one would have broken, the boat might have sunk. Several problems also occured with the motor during the first voyage. Resulting work:
- Replaced alternator, the old one stopped working with a broken PCB. Reparied the old one after importing a PCB from Germany to keep as a backup.
- Removed motor oil, there was almost a liter too much in it, leading to heavy smoking.
- New diesel filter.
- New belts.
- Had to clean out both tanks, lots of dirt / bacteria had accumulated there and caused the engine to stop frequently because it clogged filters.
- The aft tank was loose, mounted it usign bigger screws and secured it with additional wood blocks to prevent it getting loose again.
- Replaced the broken tank sensors for fuel level.
- Addressed cooling water problems three times. Supposedly an air pocket, recommendation to mount the strainer lower.
- Removed rust from pulleys and primed them. They were so abrasive from rust that the belts were wearing so quickly that they had to be tightened each day. (Need new pulleys at some point).
- Fitted new key switch in motor control panel. In the old one the switch was stuck and could not be removed.
Electrics
After several assessments and a few attempts to repair the old system: Ripped out everything except for the motor circuits. Cables, contacts and devices were just too rotten from the water intrusion, most of it beyond repair. After waterproofing the deck (rainwater was dripping onto the electric compartment behind the switch board, a major cause of the rot) redesigned and rebuilt the whole electrical system:
- Sourced required parts and components, from own stock (the electronics trade person never throws anything) and various suppliers.
- Replaced the two broken lead acid batteries used as house battery with a LiFePo4 house battery. The previous owner had installed car starter batteries instead of deep cycle batteries, using them as house battery was a death sendence for them, sure enough they were both dead after 4 months.
- Replaced the old solar charger that had no provision for Lithium with a VICTRON charger.
- Designed the new electrical system system, printed circuit diagrams and came up with a technical manual with specs.
- Ripped out all old cables and components, designed and made a new DIN rail distribution panel.
- Designed and made a new central switchboard.
- Implemented the electrical system according to German standards.
- Installed new navigation lights at the hull, red and green at the bow railing, white at the transom.
- (Replaced the broken three colour navigation light and anchor light at the mast top.)
- (Replaced anchor/deck light.)
- Replaced the large vintage shore power connector in the cockpit with a much smaller, modern one at the companionway.
- Placed 12V cigarette lighter outlets in: Central switchboard, galley, cockpit switch panel.
- USB ports in: Central switchboard, Cockpit switch panel, aft cabin and bow cabin (in still to be installed).
- Fans: 2 in Saloon, 2 in aft cabin, 1 in forward cabin, one portable fan with cigarette lighter connector and clamp for use wherever needed.
- New refrigerator light turned on by push button, timed for 1 minute.
- Had to remove charge relais. It did not work with two different battery chemistries. Maintained the emergency switch connecting both battery banks.
- Installed 2 battery indicators at the central control panel to allow a quick status check without having to measure voltages.
- Redesigned and wired the 220V system. New earth leakage circuit braker (there was none) and fuses.
- Option to feed the 220V outlet from an inverter.
Entertainment
- Installed a Kenwood CD player radio with 4 speakers, two in the saloon, 2 in the cockpit.
Navigation Equipment
After testing all (unmounted) instruments, chart plotter, car radio, UHV radio, leftover of the autopilot, etc., and finding most of them broken, some still working but with black or unreadable displays, I decided to get rid of the whole crap.
- Ripped out the old SeaTalk, SeaTalk -II and NMEA backbone cables.
- Installed new Raymarine i70 display.
- Installed new Raymarine depth sensor.
- installed new Raymarine logsensor.
- Installed new Raymarime masttop sensor for wind.
- Installed SeaTalk NG backbone throughout the boat.
- Recycled course sensor and controll unit for autopilot.
- Purchased components needed for a chart plotter based on OpenPlotter and Raspberry Pie technology.
Fixed Leaks
The boat was porous as a sponge. Water came in everywhere, entered most of the through-deck fittings, ran through the balsa wood core of the deck, exited at all sorts of places through the lower fiberglass layer of the deck and dripped into the cabins. As a result the wood of parts of the bulkheads, furniture and the floor was rotten, having the consistency of compost, and the electrical system was junk. Fixing the leaks was therefore priority no. One.
- Removed the two main deck winches and the jam cleatS, strenghtened the deck, repaired the holes, strengthened the counterplate, primed and repainted the deck and remounted the devices sealed with Sikaflex.
- Removed the port and starboard foresail sheet travellers, repaired the holes, filled gaps with marine epoxy, primed, painted and remounted the travellers sealed with Sikaflex.
- Designed a new mast boot, sourced material in China, and implemented it.
- Sealed the metal fitting for the mast through deck hole with Sikaflex.
- Removed the sliding hatch cover and the sliding hatch rails, cleaned everything, made expoxy fillets for the screws (major culprit with respect to deck leaks), re-built the wooden parts, varnished them and remounted everything (this finally stopped the water intrusion).
- Cleaned and sealed the wooden blocks for the forsail sheet.
- Filled a big hole at the transom though which the solar panel cable and the GPS sensor cable ran. This had been the cause of the bilge pump getting activated immediately every time it rained.
- Removed all ceiling panels and sealed through hull bolts from inside.
- Fixed many cracks in the small cabinet above the galley thorugh which water leaked into the deck above the aft cabin, and from there dripped down into the cabin at several places.
- Cleaned, removed old damaged fiberglass fixes from the portside cockpit pocket. Water entered from there into the Aft Cabin. Cut open the fiberglass from below and let the wood dry out. Added a fiberglass layer inside the cockpit pocket, filled the gaps with PU foam and closed the holes with marine epoxy.
- Restored the gasket and the wooden base of the Head hatch / window.
- Restored the wood of the Saloon hatch / window, ordered a new hatch from SVB because the old one was beyond reasonable repair (in Balikbayan Box).
- Removed all three cockpit windows, restored two and ordered one replacement from SVB (in Balikbayan Box).
- Removed the Kitchen window because the rubber gasket leaked, placed a temporary plexy glass window, ordered gasked from SVB (in Balikbayan box).
- Removed the starebord side aft and the port side forward window of the saloon, restored the base (all holes worn with big cracks in the fiberglass). Remounted both, the first with Sikaflex, the second with silicone to be replaced once new Sikaflex arrives. Temporarily sealed the other two windows with lots of weather resistant silicone. (Next thing to be done)
- Sealed the thorugh deck fittings of the shrouds from outside and inside.
- Filled spaces thorugh which water flowed with PU foam: Top of the bulkhead where the mast boot sits, cable channel laminated into the deck.
Saloon
- Totally dismanteled the ceiling and its support structure after it partially collapsed due to the failure of the adhesive attaching the wooden support structure beams to the fiberglass deck. Cleaned the fiberglass, the wooden beams supporting the ceiling and remounted everything, glueing the wooden beams with marine epoxy to the fiberglass deck since the elastic compound used before did obviously not work.
- Removed the floor panels. Remade two rotten ones, restored the other ones and varnished all. Made epoxy fillets for all screw holes.
- Replaced two wooden beam sections of the floor support stucture.
- Cleaned out all the compartments under the floor panels. They were a complete mess with moist debris accumulations. The bottom of the mast is quite corroded because of this.
- Removed the shelves on both sides in the Saloon to check whether water leaks in underneath, also because they looked terrible and were partly broken. Restoring them is low priority.
- Cleaned out the battery /water tank compartment on starboard (see also section on electrics).
- Cleaned out the battery/diesel tank compartment on port. Re-attached the loose aft diesel tank.
- Restored the main bulkhead separating saloon and head after removing some major rotten parts (caused by water entering from the mast boot)
- Restored the rotten section of the bulkhead separating the saloon from the galley, caused by water entering at different points of the deck.
- Installed a new bilge pump with auto / manual switch.
- Made a new washboard with a removable blower for more circulation of air when the boat is moored.
- Started restoring wooden frame holding the washboard in the companionway.
Galley
- Restored the rotten bits of the bulkhead separting the galley from the aft cabin.
- New scratch resistant panel on the work area.
- New facuets (for fresh water and for sea water).
- Rennovated the cover to the refrigerator
- Replaced refrigerator light, added a push button and a timer.
- Rennovated and mounted the strorage fittings for kitchen utensils.
- Mounted new fire estinguisher.
- Polished and mounted the stainless steel railing.
- Fitted a temporary single flame alcohol cook stove. Need to find a new, fitting range later.
- Restored the food pump, used it for the sea water faucet instead of as emergency pump for fresh water.
Head
- Replaced all three sea cocks and two through hull fittings.
- Filled all the holes in the walls that were previously used, e.g. for the electric toilet.
- Removed old navigation sensors under the floor, cleaned the area and fitted the new Raymarine sensors. Cleaned up cable mess and routed new cables properly.
- Fitted connection box for mast lights.
- Removed all 3 ceiling panels, sandend and repainted them.
- Removed gray paint from the wooden parts and varnished them. These are made from nice tropical wood. Should do the same with all panels of the other cabins too.
- Replaced the sink and the faucet.
- Restored the two lights.
Bow cabin
Not much done yet since there seem to be no leaks that are urgent.
- Drained out the sections underneath the floor panel.
- Cleaned out all cabinets (found rotten chart plotter and life jackets in there).
Aft cabin
This was lower priority in terms of other, more urgent work, but on the other hand also high priority because the cabin was totally wet, rotting and smelling moldy very badly.
- Removed ceiling panels and the shelf in the cabin.
- Removed rotted wooden parts of the cabinet, quite a lot, I thought about replacing the whole cabinet but then decided against it since there is so much other work to do.
- Made a new front panel for the cable compartment
- Made a now top for the clothes cabinet
- Removed all the delaminated top layers of the plywood components
- Sealed all through hull fittings of the deck from outside and inside.
- Found a major leak in the ceiling below the cockpit pocket. It had been fixed before but the glued-on fiberglass layer had delaminated. (See also fixing leaks section).
- Cut an inspection hole in the aft bulkhead to get access to and fix the loose aft railing mount.
- Replaced the gaskets in the two windows, after unmounting and cleaning the windows.
- Temporarily mounted a panel with two blowers for working in the cabin
- Sanded and repainted the roof panel in the cabinet area, fitted two ceiling lights there.
The aft cabin is now dry. It needs a lot more work to restore it
Cockpit and Deck
- Cleared the two large drainage holes that had clogged with plant materials during the stay in the dry dock at Watercraft.
- Made a new cockpit table.
- Made new panels for the instruments. Mounted Raymarine i70, a switch panel for compass light, horn and deck light plus USB outlets, (and the two cockpit speakers).
- Moved the shore connection next to the comagnian way, filled the old holes with fiberglass / epoxy.
- Rennovated the deck shower.
- Restored the manual bilge pump. It was totally broken.
- Checked the main sheet traveler, of all fittings, this one did not leak water.
- Temporarily closed the compagnionway window with a plywood board, until the new window arrives. (in Balikbayan Box)
- Had the spinacker boom aluminium-welded, at one end the eye was broken off. Restored one spinnacker boom bed, treated it with teak oil, sealed the deck underneath and remounted it. (The second one to be done later)
- Bought 3 new lines for the spinnacker.
- Replaced the topping lift.
- (Bought a new, longer reefing line for the genoa furler.)
- Repaired the genoa furler, a plastic disk was broken and blocked it (needs further action since we did nit find stainless screws in Sablayan)
- Rennovated the sliding hatch cover, sanded, repainted it, restored and varnished the wood fittings.
- Got a newly serviced life raft donated from Costa Rica.
- Made two new holders for the new life raft, which is smaller than the old (missing) one. varnished and mounted it on top of the sliding hatch cover.
- Repaired the sprayhood using our SailRite.
- Repaired the boat cover using our SailRite.
- Welded the ends of all ropes to avoid further fanning out.
- Replaced the rotten ropes (e.g. at fenders).
- Repaired the gooseneck (bolt had fallen out, safety ring was obviously missing).
- Fitted an aft anchor line with reel (as used in Scandinavia).
- Fitted a new life saver ring.
- Tried to fix the anchor winch. (Needs repair.). Anchor chain is probably too small for the winch / size of the boat. Check.
Sections Underneath the Cockpit
- Tightened the frame that holds the rudder.
- Temporarily seald the air condition exhaust sea cock with epoxy. This should be removed during the next haulout.
- Sealed the big hole in the back for solar panel cable.
- Filled several holes previously used in the cockpit locker.
- Removed the wash down pump in the cockpit locker.
Paperworks
- After lots of problems with trying a local registration (four months, two trying myself, two through an agent, with no result), registered the boat in Poland (took 5 days).
- Got third party liability insurance for one year.
- Worked with Ivy to get the first entry clearance for SUbic for getting to the haulout and starting a track record.
- Started a logbook.
- Started writing a users manual
- Made letters for new port of registration and registration number.
Additional purchases
- Ordered 4 sets of inflatable life jackets with life lines from SCB (in the Balikbayan box).
- Ordered a wide SUP as temporary tender until I can get a foldable Banana Boot from Europe.
- Bought 2 more Polish flags.
To Do Next
Step by Step, at Mooring
- Repaint all interior
- Organise kitchen utensils
- Mount toilet once it arrives
- Mount saloon hatch, once it arrives
- Mount Aft cabin window, once it arrives
- Restore galley window (rubber gasket, clean) and install, once it arrives\
- Strengthen mast foot, once aluminium sheet arrives
- Repair anchor winch, new anchor chain?
Next Haulout
- Change diaphragm of the SailDrive
- Paint hull yellow
- Paint deck
- Restore interior (shelves, ceilings..)