
The heart of the boat
Initial assessment
A new motor with a sail drive was installed in 2008. It seems OK, but have some problems in details.
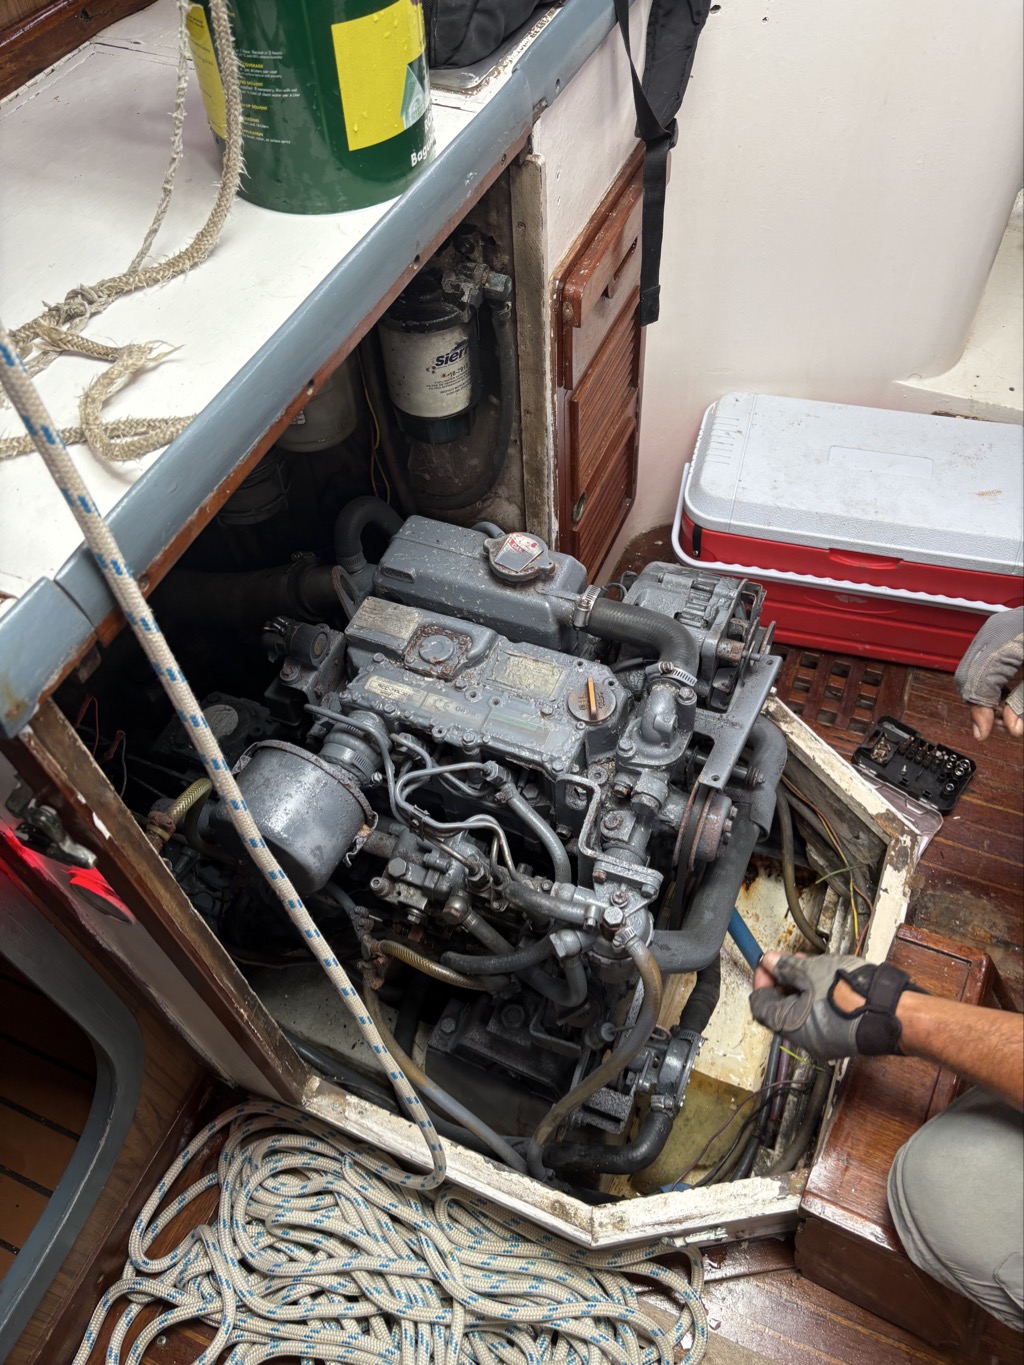
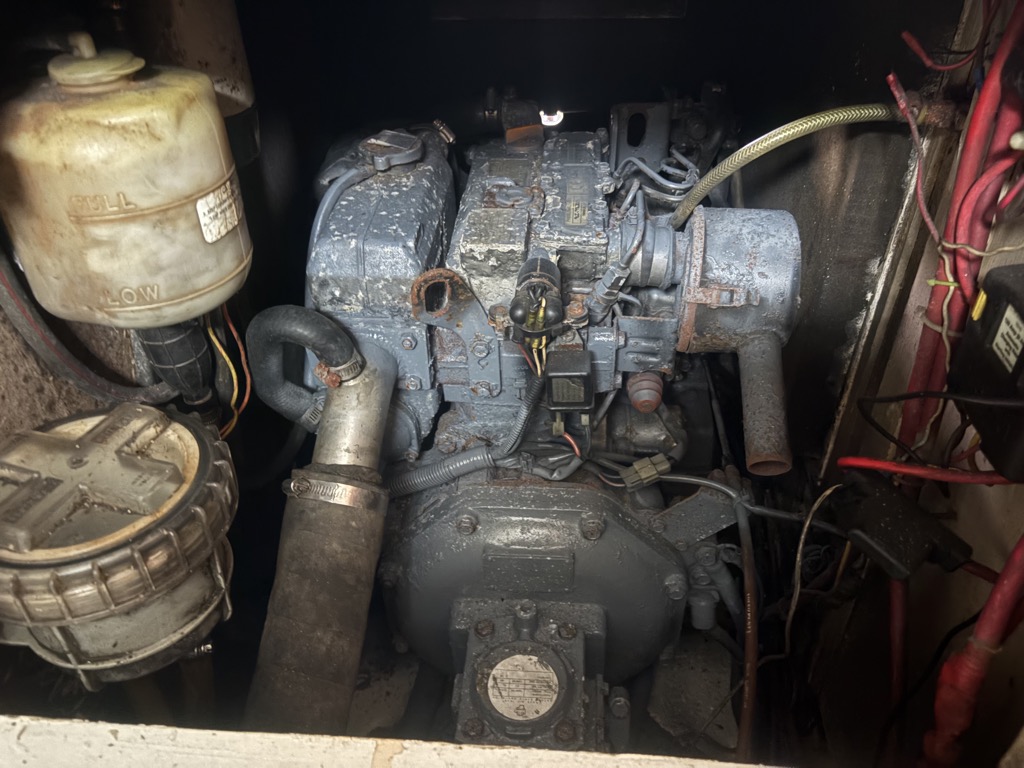
Sail drive
The boat has not been out of the water for years. Yanmar recommends to change the diaphragm of the sail drive every three years. We have no information on whether it was ever changed since 2008 when the motor was replaced.
Fuel pump
There are manual and electric fuel pumps. The manual one is the same as in outboard motor fuel lines, but one has to open the engine compartment to use it. The electric pump seems to be a diaphragm pump, it was controlled by a switch in the control panel. In terms of operation it would make more sense to have the pump switch in the cockpit, ideally at the motor control panel.
Electrical System of the Motor
Motor
There are different types of alternator belts on board (A and B) as spare parts. It appears that the A belt used currently wears quickly. The reason being the pulleys very corroded and covered with abrasive rust particles. There were different spare belts on baord of different sizes, some of them not fitting at all.
To do:
- Check which belts fit
- Buy seawater pump belt
- Buy impeller
- Buy alternator belt
- De-rust or change pulleys
- Come up with a maintenance schedule. Check operating hour meter and install one if broken.
- Change sail drive oil and check for water intrusion, if neccessary change o-rings and oil seals of the propeller shaft
- Change anodes of the sail drive
Sometimes the motor does not start, the starter motor “does not have power”. It appears that the cause is bad contacts at the starter motor relay because the battery is full.
Note to self: Check wiring and replace corroded connectors.
Additional problems
When sailing to Pandan Island we had several motor problems:
- Heavy wear of the belts because the pulleys were very rusty / abrasive
- Malfunctioning alternator – empty starter battery, no charge
- Clogged fuel lines
Repairs at Pandan Island
Addressing overlooked problems
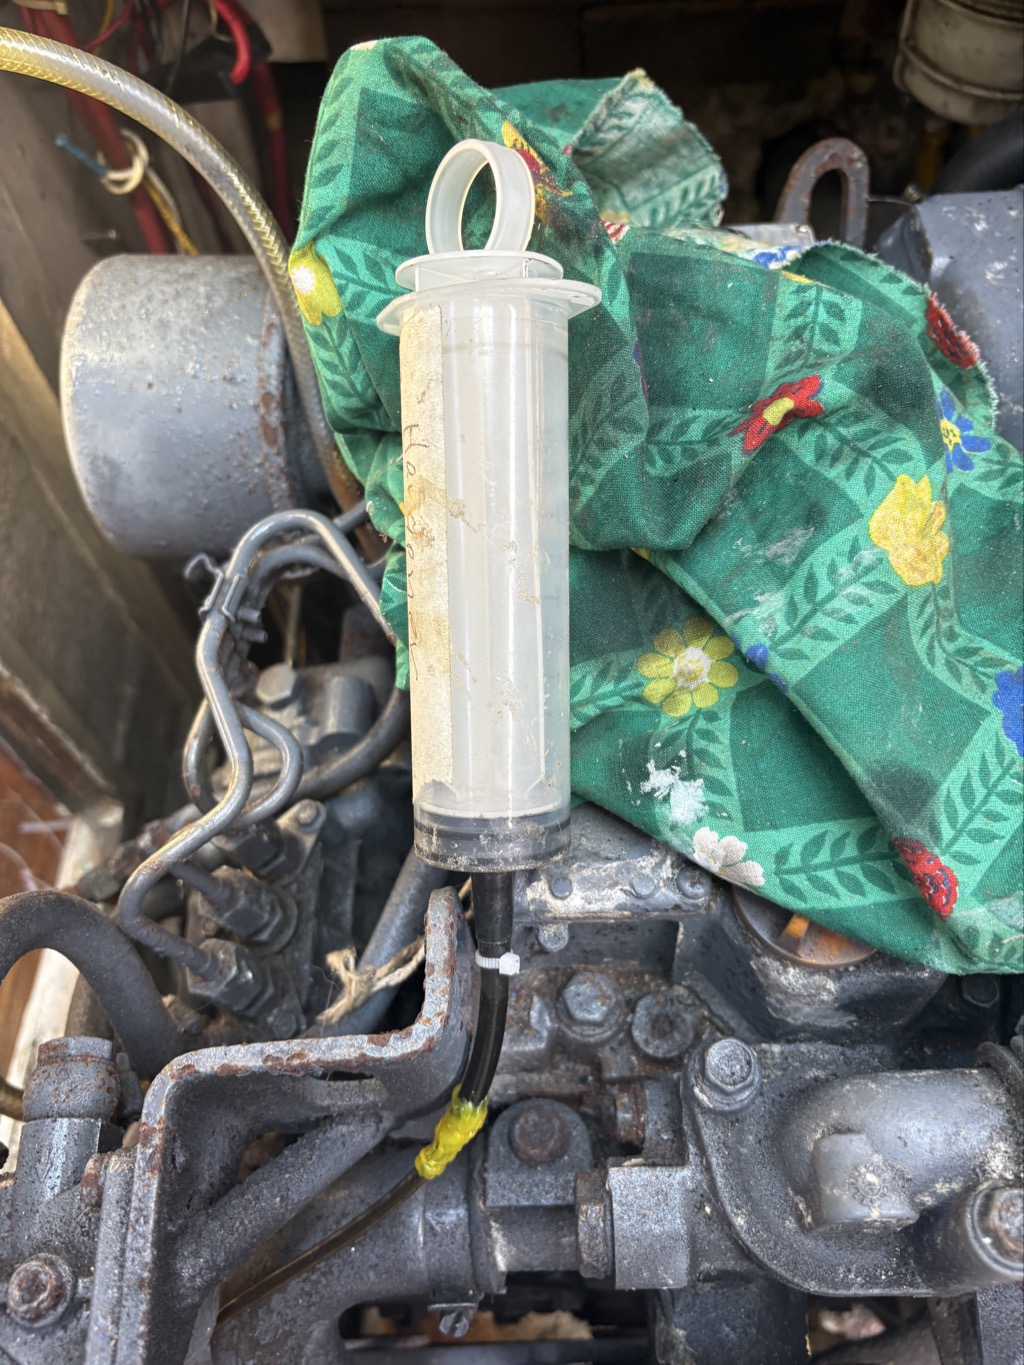
Martin had made a basic mistake. He had not checked the oil level of the motor before leaving, trusting that it would be all right because the oil was just changed before the All Souls Regatta. When the motor was reved high at a course facing waves at night, the motor was producing some smoke. Checking the oil level showed that it was overfilled. The manual pump for draining the oil was, as so many things on board, unuseable. So improvisation was needed again.
After the maximum level of oil was reached, around one liter had been removed.
Lesson learned: Trust nobody.
Changing the first tank sensor
The instruments for the tank levels were broken. I could not find replacements for the same sensor, so I bought commonly avaialble gauges and the corresponding sensors. The aluminium tank cover needed some modifications because the new sensor requires a bigger hole. Luckily the distances of the 5 screw holes have the same spacing for new and old sensors. I went to work at Mariposa’s workshop with the electric jig saw and a file.
Before fitting the new sensor I calibrated it for specifying the input singal for the Arduino HAL 9002.
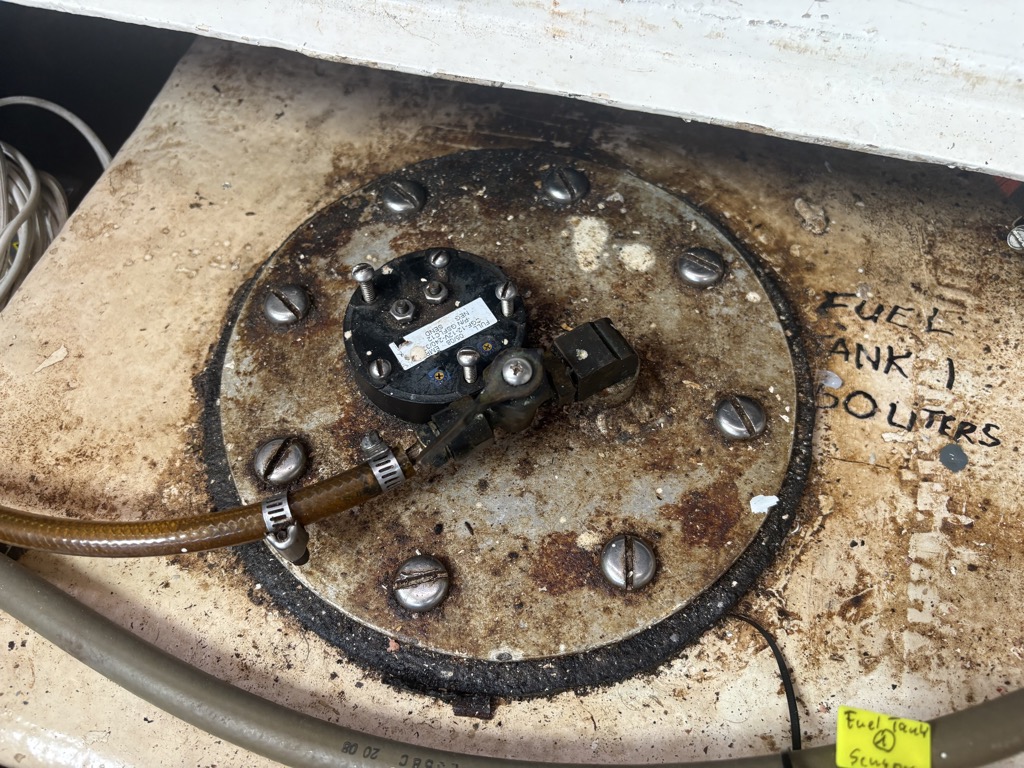
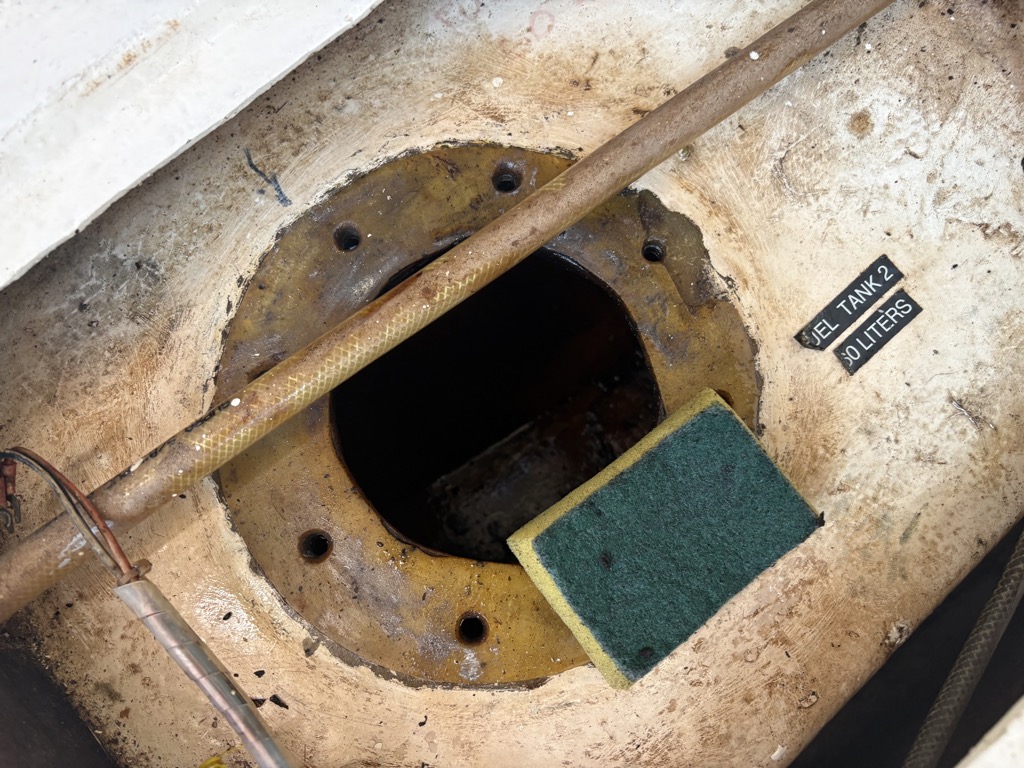
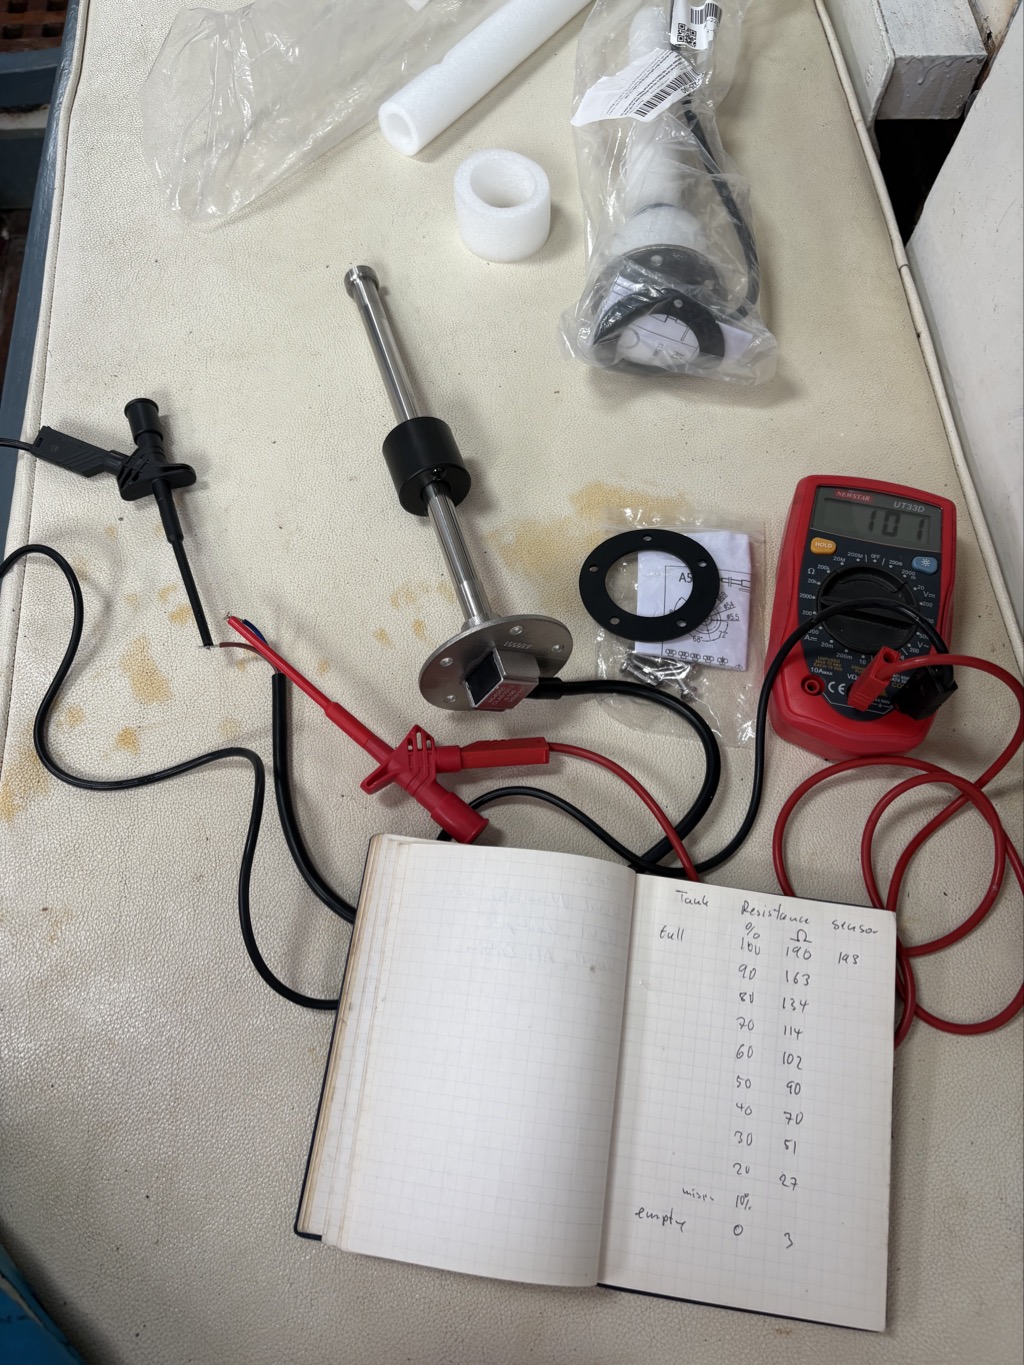
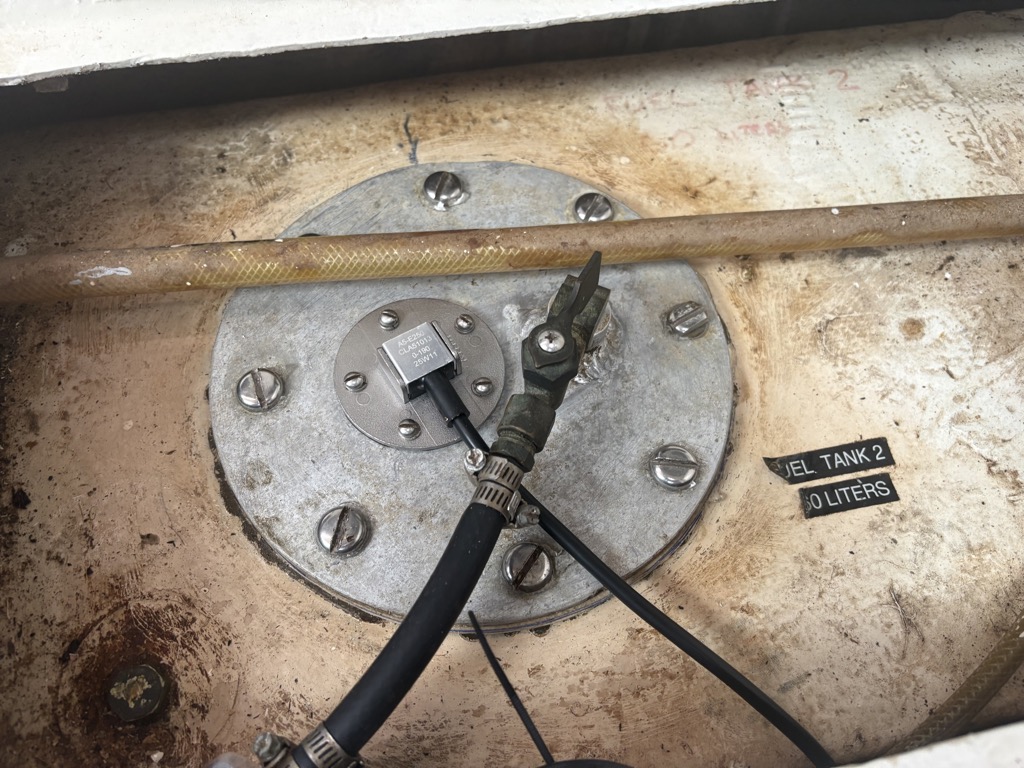
Right: Cleaned plate with mounted new sensor, new cables and fuel line.
Fuel system
The boat has two diesel tanks. One with 50l and one with 60l capacity. When we purchased the boat only the 50l tank was used, the 60l tank was almost empty. Removing the aluminium cover on the top of the fiberglass tank showed that there were a few liters diesel inside but they were also heavily contaminated with sludge.
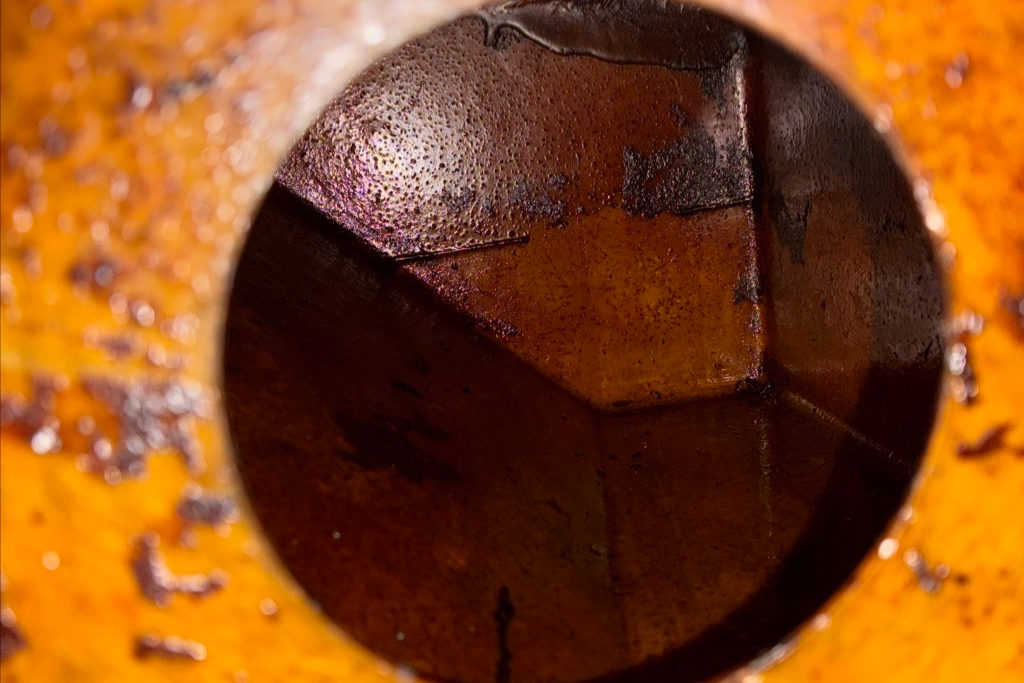
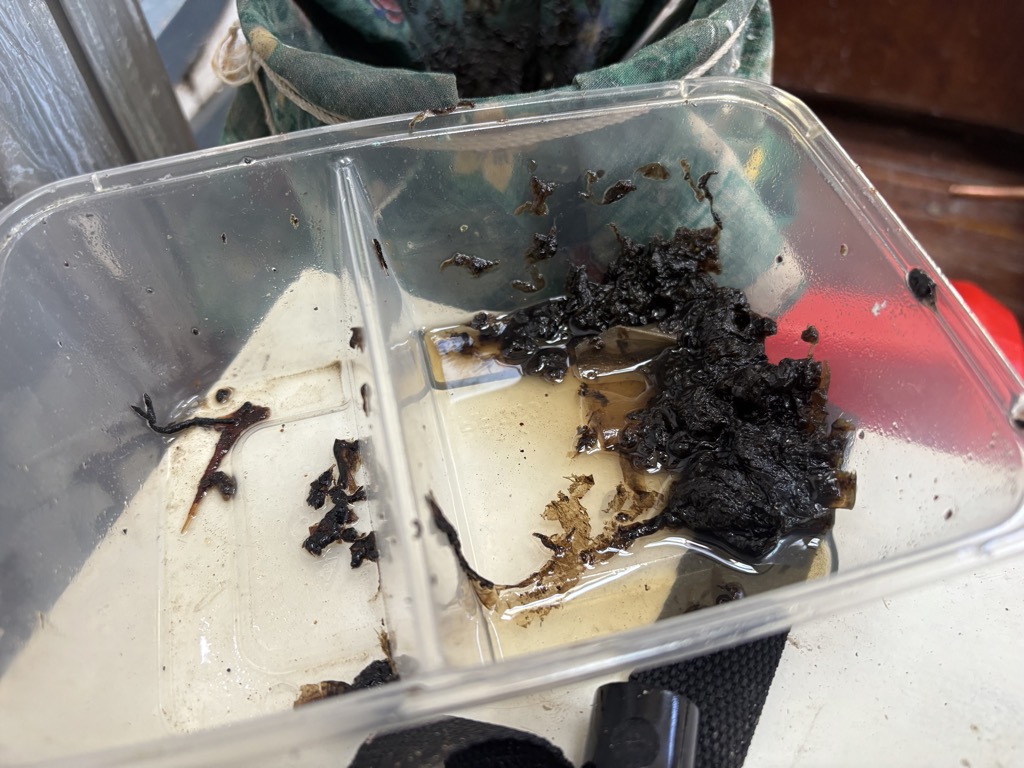
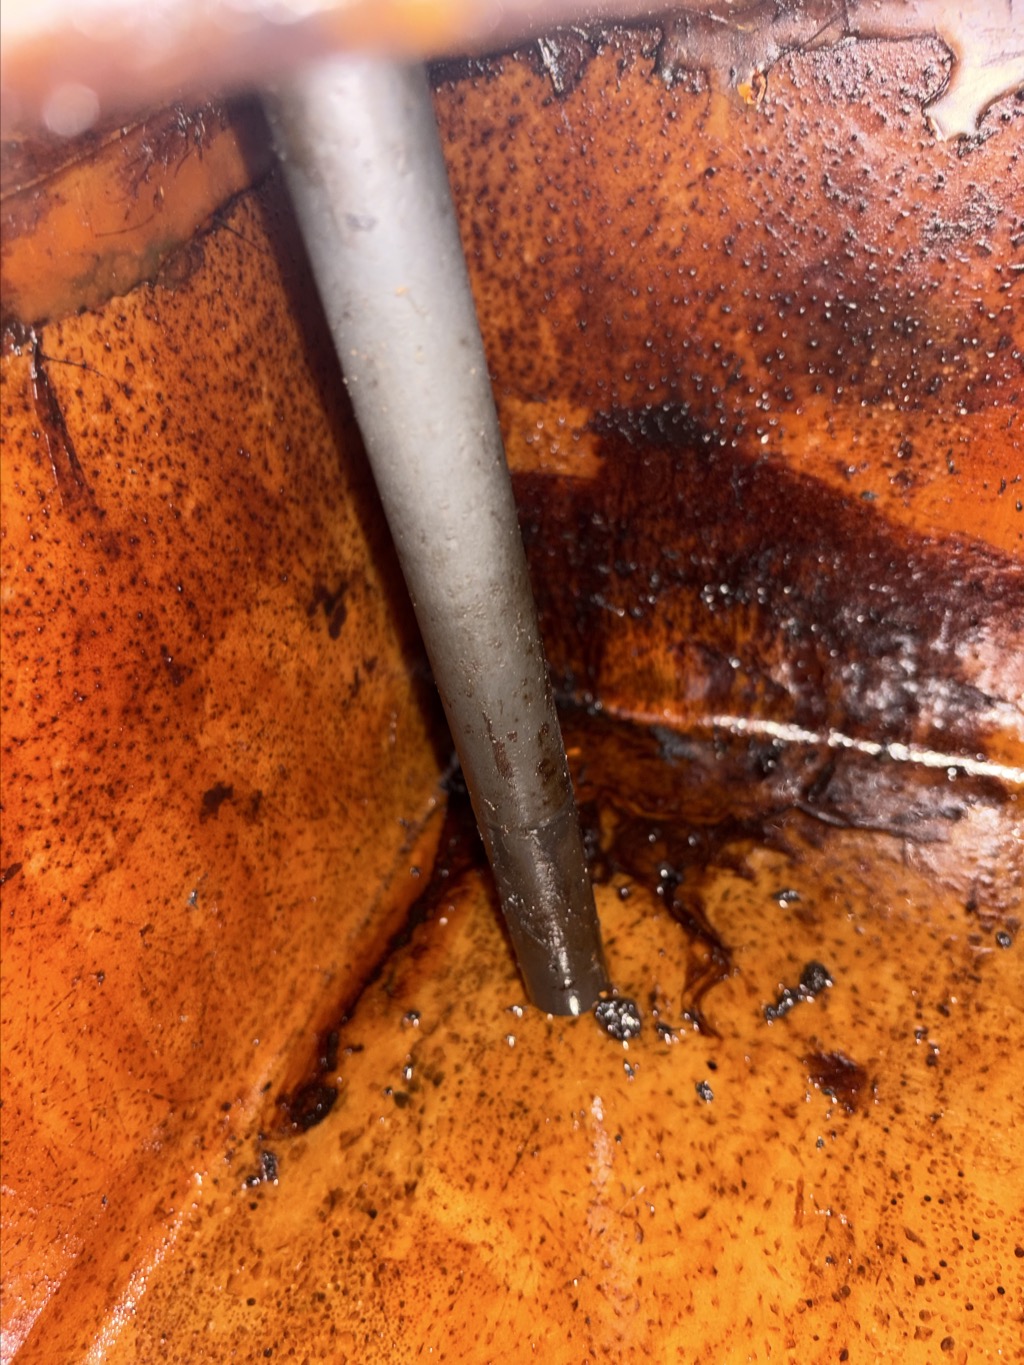
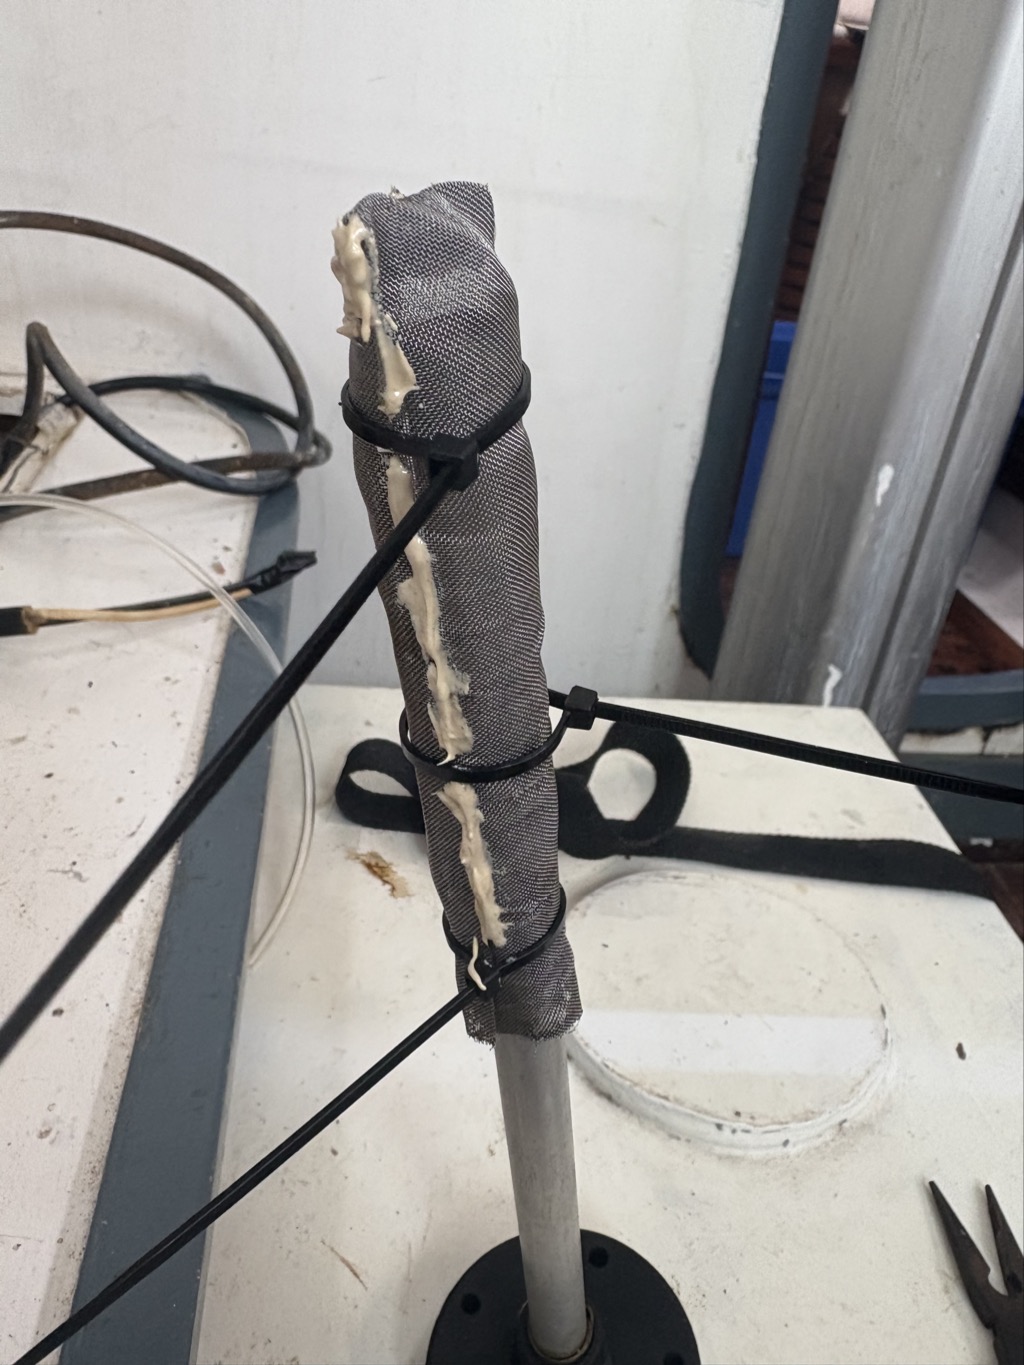
I should have cleaned it with a high pressure cleaner, but in the absence of it I had no choice but to manually clean it. That is nothing you like to do more often. After cleaning the tank, fitting a new filter and fuel lines, and installing a fine wire mesh filter at the tip of the outlet tube, this side of the system was OK. I also needed to change the fuel filter and to bleed the lines. The engine then started immediately and ran well.
Replacing the Alternator
The alternator had given up on our trip to Pandan Island in December 2025.
A survey of various boat supply web pages showed that new replacement alternators cost between US$ 450 and 1,200, plus shipping. SVB in Germany had one for 195 Euro. A quick communication with Willi and Klaudia, who were scheduled to come to Pandan in a few days, led to Plan A: Purchase of a new alternator in Germany, shipped to a German address and hand carrying it to Pandan Island.
Plan B was to get the old generator repaired in a local car electrical workshop in Sablayan. Noel helped me in implementing this. Mathias brought the broken regulator IC from Germany, the shop soldered the old one out and the new one in, and now I have a spare alternator.
All worked out well with Plan A, I fitted the new alternator and we now have the repaired one as spare.
Before fitting the new one I had to wire brush the pulleys on the crankshaft and the water pump. They were totally rusty wearing down the fan belts in record time. After reaching blank metal I treated them with rust converter and primer. The are not abrasive anymore, but probably it would make sense to replace them at some time (after the dry dock).
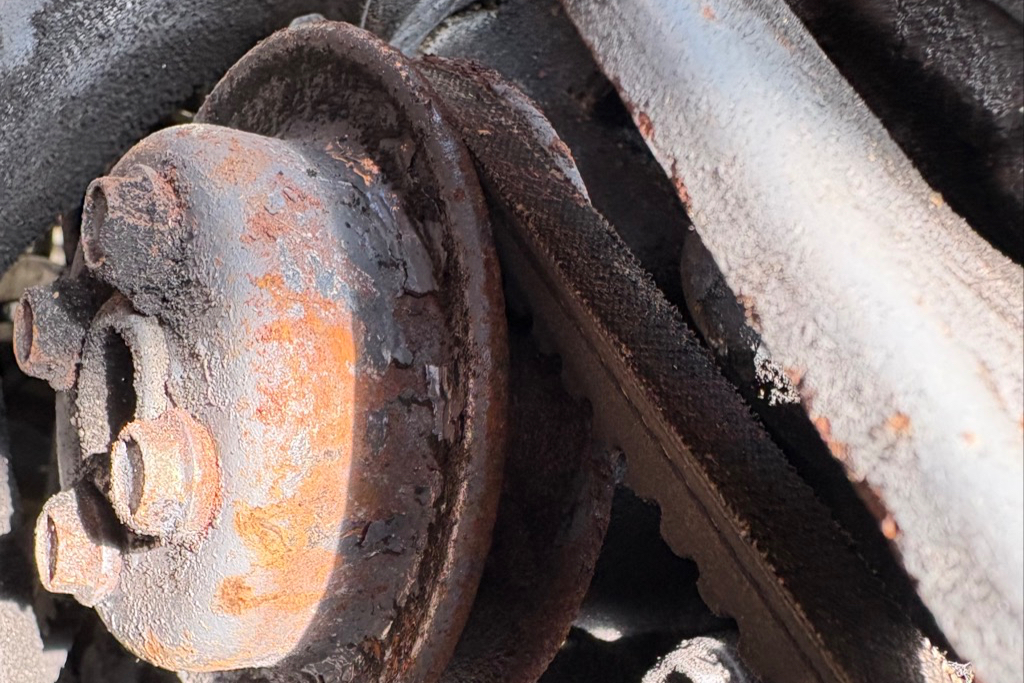
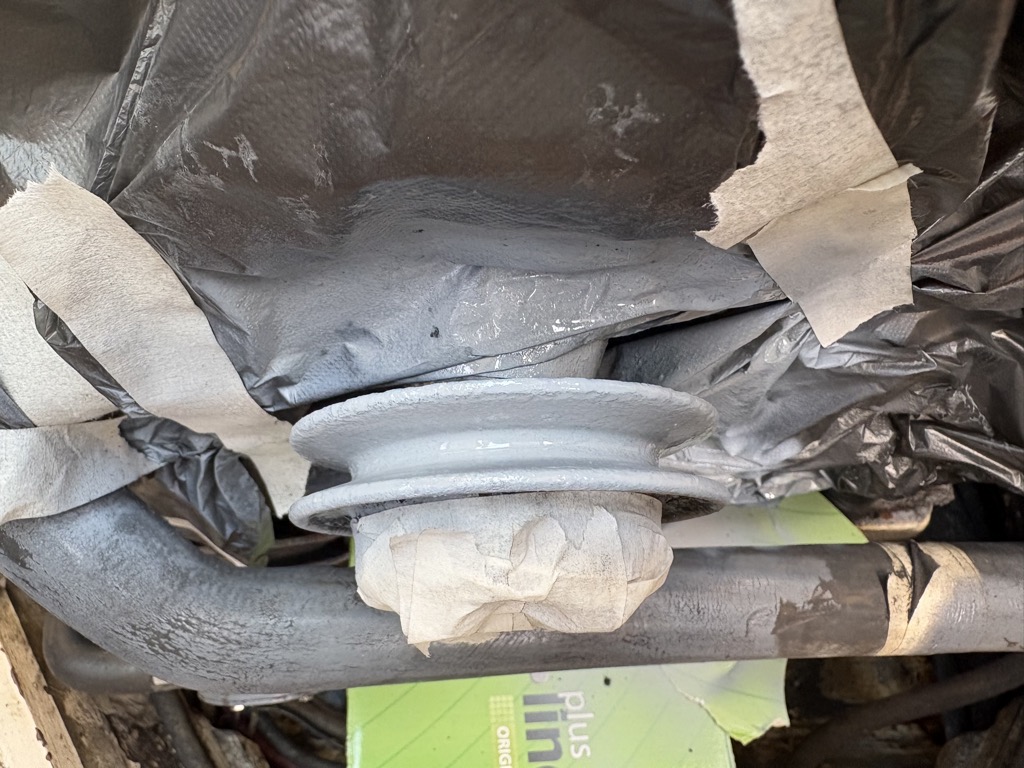
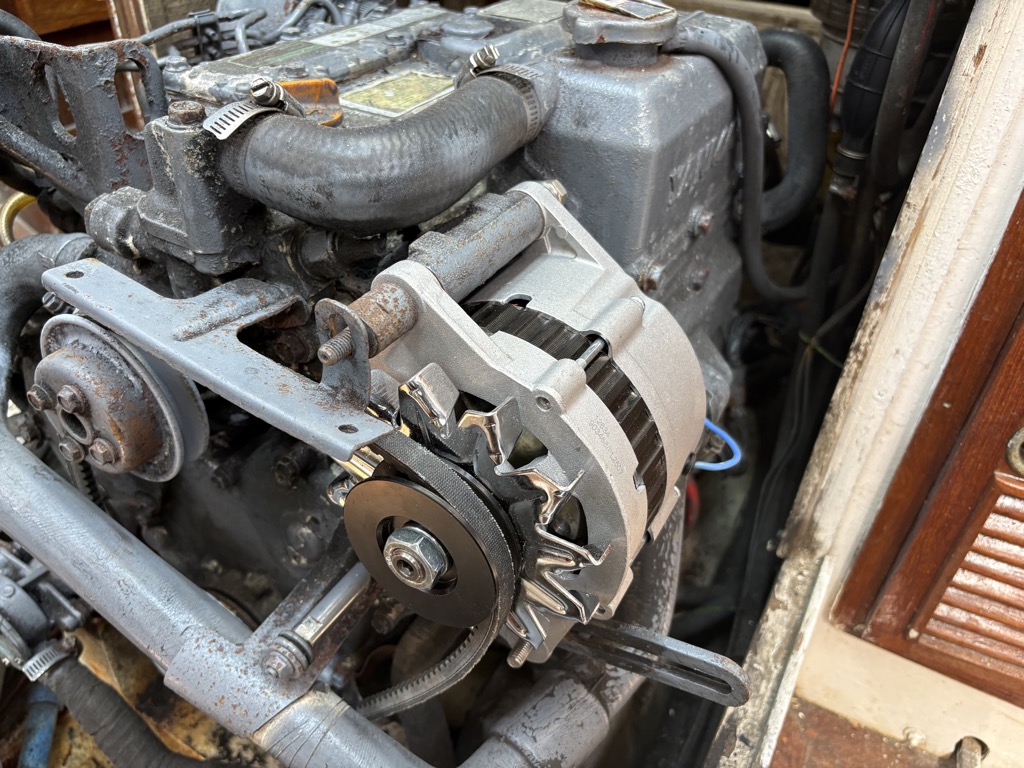
I tried to find a portable sand blaster, another German and his son living here knew some companies that have sand blasters. But unfortunately, upon checking, none had a portable one. So I spent significant time to remove all oxides using first the electric drill with a wire brush and then a Proxxon with mini wire brushes that got into the smaller holes. Etch primer I found an ordered through the internet.
The Diaphragm
A critical component of the saildrive is the diaphragm, a large rubber piece, that connects the drive with the hull and prevents water from getting in. Yanmar recommends to change the diaphragm every 3 years. Insurance companies reject to cover boat loss if the change interval is not maintained, not that we would have insurance for the boat (only third party liability), but this is an indicator for the importance of the diaphragm. I would assume that it has not been changed since the motor was installed in 2008. There is also a sensor that triggers an alarm when water leaks beyond the diaphragm, but the motor alarms currently do not work. So I am a bit worried about this.
I checked online, no company that sells sailboat supplies, had the diaphragm. Then I checked with Broadwater Marine, delivery time for a part ordered from Yanmar is 4 months, WHAT? For a part that is supposed to be critical? I ordered it, just to have it when the opportunity to change it arises.
The Anodes
The other critical parts are the zink anodes. The protect the aluminum and other metals of the SailDrive from corrosion. They should also be changed frequently. They are in really bad shape on the boat since not has not been out of the water for so long. There is actually some corrosion on the SailDrive on the left side, not too serious, but starting.
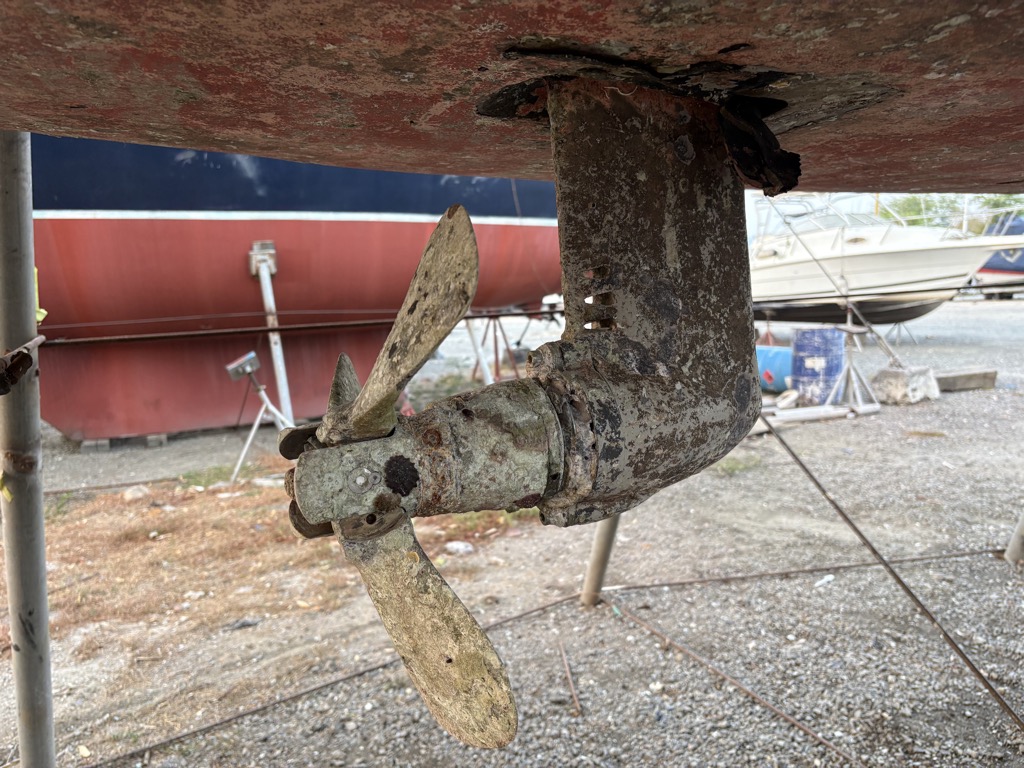
This needs urgent attention.
Repairs in the Dry Dock
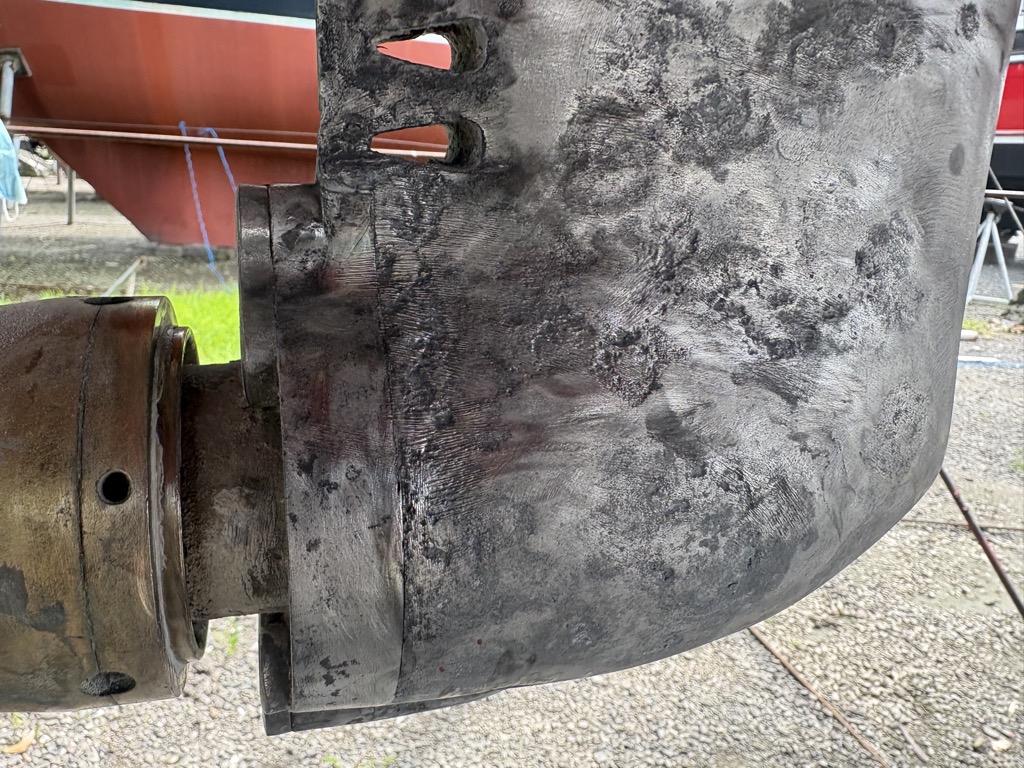
When the guys from the yard who do the antifouling work and the osmosis repair sanded the hull, they also sanded off the antifouling from the SailDrive. A lot of corrosion spots appeared, for some reason more on the starboard side than on port. I left it there when going on 3 week business trip.
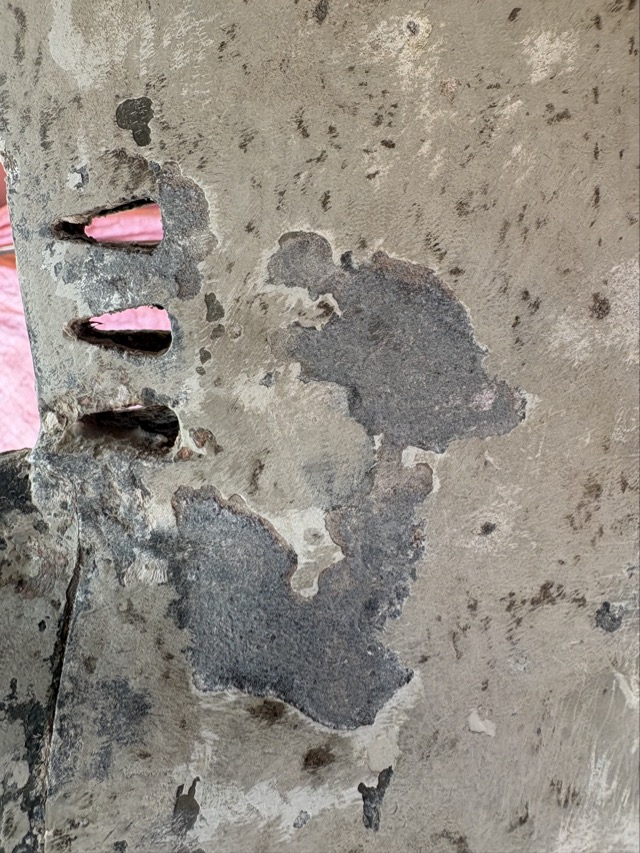
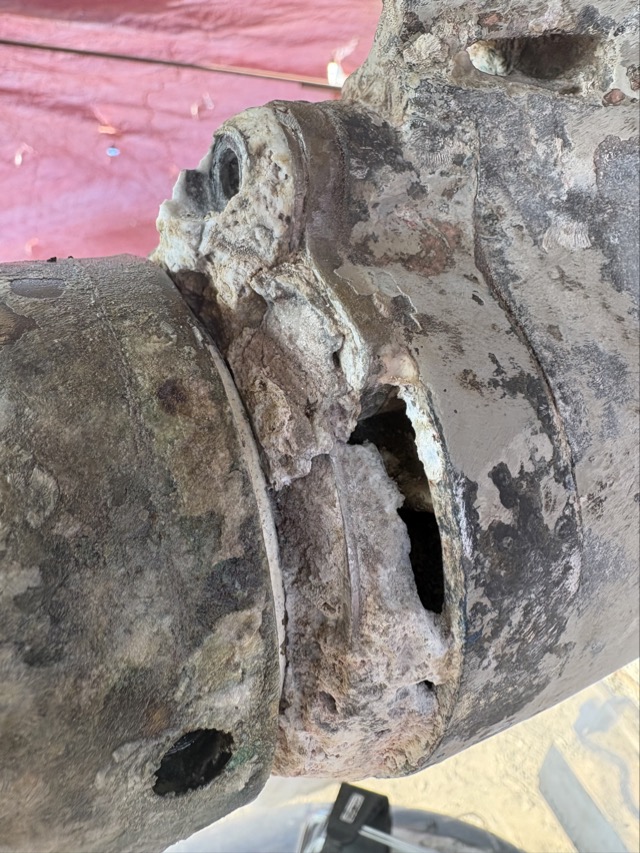
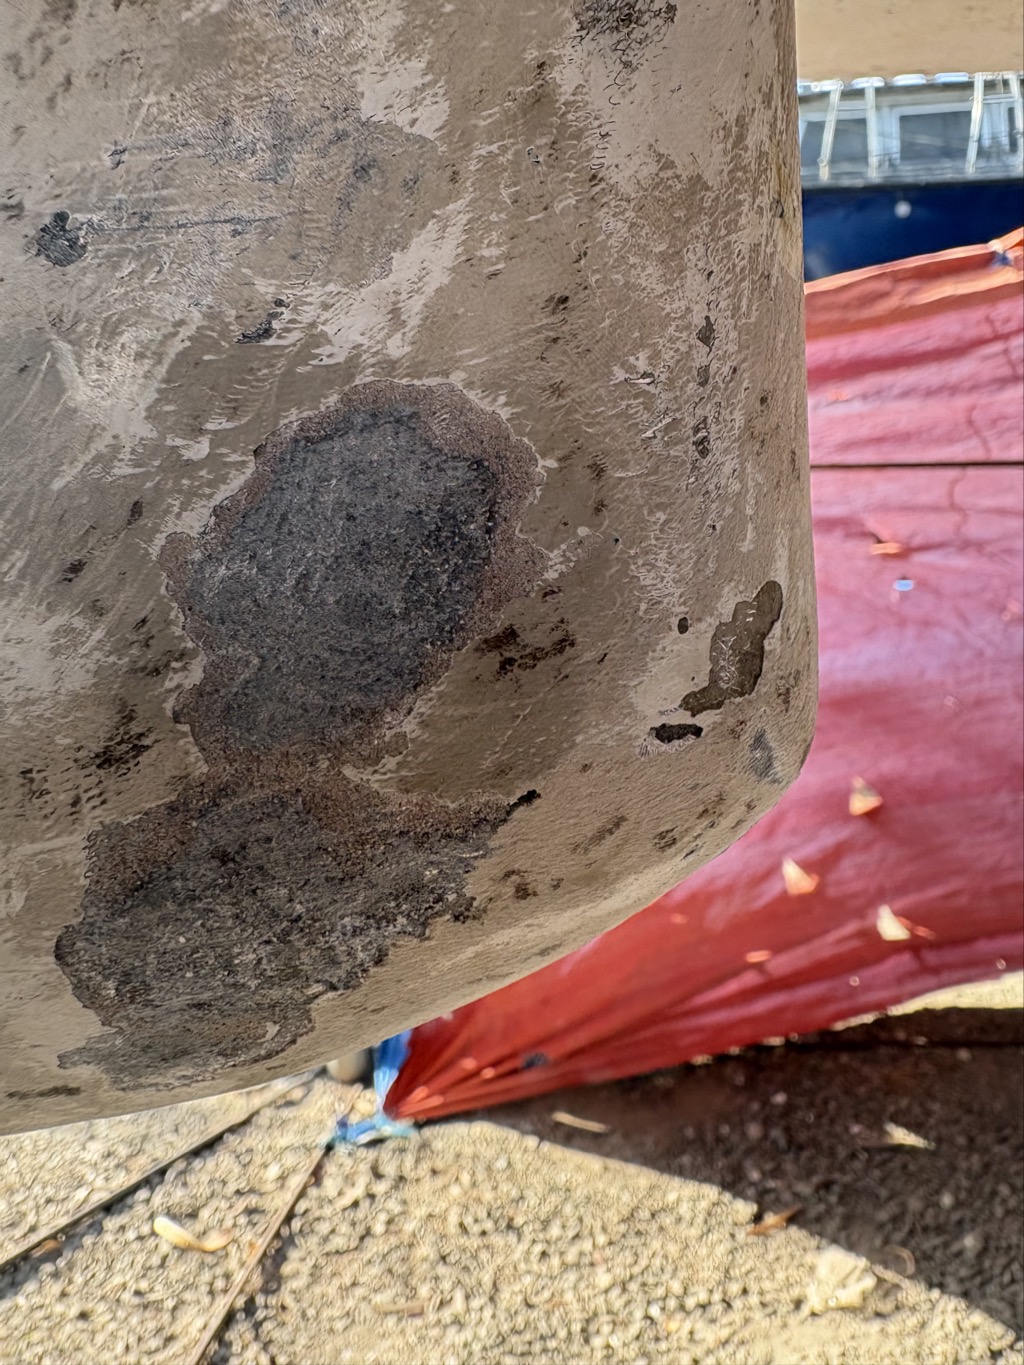
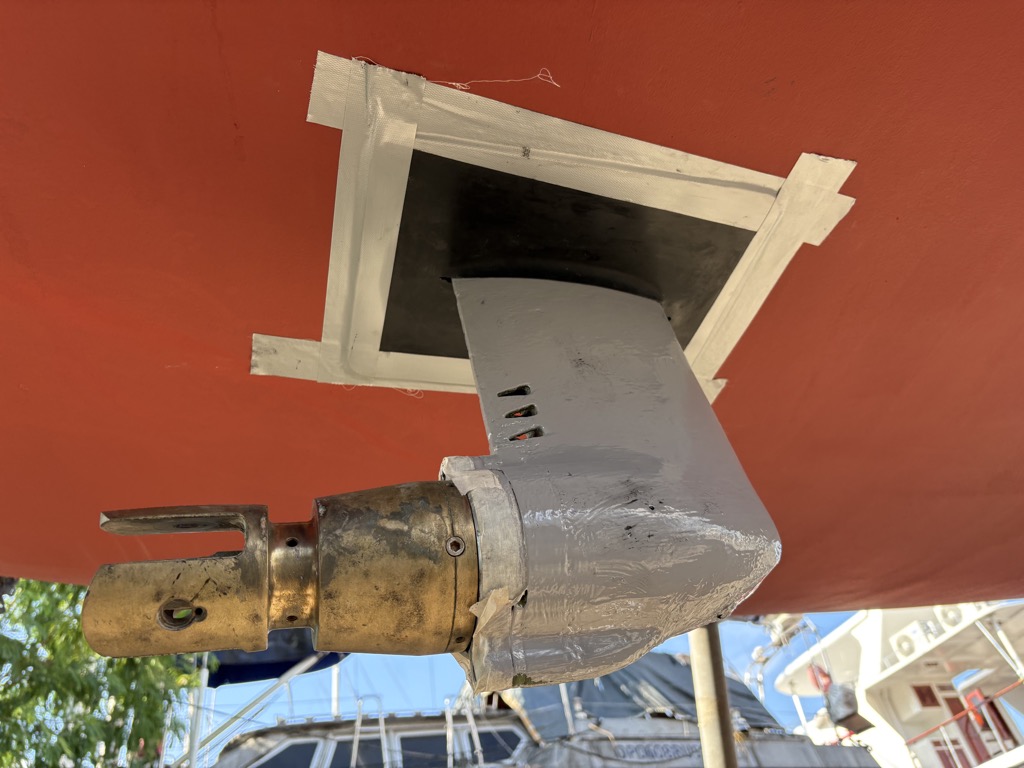
June 9, 2026: Grmbl :@&%#* 🤬. the workers totally screwed up the SailDrive. It had corrosion at several spots. Rather than removing the aluminium oxide and treating the affected spots with etch primer or a product that is sold for outboard motor repair, they just covered them with epoxy filler. After I told the Cappo that that is wrong, he agreed and said he will instruct the workers to take it off. They then sanded all the surface, even where the original paint was still good. (nothing sticks better than the factory paint). How can people who are supposed to be professional be so poor at their profession ? It‘s more fun in the Philippines.
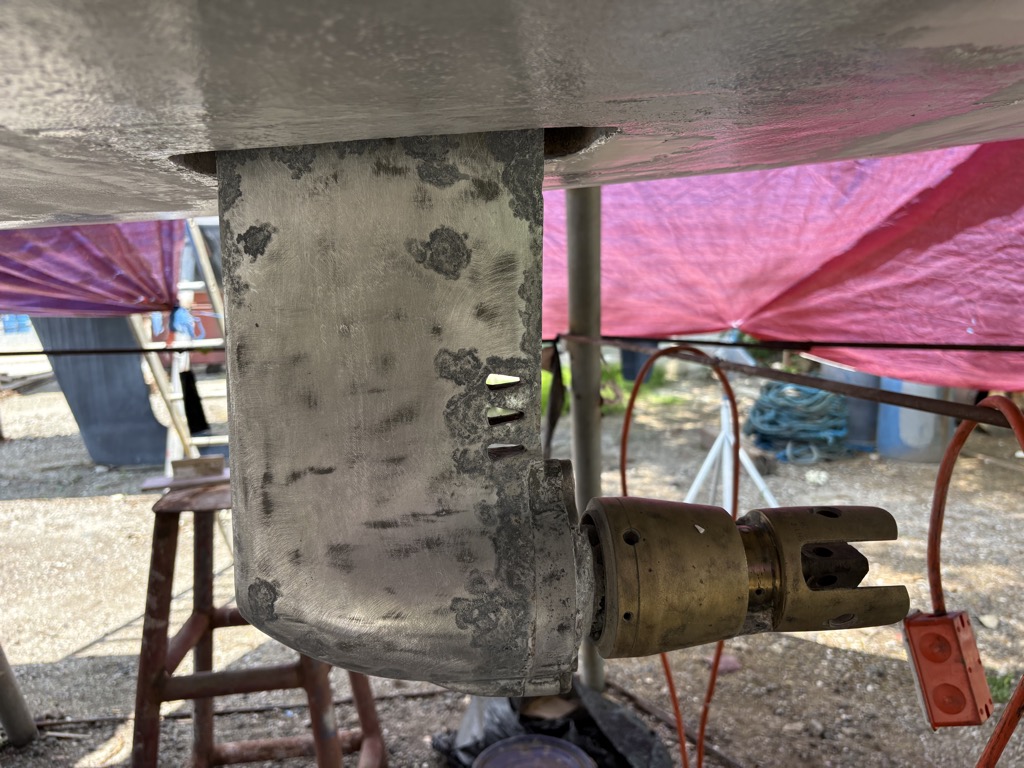
Not good. It also was clear that the oxides had not been removed. That just confirmed my believe that the best way to do things is DIY.
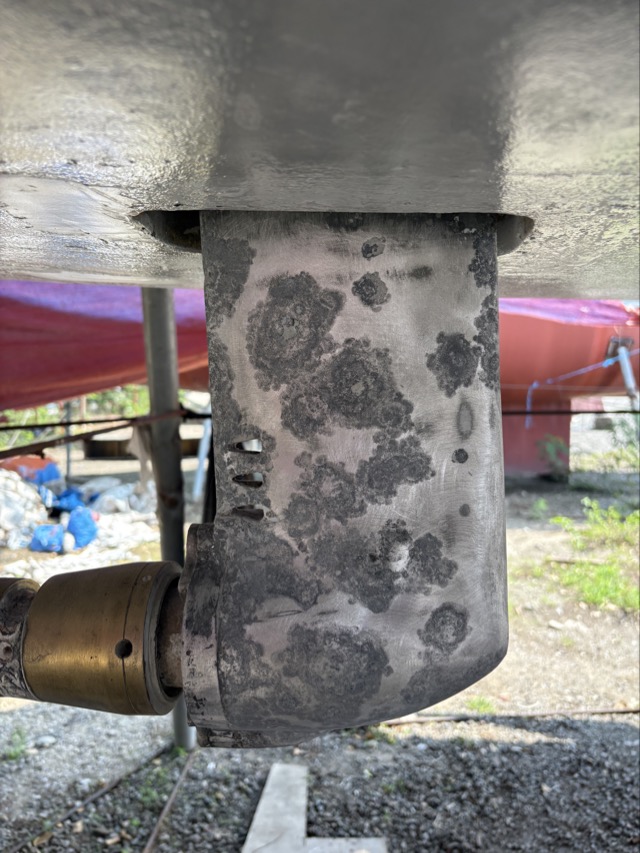
June 19, 2026: I tried to remove the remaining oxide with the wire brush but the holes are too deep to reach into them. Trying to find a portable sand blaster.
June 17: I went to BWM for different reason and they showed me all the parts for replacing the diaphragm, except for one, which is still scheduled for the first week of July.
First week of July. Update from BWM, the Yanmar parts did not arrive since Yanmar supposedly has a backlog of orders for the diaphragm, it is now supposed to arrive first week of Ocbober. Supposed. No guarantee. After a day full of frustration and evaluation of options (keep the boat on dry dock until October), I decided to postpone the saildrive diaphragm work to next year.
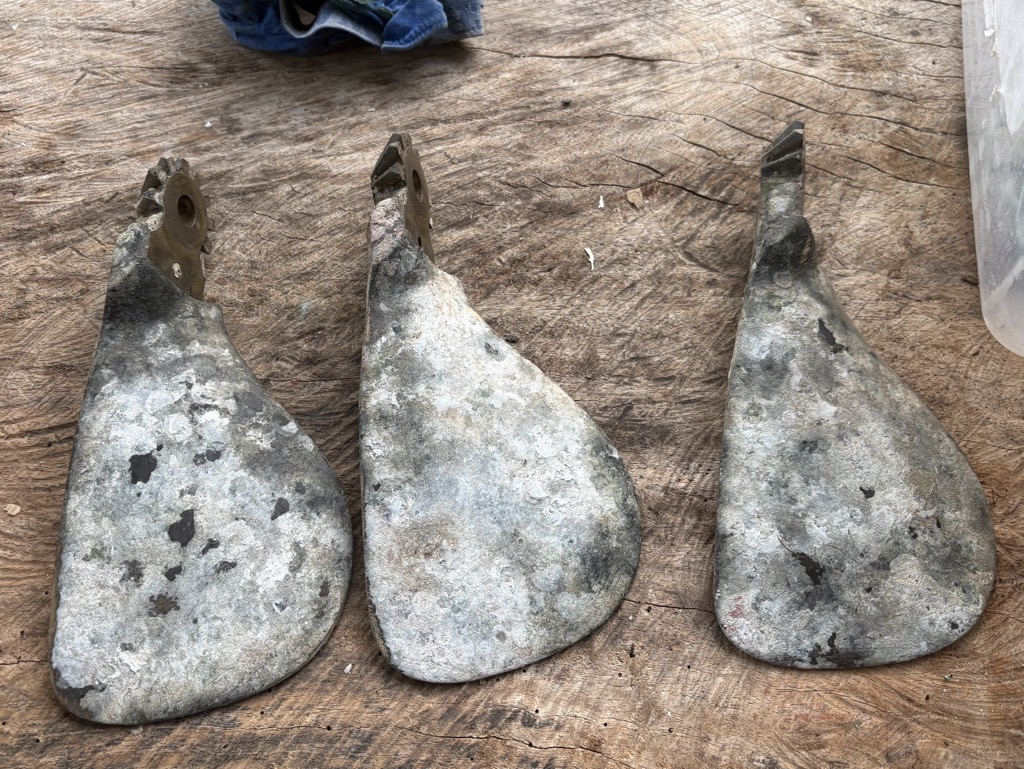
July: I had tried to find a portable sand blaster because the corrosion spots were quite deep and the wire brush did not get into all the holes. With no success. Several companies in the SBFZ have supposedly sand blasters but they are not portable. So I spent some more time with the big wire brush and a cordless drill and afterwards with a Proxxon with very small wire brushes to get into the holes, also removing the residues of the anodes of the propeller. Two layers of etch primer applied right afterwards hopefully before the aluminium oxide layer developed too much should provide better protection from further corrosion than the unprofessional treatment of the yard.
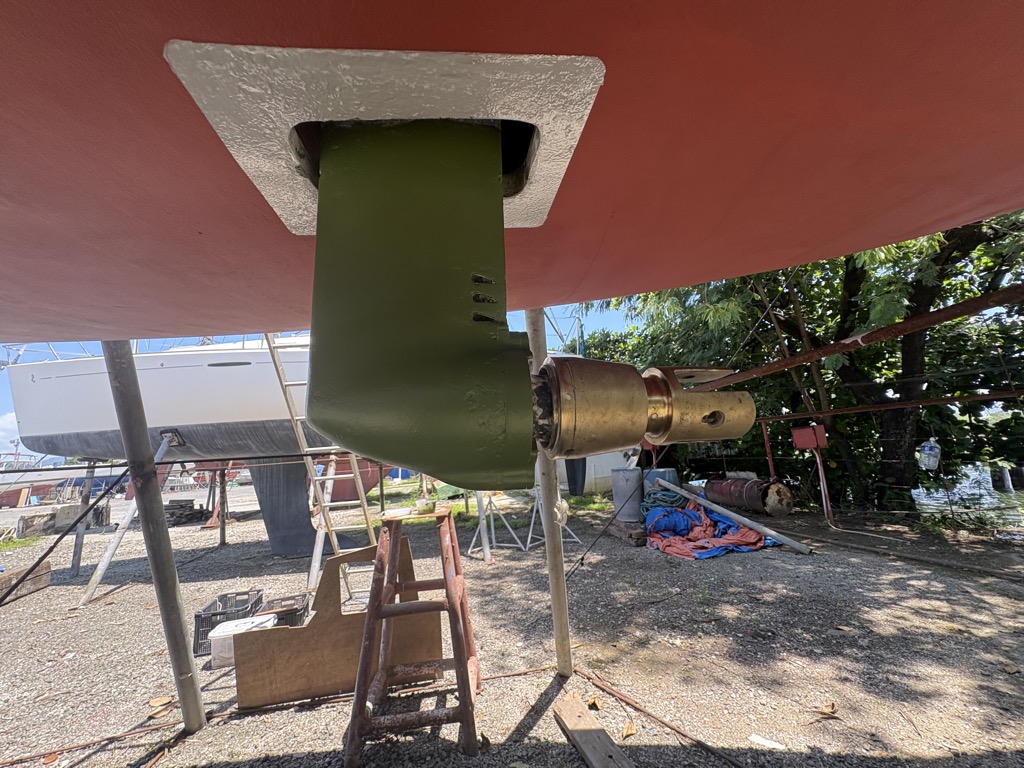
I had taken the propeller blades off in anticipation of changing the diaphragms. Given the delays in diaphraghm shipment this was actually not neccessary. But it was much easier to clean them.
The Aft Fuel Tank
Repaired on dry dock in July 2026.
The tank had given me headaches on our trip to Pandan Island. It was the tank used when we took over the boat, despite the fact that it had detached from the hull and was loose inside the tank compartment. I addition it was so dirty that the motor stopped many times and got us in trouble several times.
I had emptied the tank at Pandan Island but now it was almost totally full. I might have overfilled the other tank and the excess might have flooded this one through the aeration tube that connects both tanks. The diesel appeared clean and I ran it though a filter into 2.5 20 liter jerry cans, and then donated the diesel to our housemate. The next step was to re-attach it to the hull somehow. I first thought I would have to cut the seat open and remove the tank but it turned out to be accessible and moveable so that I could clean the compartment and underneath the tank. The compartment was totally filthy, it took the wire brush, hand brush and vacuum cleaner and around an hour to clean it and remove probably 40 year old trash that had accumulated inside.
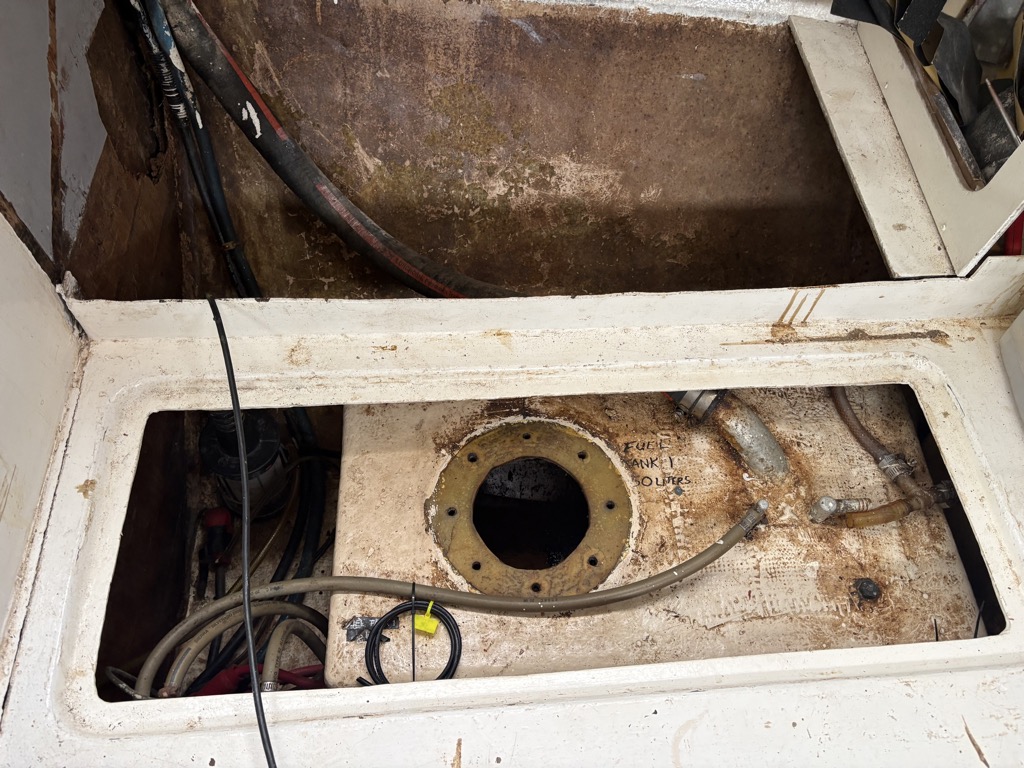
The tank was originally attached with only 4 screws screwed into the floor board underneath. The two screws in the front were totally missing, and would also not habe been accessible without removing the seat. The same was the case with the forward tank, which was then fastened by using a piece of wood that is between tank and bottom of the bench. I decided to do the same with the aft tank. The two screw fasteners at the aft side of the tank I could restore. To additional wooden beams glued underneath the tank longitudinally to prevent it from tilting provides additional stability.
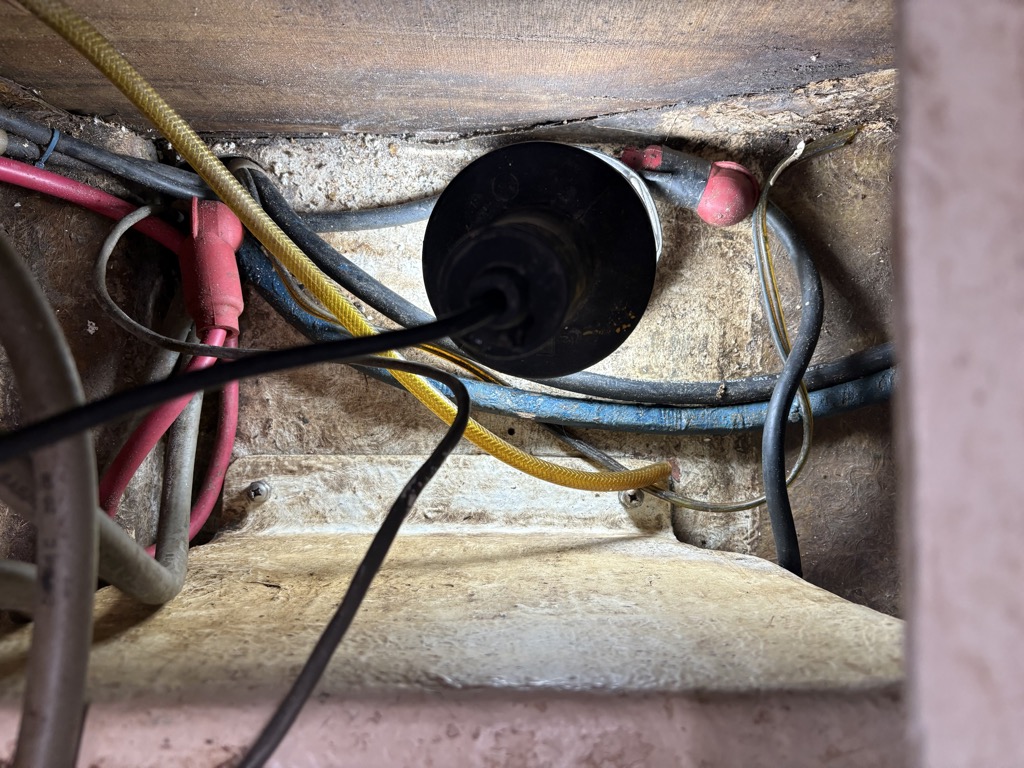
Next step was cleaning the tank inside. D. recommended pressure washing it with water but without removing the tank that would have been almost impossible. So I put my rubber gloves on and cleaned it manually with a sponge, checking with a light every now and then. There was so much sludge inside that it clogged the funnel when I filled the cleaned out diesel in a bottle.
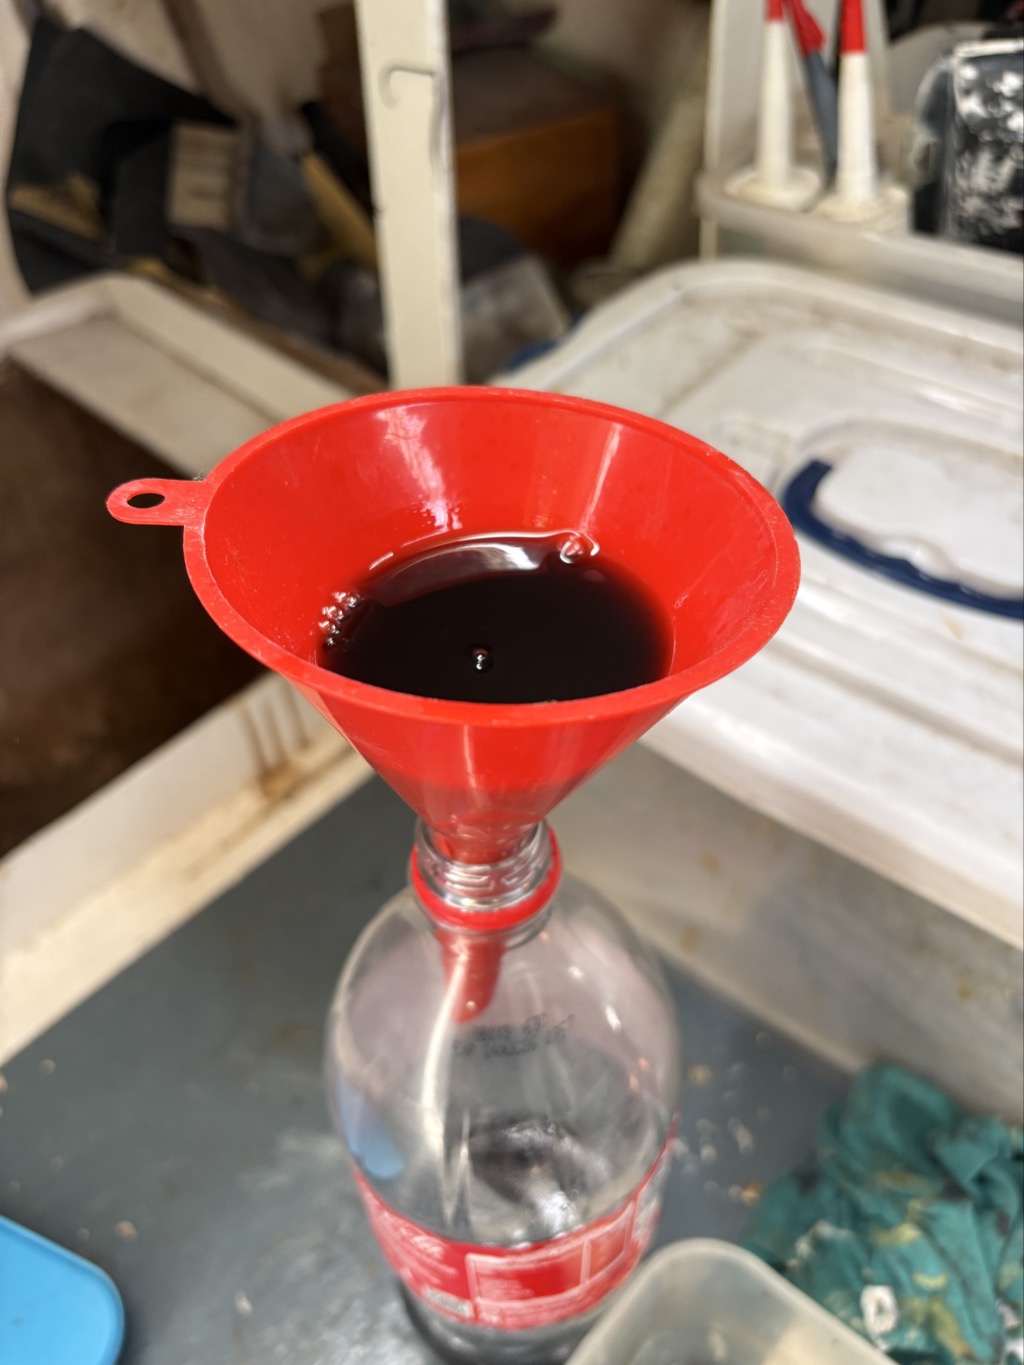
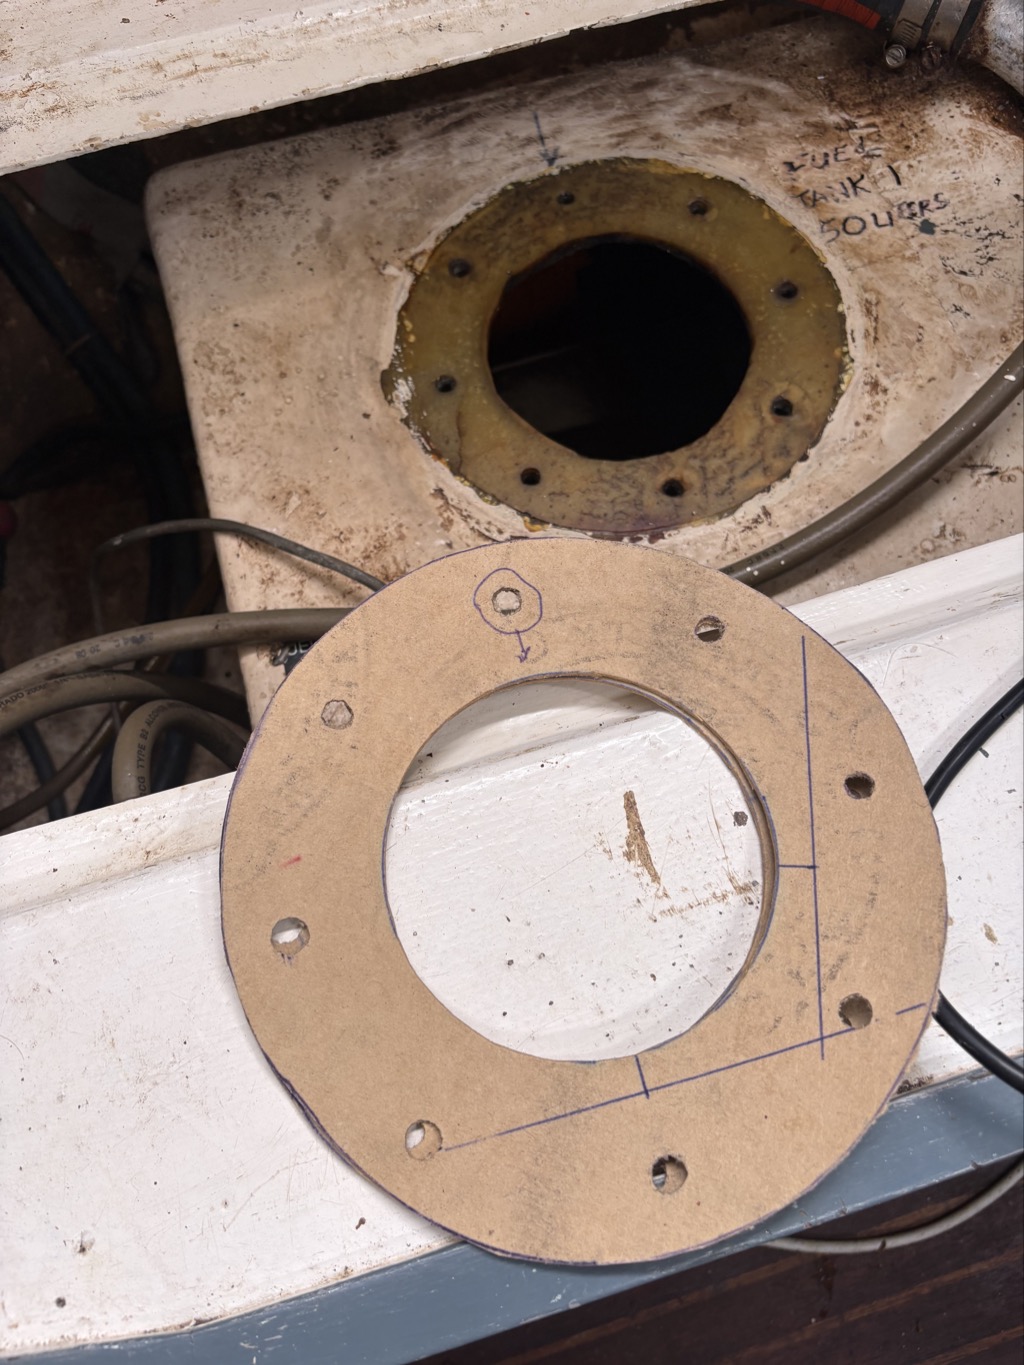
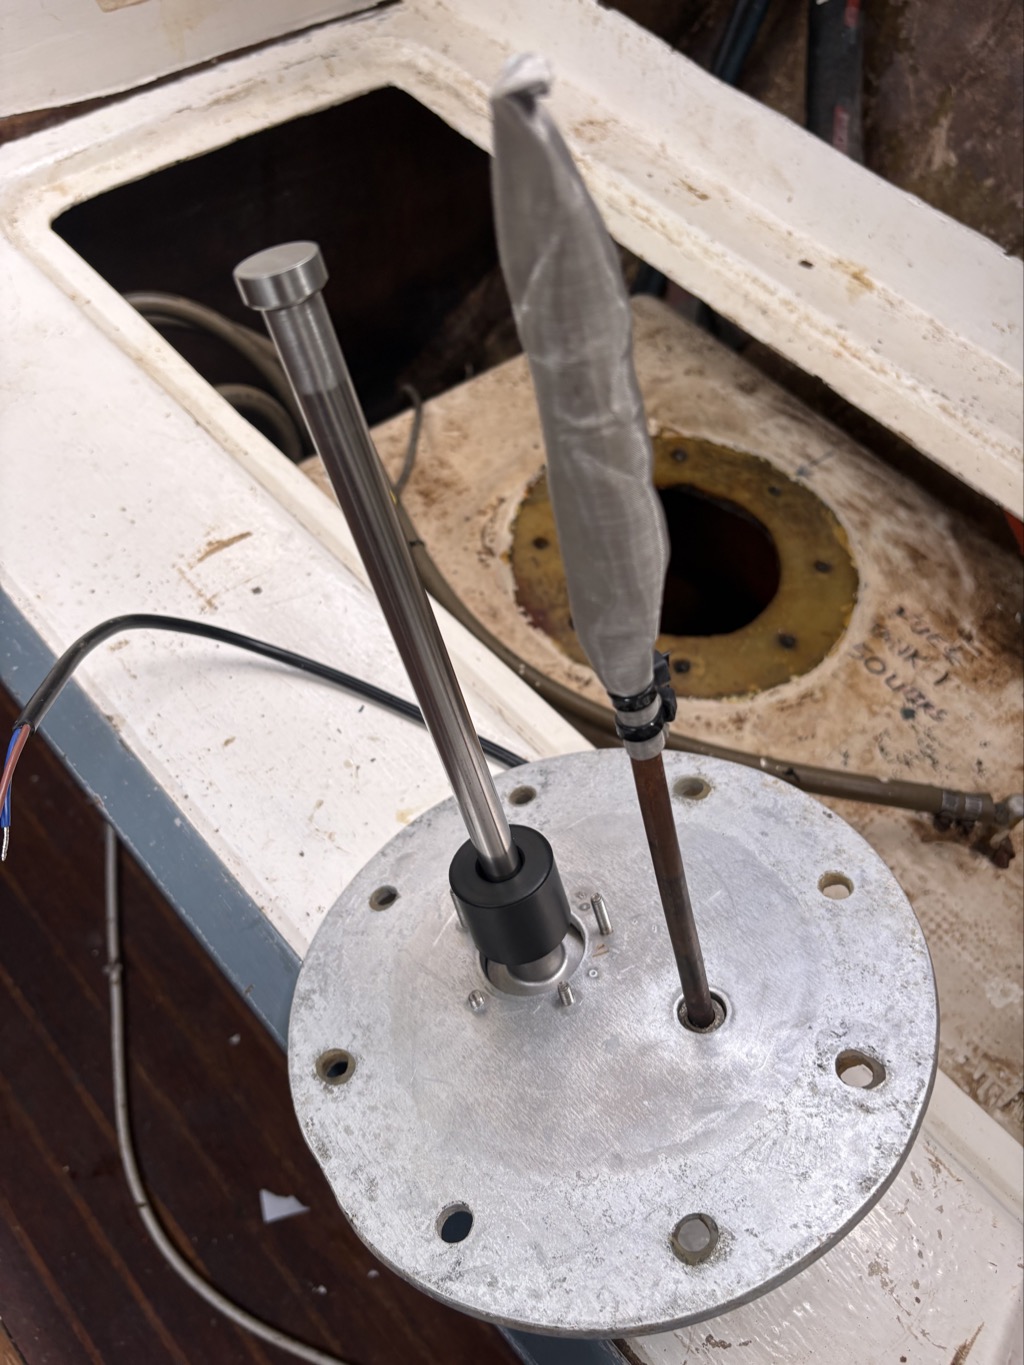
I had already installed the new fuel level sensor and an tank internal fuel filter using fine stainless steel wire mesh.
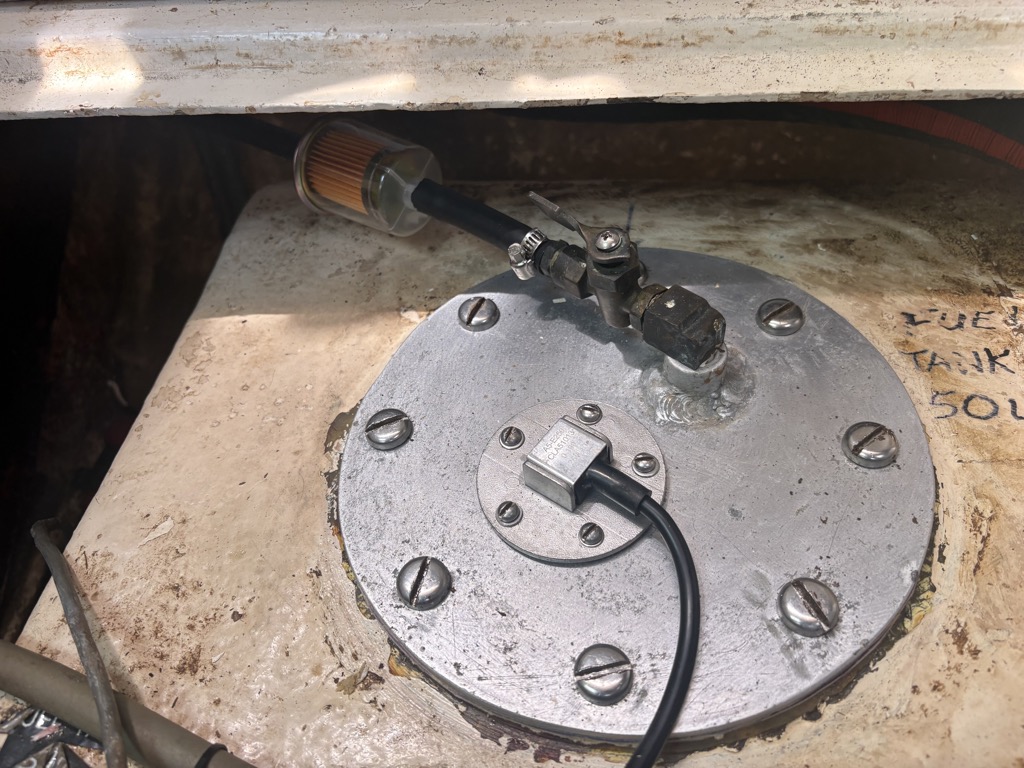
Working on the tank compartment I also took out delaminated layers of the plywood of the galley bulkhead and re-attached the bulkhead to the seat.