After moving to SBFZ in July 2024
June 28-29
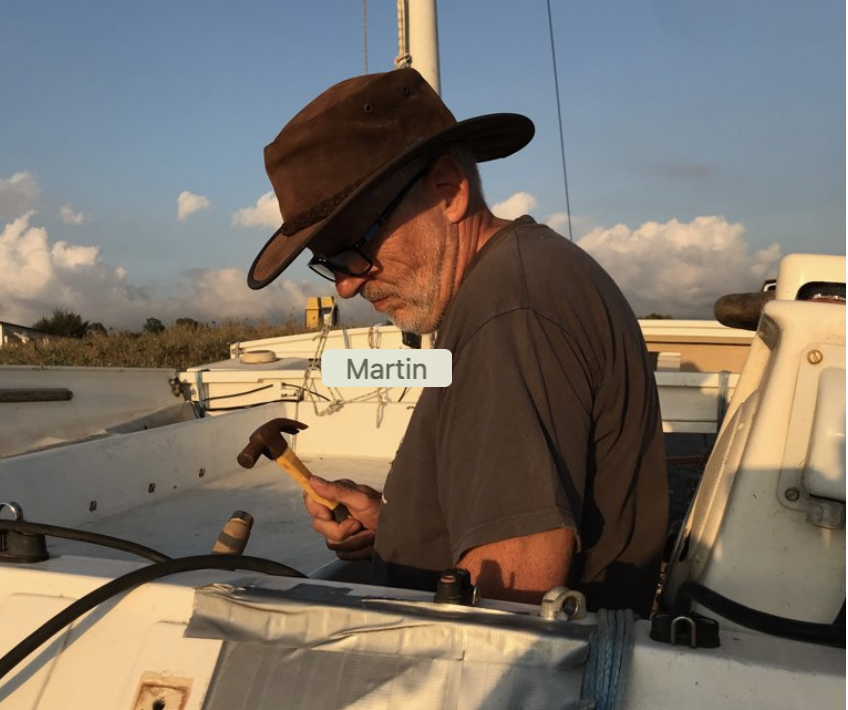
Launched in Iba and sailed the boat to Subic Bay. Moored at Watercraft. Crew were Miriam, Regis and Martin.
July 4
Paperwork with Watercraft. Monthly fee is P 16,500
July 6
- Cleaned the boat with help from Mavic
- Made a sun shade for the restoration work
- Installed a provisional land power line
July 7
- Tried to buy water hose and electric cable at Handyman. Totally overpriced and not in the right length. Ended up ordering some from Lazada.
- More cleaning of the boat, sorted out lines
July 8
- Tested solar panels at covered sky, all still work despite being in really bad condition
- Made main sheet hull attachments and attached them to the hulls
- Started to replace the rope holding the trampoline, got too hot to finish
- Searched components for possible LiFePo4 battery to replace the broken AGM battery
- Plan to change electrical bridge connection of starboard hull, source components
July 9
- Finished trampoline rope
- Fabricated new main sheet traveller and mounted it
- Changed port speaker. Second spare speaker is not working, need to order a new one from SVB
- Changed lock in the port hull
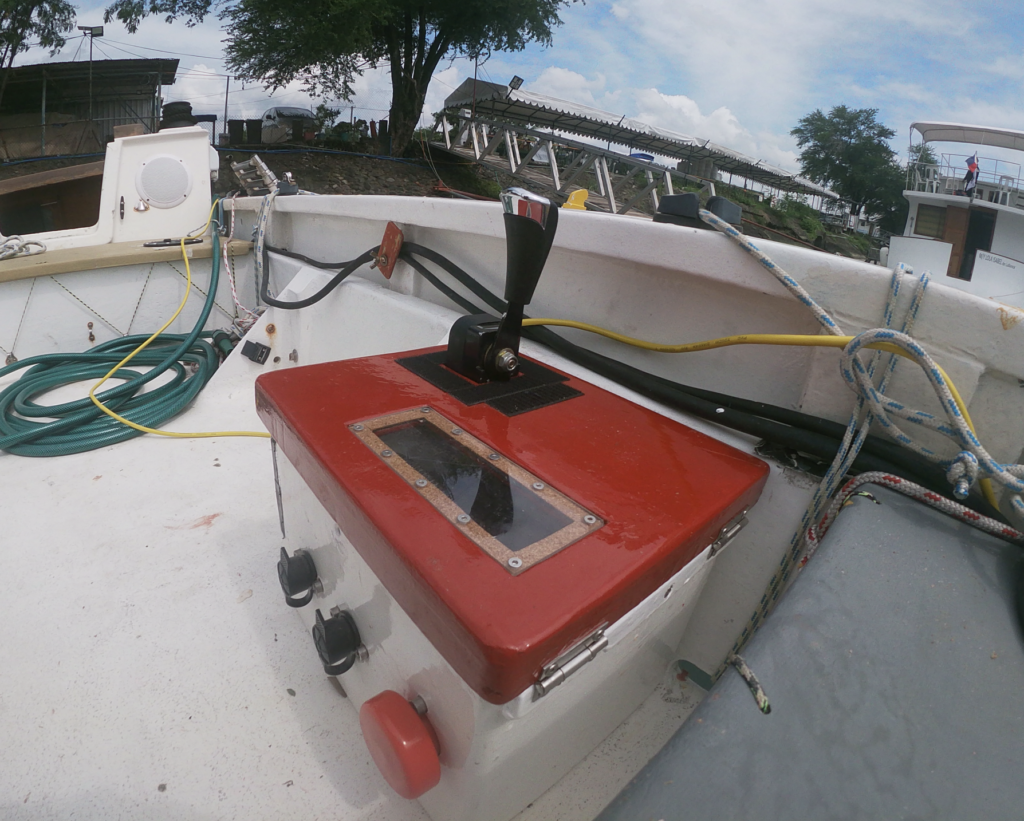
- Started to make the mechanism for retractable joystick for electric outboard motor
- Designed the battery boxes, decided to go for a simple hose solution for the drainage after doing a lot of research on drainage valves
- Lazada, SVB and internet searches for components.
- Made cable for LiFePo4 temporary battery
- Ordered the LiFePo4 cells, 120 Ah, from a supplier in the Philippines.
- Ordered an ANT BMS on Alibaba, we’ll see how that will work out
- Ordered the speaker, shipped to Kata
- Ordered a few small things needed.
Getting into a routine, working on the boat early in the morning to beat the heat, then go for a swim, and then do some work at home.
July 10
- Fixed the main sheet shackle and block and installed the main sheet
- Measured cockpit area for joystick location
- Tested battery, 11.8V after disconnecting it from the landline (maybe one cell is damaged). The AGM charger also never reaches maintenance charging status.
- Left anchor light and three color light ON to check from the road
- Explored the option to install the batteries inside the hulls. That would bring a bit more weight forward, protect them totally from water, but would have the disadvantage of having to take them out from deep inside the hull when no land power is available.
- Tried to install the new, cheap Chinese garden hose for water – leaking. Took it back for testing at home.
- Note: There was a big branch of a tree under the boat. Chris, the owner of a home built catamaran he bought in Cebu, said that he had been at the pier that was assigned to us. It is shitty in heavy rain, river velocity is then up to 6 knots. He is moving to a mooring tomorrow on the other side of the bay.
- Started making the box for the joystick at home.
- Cut the motor battery holder to shape to test it tomorrow.
- Ordered some parts (Battery main switch, enclosure for motor display..)
- Tried to fix the speaker by re-solderign the contacts, did not work.
- Sorted out boat keys
- Repaired the covers for the landline connectors.
July 11
- Vacuum cleaned the boxes in the seat boxes. The middle one (cool box) is rotten and needs replacement. Not properly sealed at two locations.
- Installed the water hose and rinsed the deck, under the cross beams and the seat boxes.
- Checked the box for the joystick, fits, could be a bit narrower, need to think about drainage
- Fixed the protective covers to the landline
- Checked whether the LiFePo4 batteries will fit under the floor in the middle section of the cabins. Fits.
August, 3
It has been a while. A small accident resulting in a torn ligament in the knee prevented fast progress, but today I can see the light at the end of the tunnel.
- Made two new covers for the cockpit storage lockers on the port seat, laminated them, fitted stainless handles – they need finish and painting
- Replaced the plugs of the cabin connection cable with a connection box. The power cable did not have contact anymore, and I can’t see that we will take apart the boat often. In that case the cables will just have to be disconnected in the connection box.
- Mast top light is working
- Almost completed the joystick box
- Re-set the parameters of the electric motor controller, reduced the delayed response, reversed the direction since the joystick is the wrong way around
- Made a new box for the Arduino display and tested it, it is integrated in the Joystick box.
- Ordered cables, boxes, connectors, battery switches, voltmeters, logbooks, and lots of small things that were needed. Had some trouble with the delivery boys who did not find our new house easily
- Made a new land power cable with waterproof connectors
- Made a new gardenhose for water supply
- Replaced the jib halyard and bought main halyards, that still need to be fitted
- Updated the manual and placed it also online
- Made two floors for the LiFePo4 motor batteries, one in each hull, laminated them with Rowin cloth on top, ready for fitting
- Transferred to home page and created a calendar for events
August 4
It is Sunday, so only little work was done. I tested the idea to go to the boat really early, do some work and then go swimming and then return home for breakfast coffee.
- Drilled the drainage hole for the Joystick box in the cockpit floor and the other wholes for mounting the box. Sanded the marine epoxy I had done yesterday to fill old holes and repair some damage.
- Finished the hull connection box on the starboard cabin,
- Replaced the starboard speaker (which Miriam had brought from Germany) and tested it, it works!!
- Tested the starboard seat locker boxes covers. They fit too. Need to think about a way how to secure them in tough weather.
- Made distancers and mounted them to the joystick box
- Put some thought into the voltmeters for the different batteries, After initially planning to put them into the joystick box, I decided to put all three in the Captain’s cabin, cables will go there anyway for the 48V charger that will be located there.
- Replaced starboard bow crossbeam cleat, still with a wooden one. Measured the required screw length for the aluminum cleats for the port aft crossbeam.
August 5-12
Steady progress but no major steps. I was mostly working on the Joystick box.
August 13
Sunny day today and yesterday, the exposed plywood of the cockpit drainage hole has dried. So I could continue working on sealing it.
- Sealed the lower cockpit plywood with epoxy
- Inserted PU foam between the cockpit bottom plywoods. Used foam from a spray can that I had ordered on Lazada and that came damaged. Luckily it still worked.
- Mounted the port battery floor board with previsionary fillets.
- At home made a waterproofing cover for the joystick hole when the joystick is hidden. Started working on one that serves as a Joystick condom when it is out, but I got impatient and abandoned it. Postponed for later.
August 14
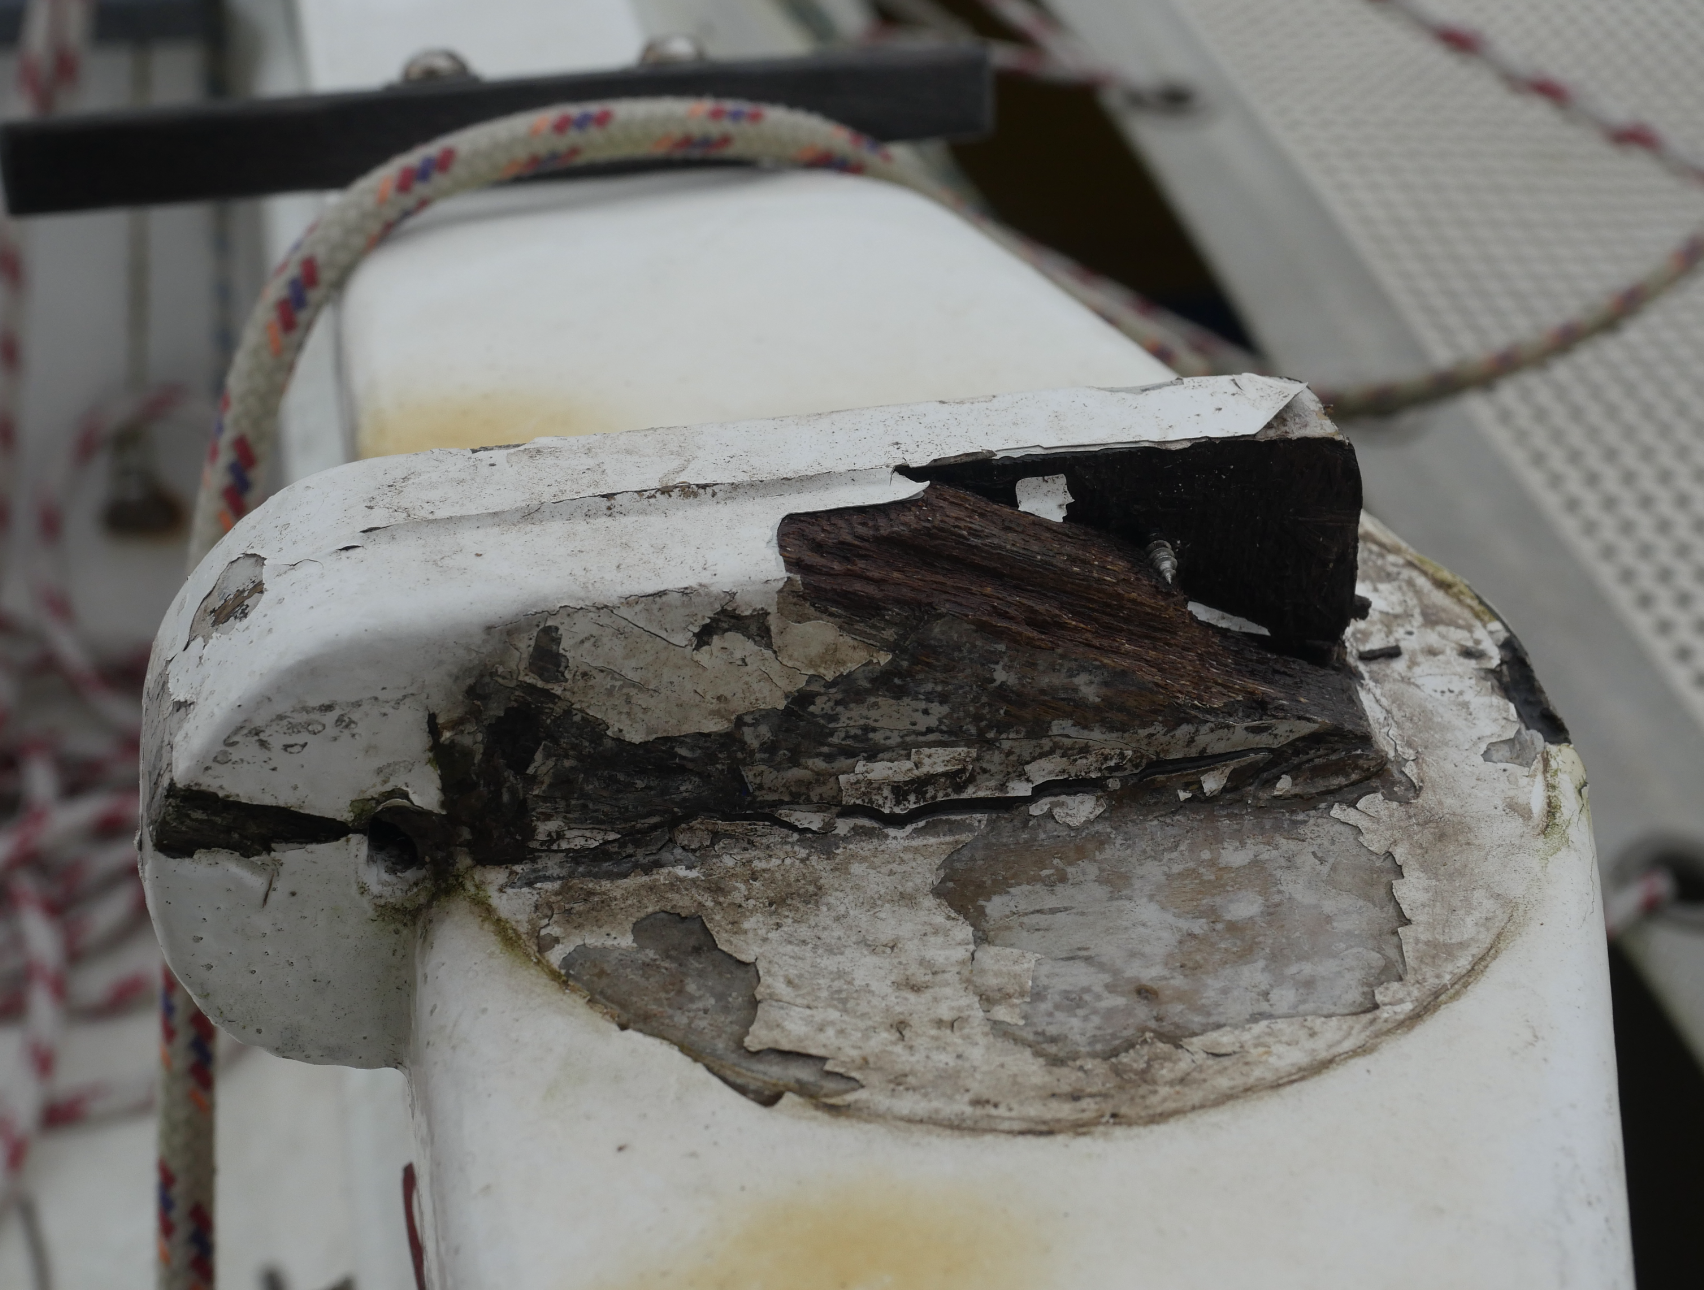
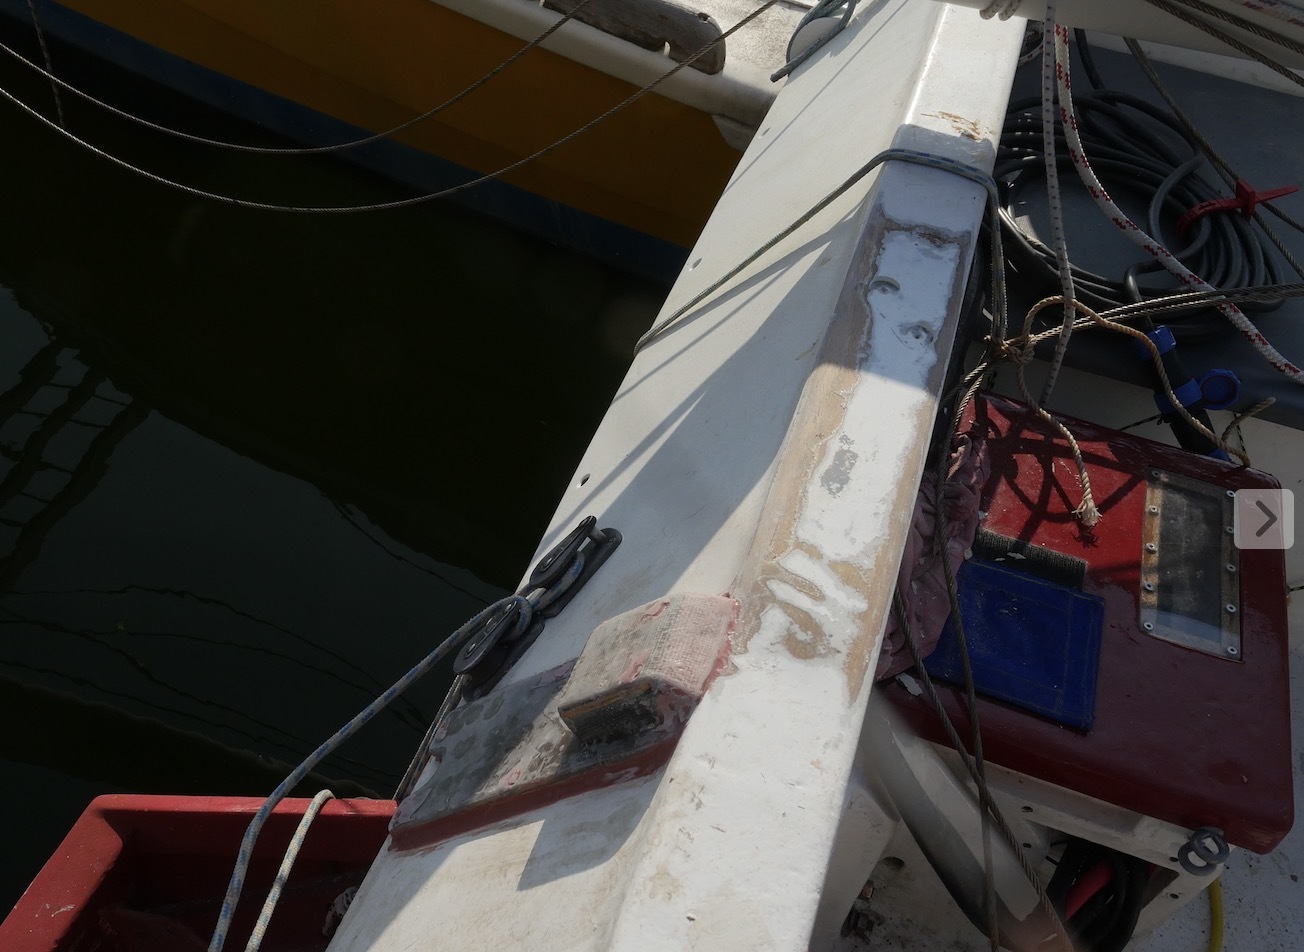
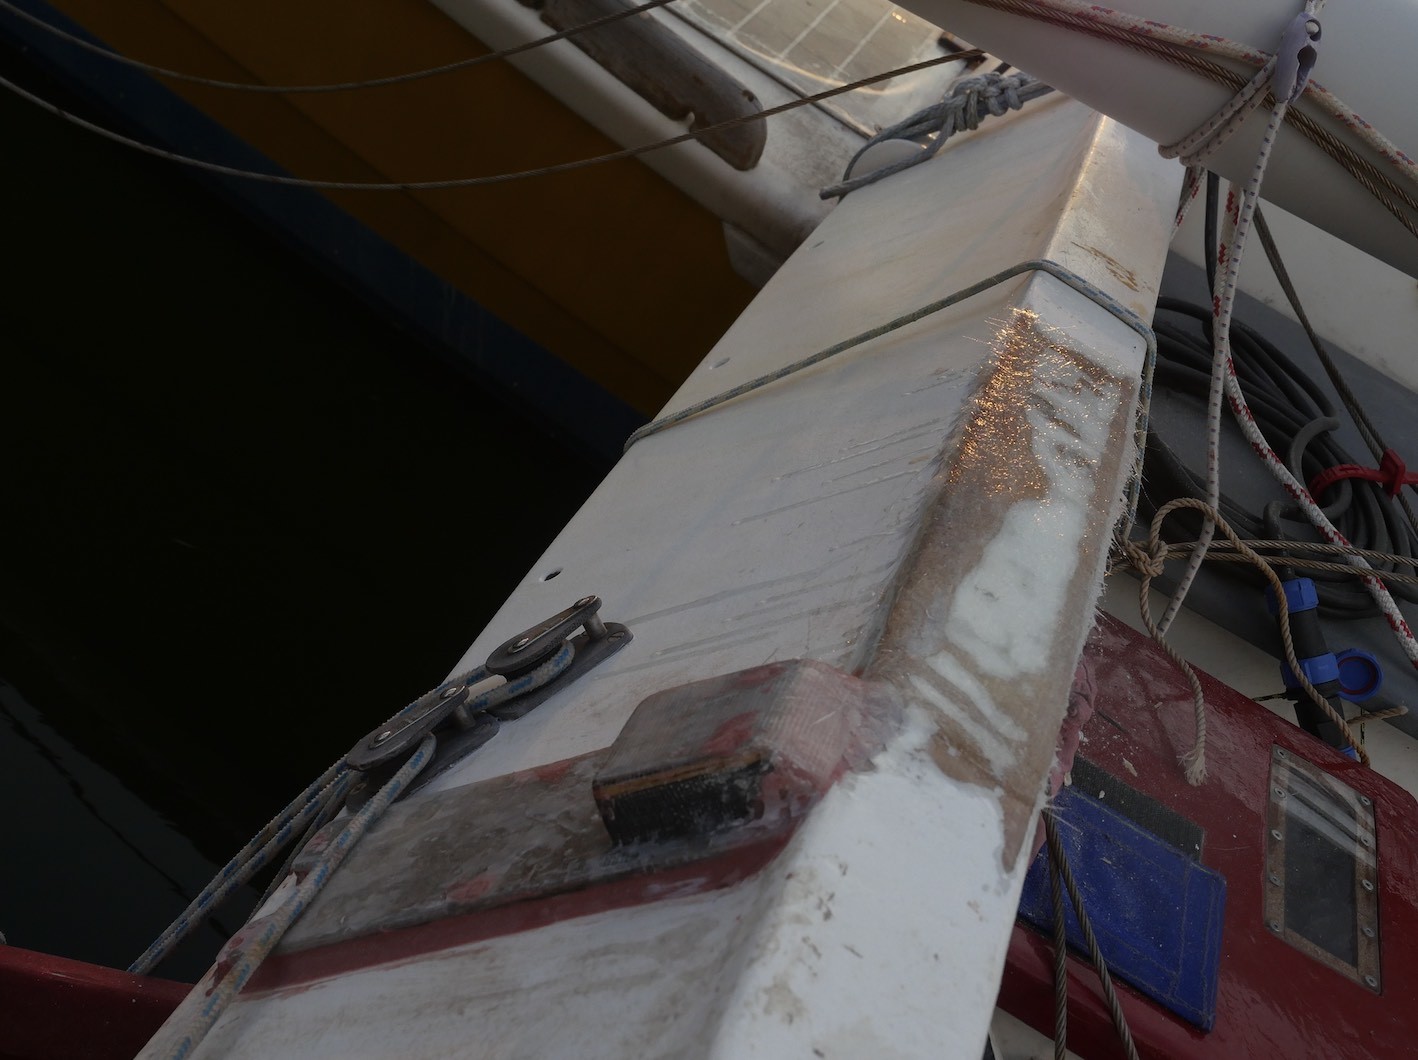
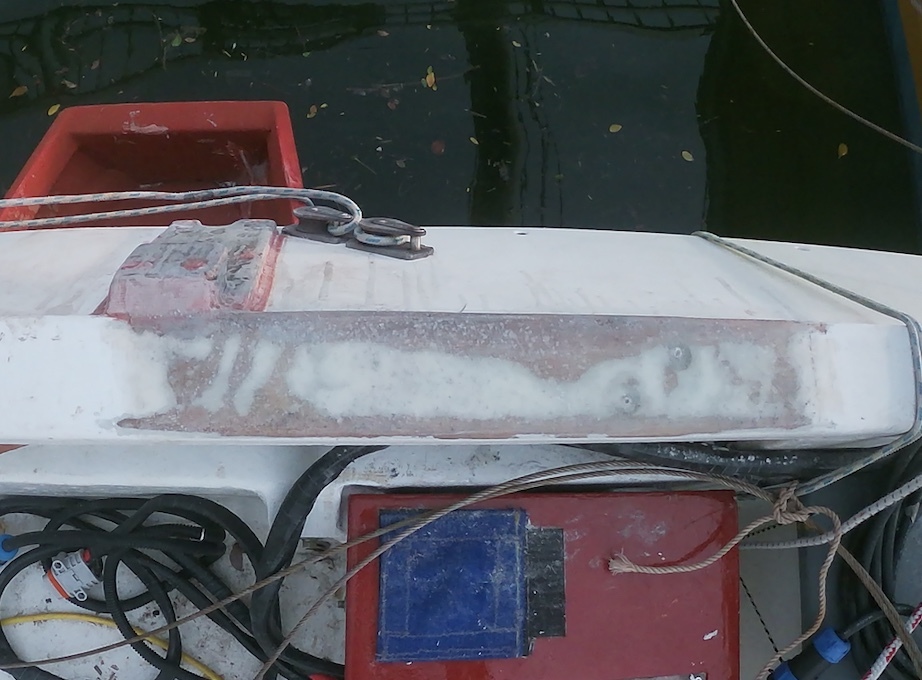
Today was a bit frustrating. When painting exposed epoxy parts white, I found that the mast foot has cracked and obviously water came inside. The wood seems soft and the mast has actually dented it inwards for around a millimeter or two.
- Fitted the starboard battery floor board
- Added some fillets to the port battery floor board
- Painted the fresh epoxy parts white
August 14-September 6
Progress was slow because of other jobs and some help did not push through due to hangovers and a tropical storm.
- Sourced the materials and made a gin-pole for lowering the mast.
- Mounted the gin-pole and came up with a plan, which requires 4-6 people to help.
- Primed the covers of the hatches of the starboard seat
- Bailed out water from the Starboard hull after heavy rain
September 7-8
Two days of nice weather, no rain and cloudy, so not too hot either. So I made good prgress in installing the electical system for the electric outboard motor:
- Bailed out around 3 liters of water from the starboard hull after the tropical storm. Need to find and fix the leaks. One is obviously the hatch of the hull, which was never 100% watertight. The other one is probably the solar fan.
- Drilled all the holes for the 48V cables in the port hull, sealed the raw wood with expoxy. Some holes in the cabinet were difficult because the cabinet sections are so small that I could not get in with an electric drill. Drilled them manually with 12mm drill bits with lots of duct tape tied around the ends to serve as handles.
- Made a big hole for the grommet in the back of the cabin, sealed the wood, glued in the grommet and led the cables through. Mounted it with plenty of silicone for water tightness.
- Installed the main battery cable.
- Installed the Port 48V Battery
September 9
Today it looked like rain on Windy, and it indeed rained in the morning. After lunch it did not appear as if there would be more rain, so I went and thought I can at least go and do a few connections. It then was clear until the evening, so the afternoon was actually quite productive.
- Connected all the cables of the starboard hull in the joystick box
- Connected the charge panel (in the process I could actually feel the 51V the battery currently has. Good that I went for 48V and not a higher voltage).
- Connected the port 48V battery.
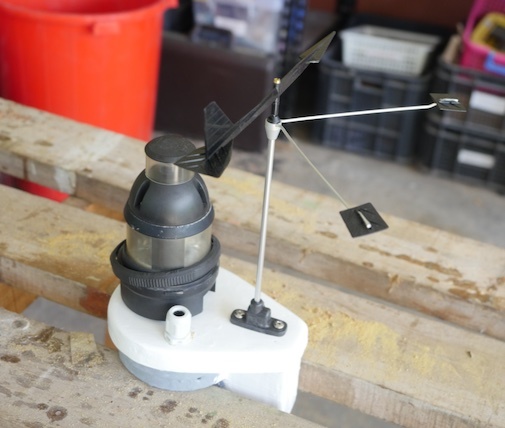
- Made a mold for the outboard motor down position securing device and formed it using marine epoxy. Covered the whole thing in packing tape in case it rains tonight.
Did not go swimming this night
September 10
Surprisingly another sunny day, after some rain in the morning. A bit too much sun to be compfortable, but I set off around 10:00 determined to make some more progress. Managed to do the following:
- Took off the upper motor downhold terminal I fitted yesterday to the aft crossbeam with marine epoxy. This needs some work to make it look OK
- Brought the outboard motor to test it with the joystick box
- Connected the motor power cable to the joystick box. This sounds easy but it is quite laborsome. Cut to length, remove insulation, crimp on the fitting cable lug, if it is loose also solder it, insulate with silicone and heat schrinkable tubes.
- Made the cable for the 48V Battery charger and found a location under the step of the port hull for it.
- Tested the motor with the joystick and the port battery.
September 11
- Installed the electrics for charging the 48V batteries
- Started fixing the port rudder
September 12
Made components
- Gap filler for port rudder (newly cut plywood, coated with one layer of Rowing fabric and epoxy).
- Made an angle piece from six layers of 250g/m fiberglass for the motor downhold bottom part
- Finished the upper part of the motor downhold
September 14
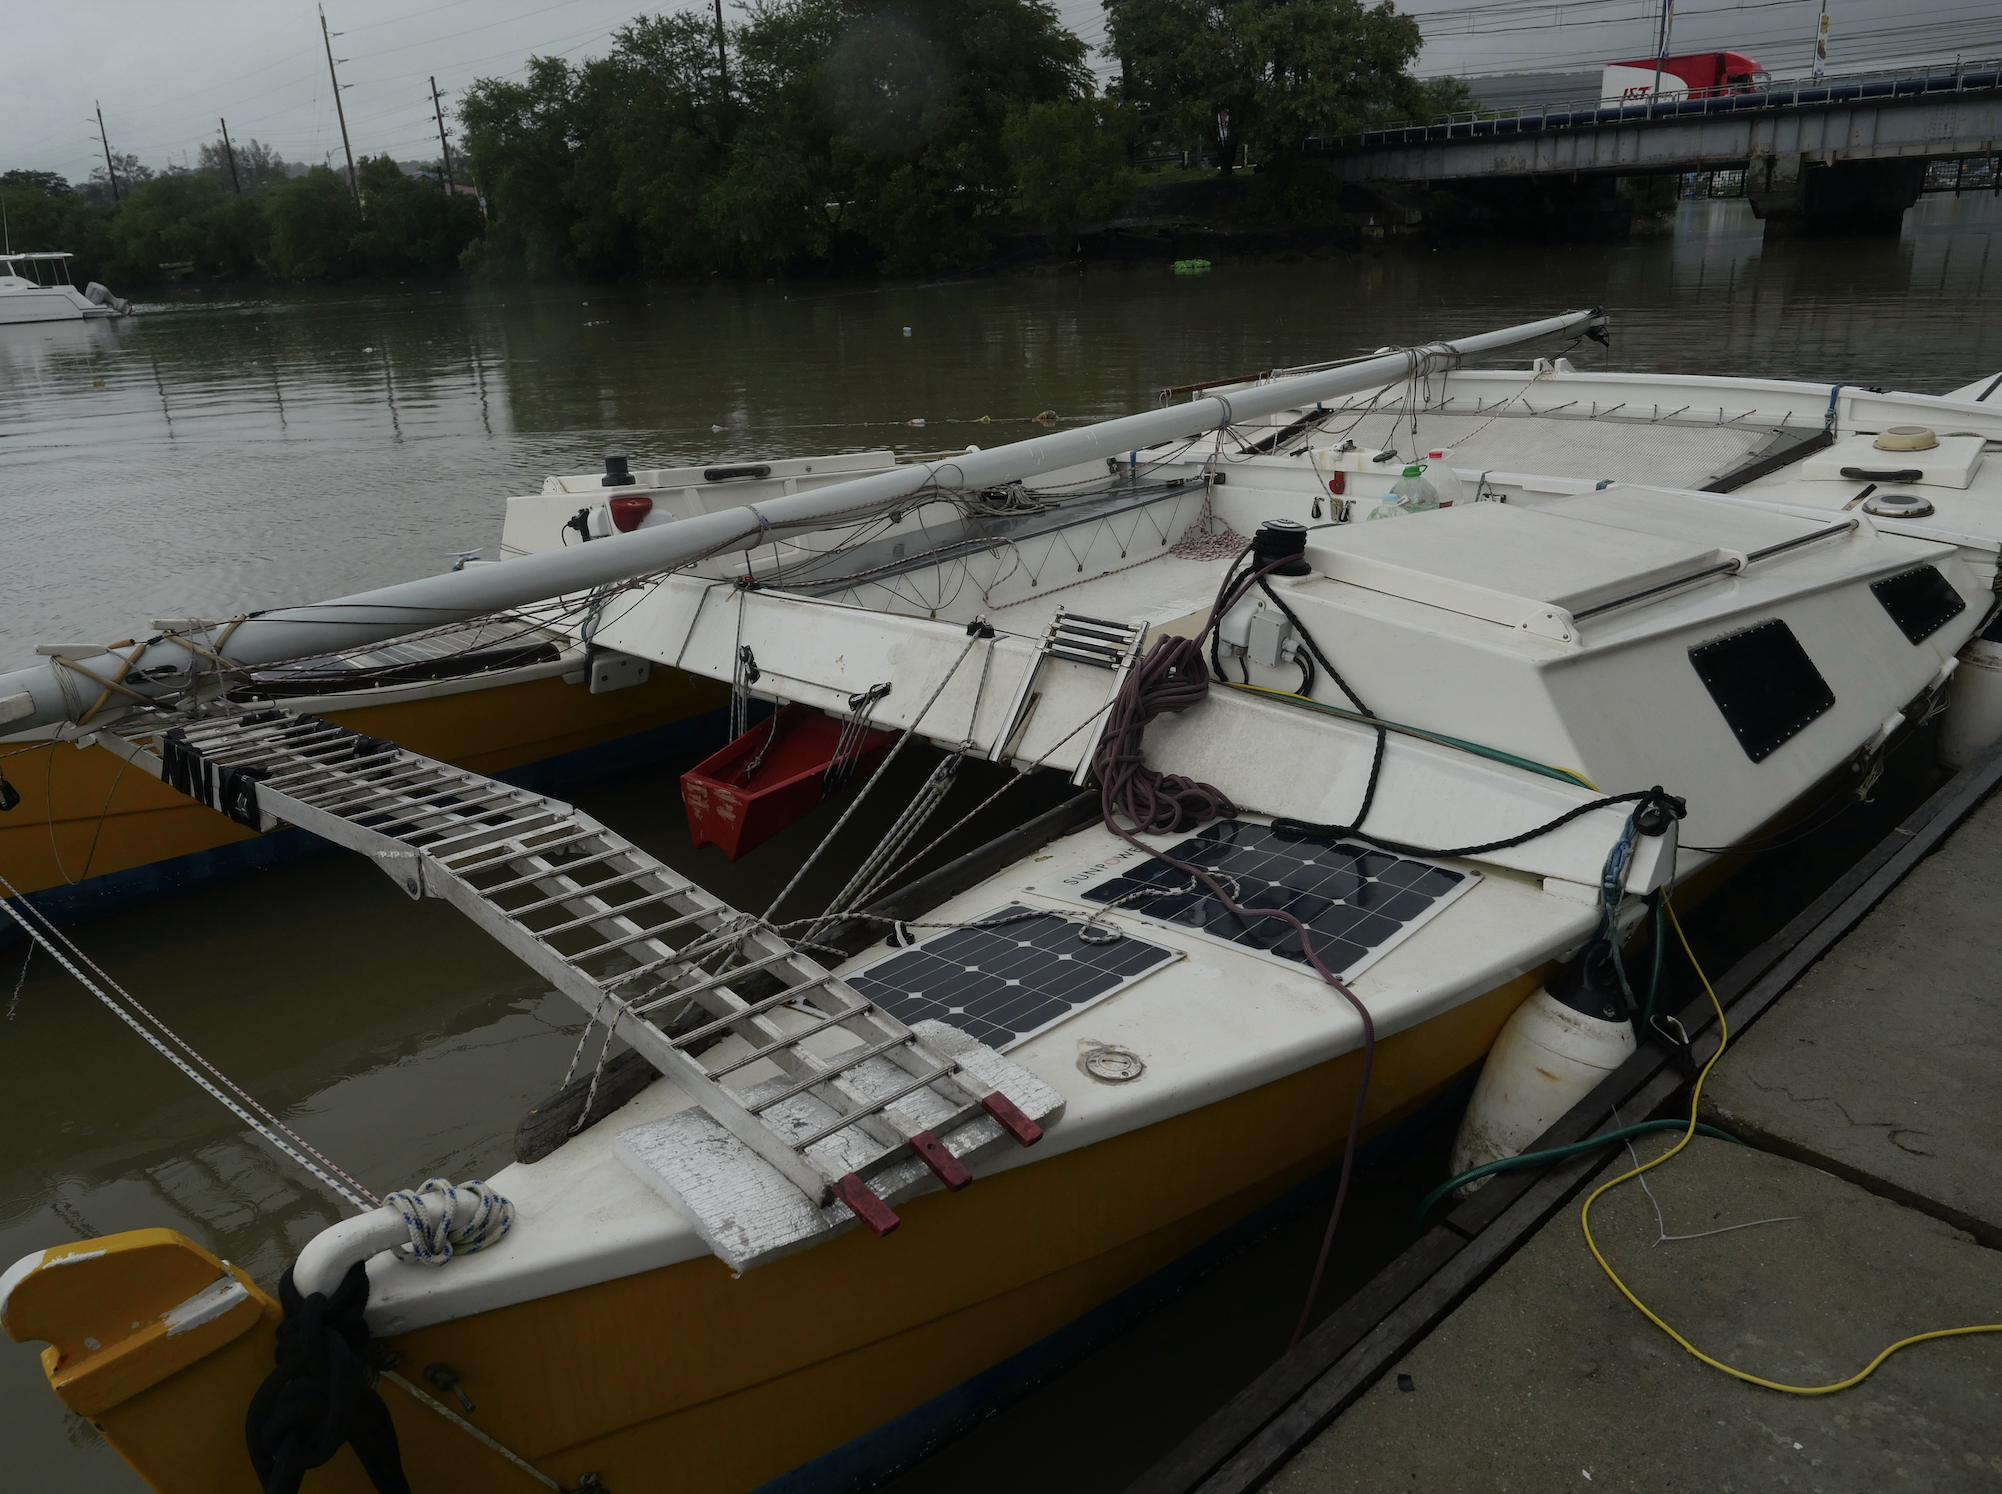
Miriam and Regis came yesterday. The weather report looked good for the morning, so we decided to lower the mast today. It was the tree of us and five guys from the yacht club Regis had arranged for the lowering part. It went surprisingly easy and fast. And revealed a very rotten mast step and top of the cross beam. Good that we decided to do it.
I had already prepared the gin pole and the jib halyard a weekend before when I thought we could lower the mast then.
- Moved the boat backwards so that the end of the mast could be temporarily caught by the wooden x placed on the pier
- Removed the safety lashing at the mast foot and the cable for the masttop light, which was stuck between the cockpit and the crossbeam. Also, one of the helpers tore violently at the cable to free it from a rope that it was entangled with when lowering the mast. Will have to check whether the cable got damaged in the process.
- Connected the two aluminum motorcycle ramps together and placed them across the hulls at the back so that one can walk on there if needed. Tied it to the hulls to secure it. Turned out to be a good idea because the mast top is now also resting on it.
- With the help of the 5 guys, lowered the mast, Miriam on the winch with the jib halyard, slowly releasing it, Regis coordinating the other guys and making sure that the mast does not move sideways, and Martin at the forestay, slowly releasing it. We did not have a photographer:-(
- This all went very quick and well, we tied the mast onto the crossbeams and secured the ropes.
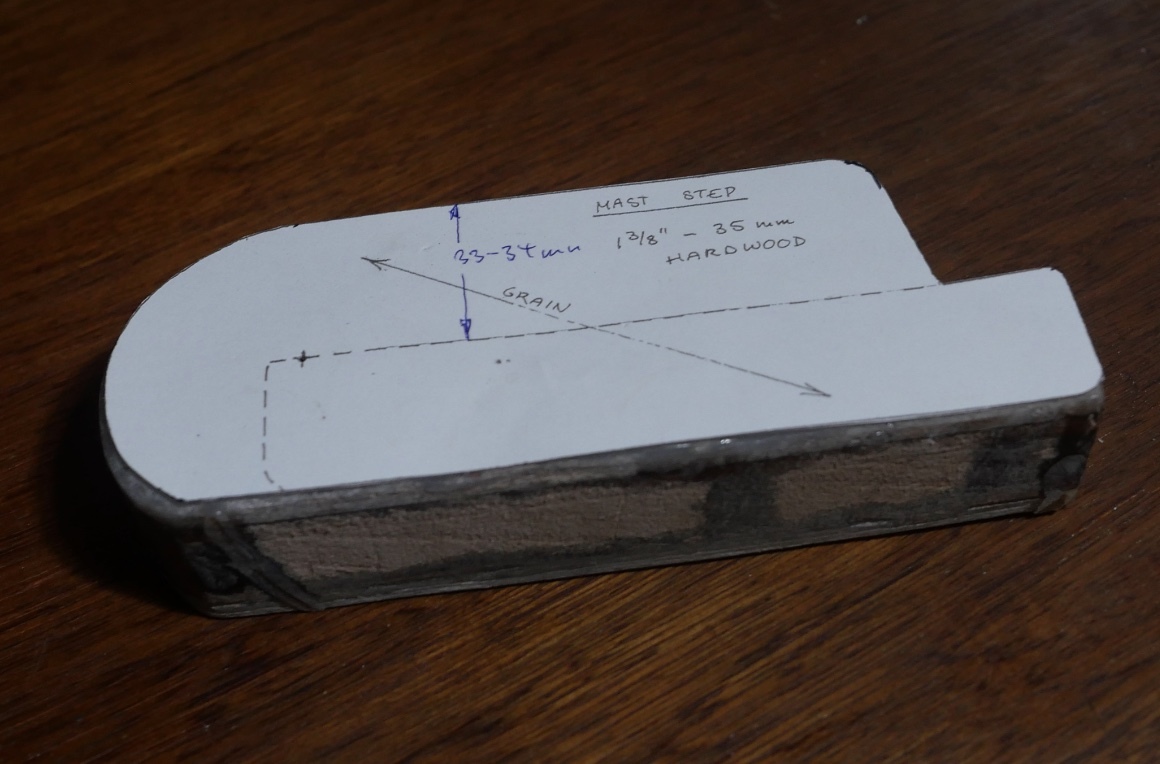
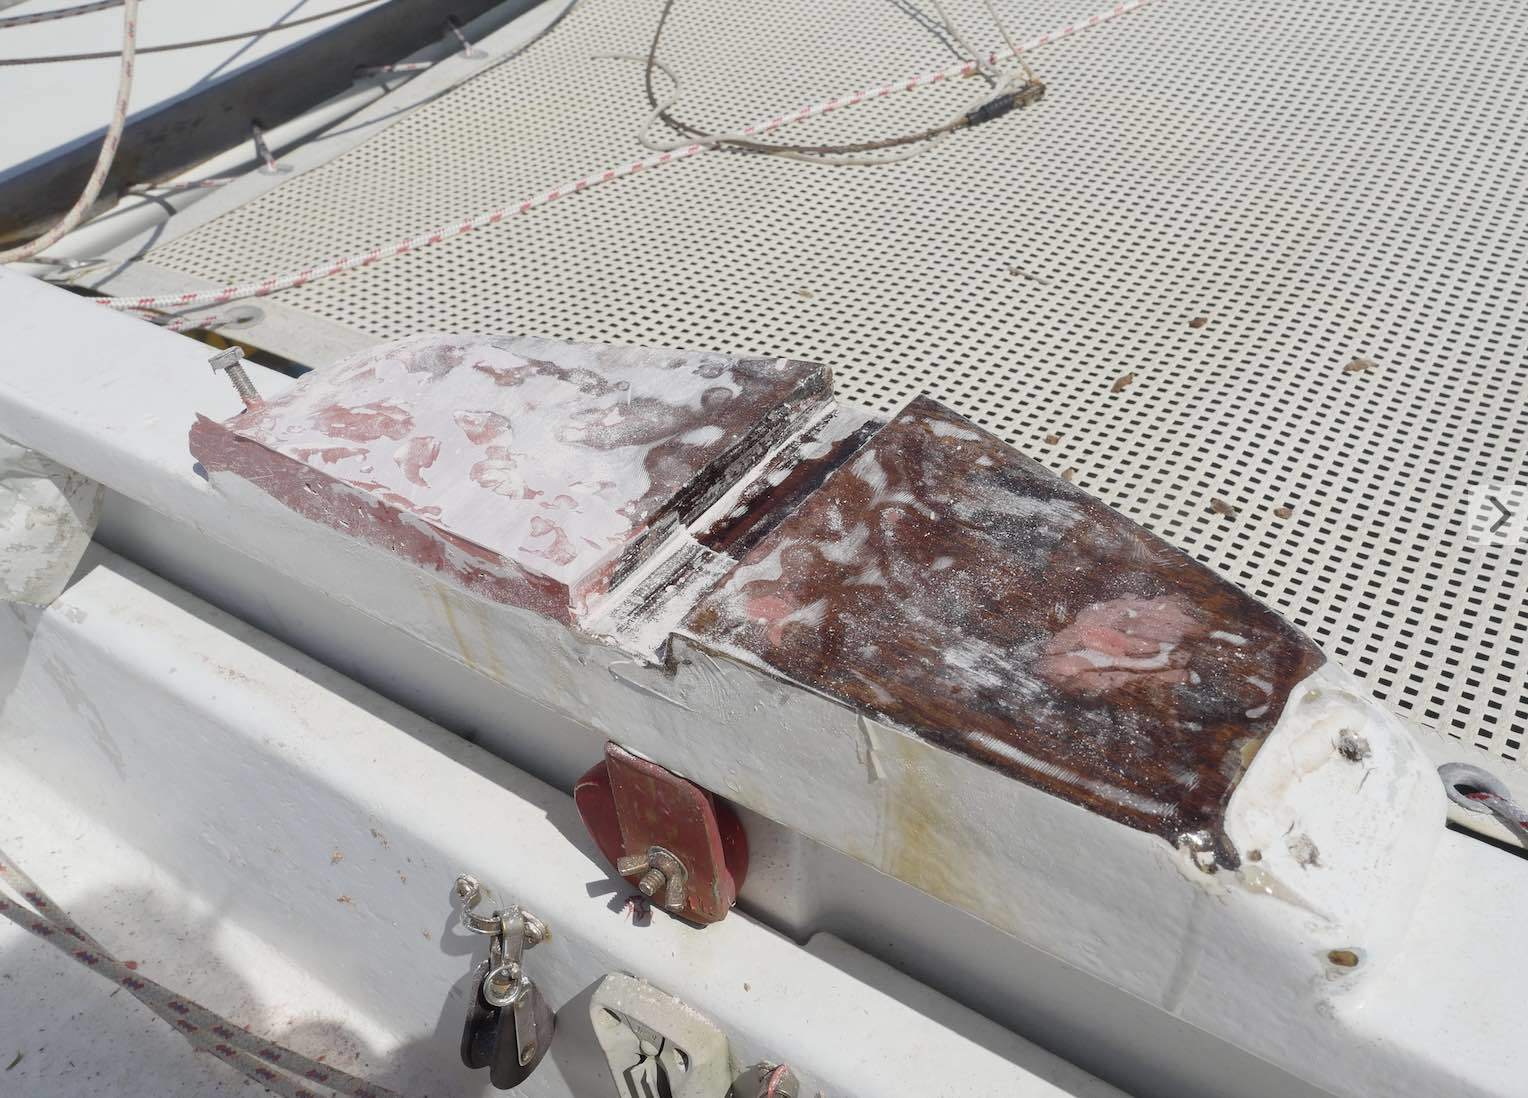
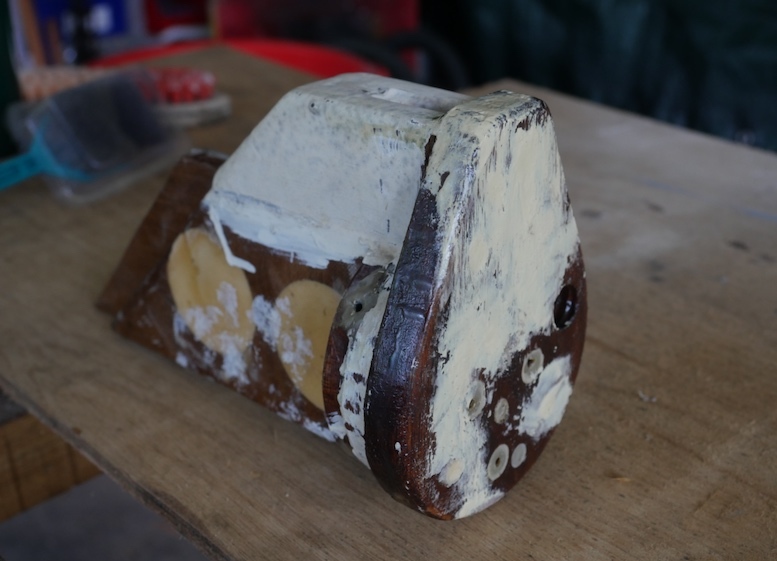
The rotten mast step
We secured all ropes and cleaned up the boat and then went to Texas Joe’s for lunch. Rain started in the afternoon, so further work has to wait until next week.
September 15-19
It is raining heavily again, so I only did small works on the boat:
- Ordered the cables for the starboard hull on Lazada. It was initially rejected because the spending limit of my credit card was reached. But then I got the bank card for my new account and could pay with that.
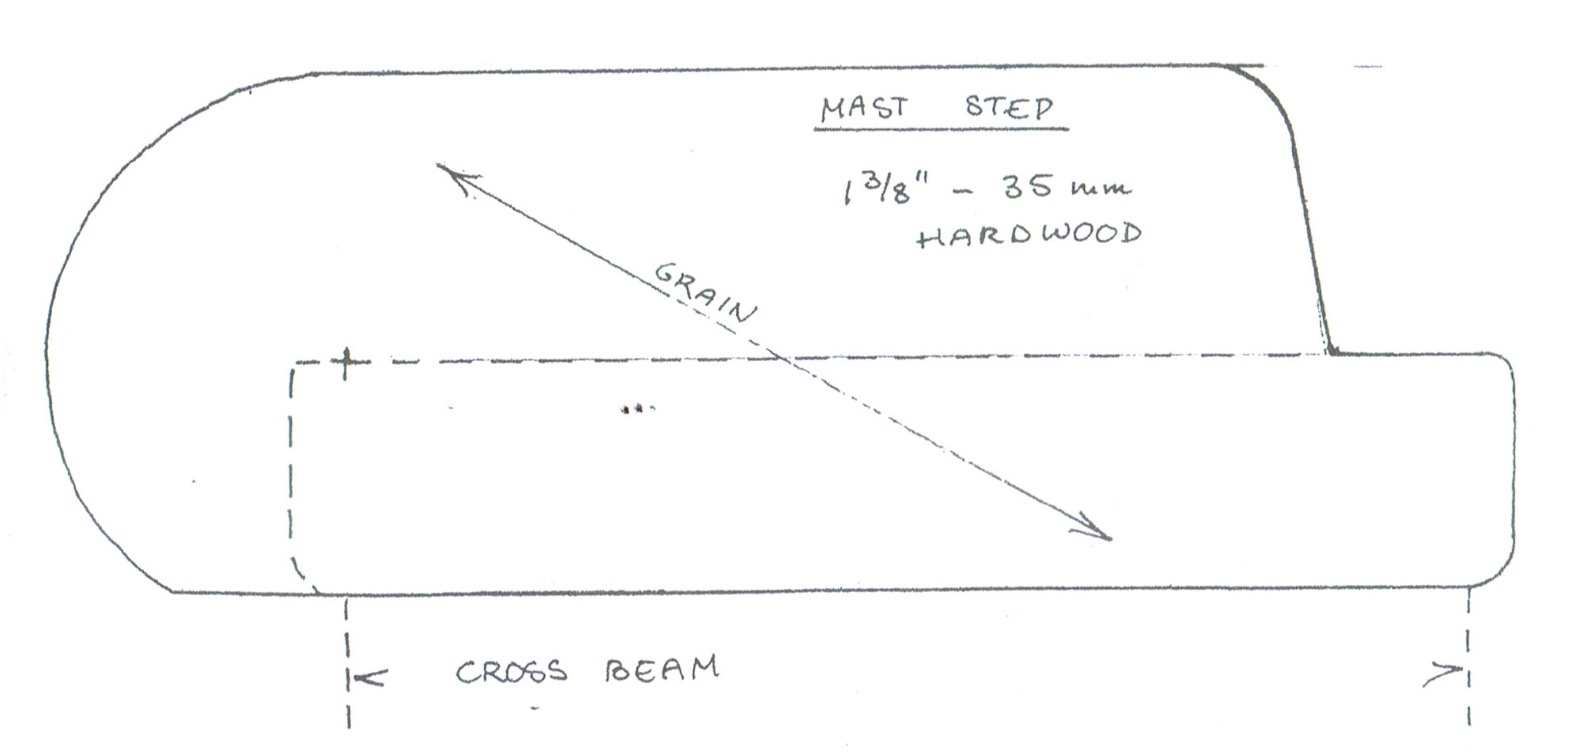
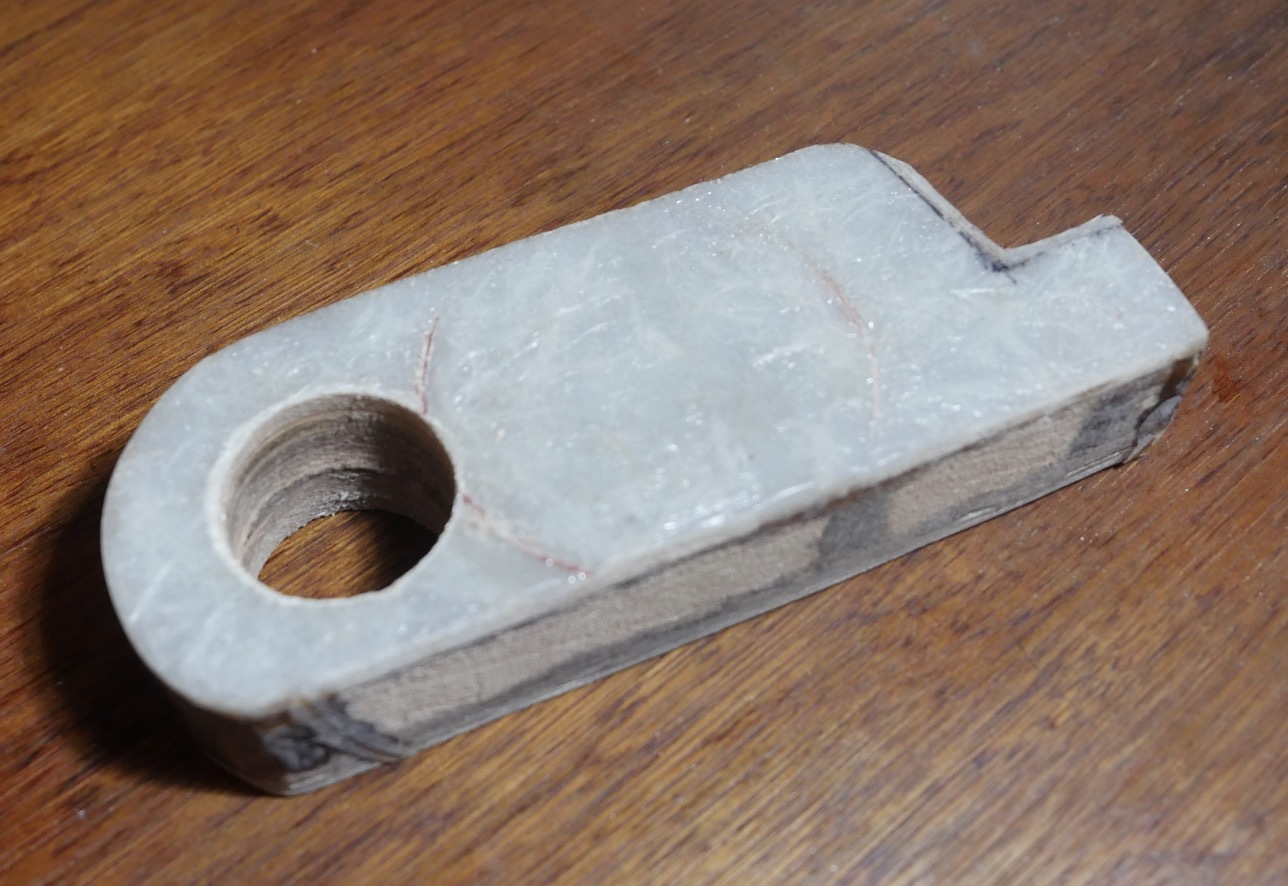
- Started making the mast step, glued two layers of wood together, cut it to rough shape and then coated both sides with 4 layers of 250g/m2 fiberglass / Epoxy.
- Made an instruction board for the 48V charging system to be placed in the port cabin
- De-rusted, primed and spray painted the fire extinguisher holder from the port engine
- Charged the second 48V battery to full charge
September 20
Still lots of rain.
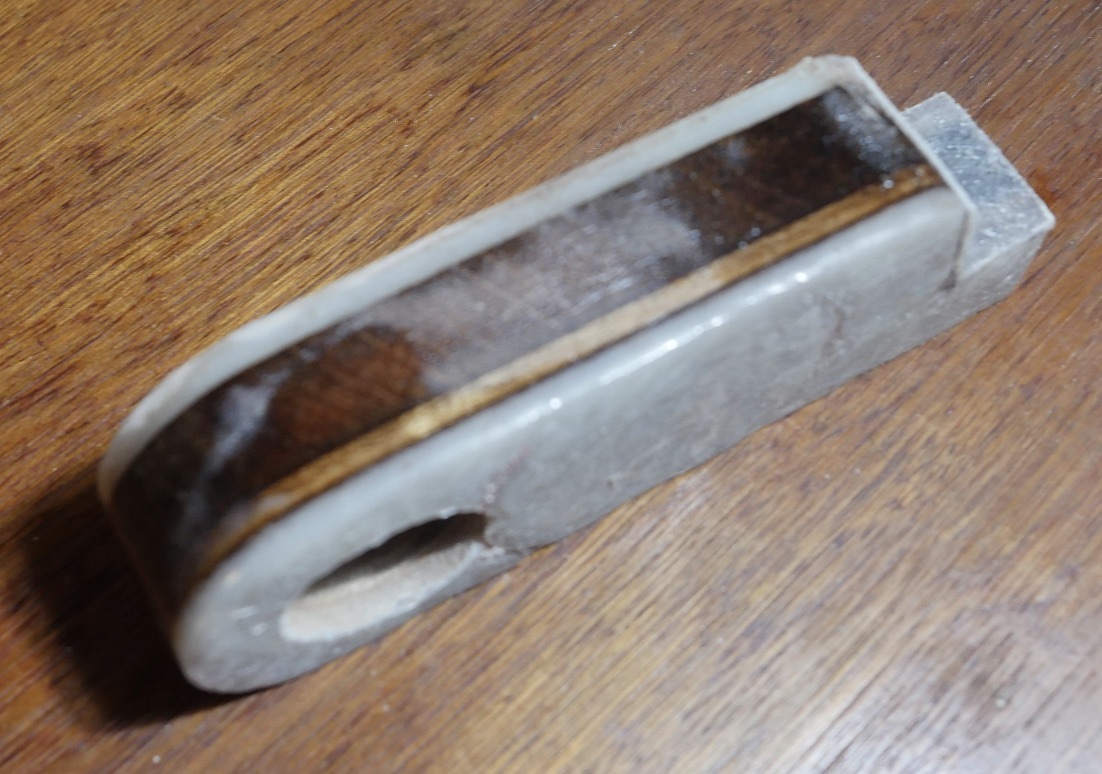
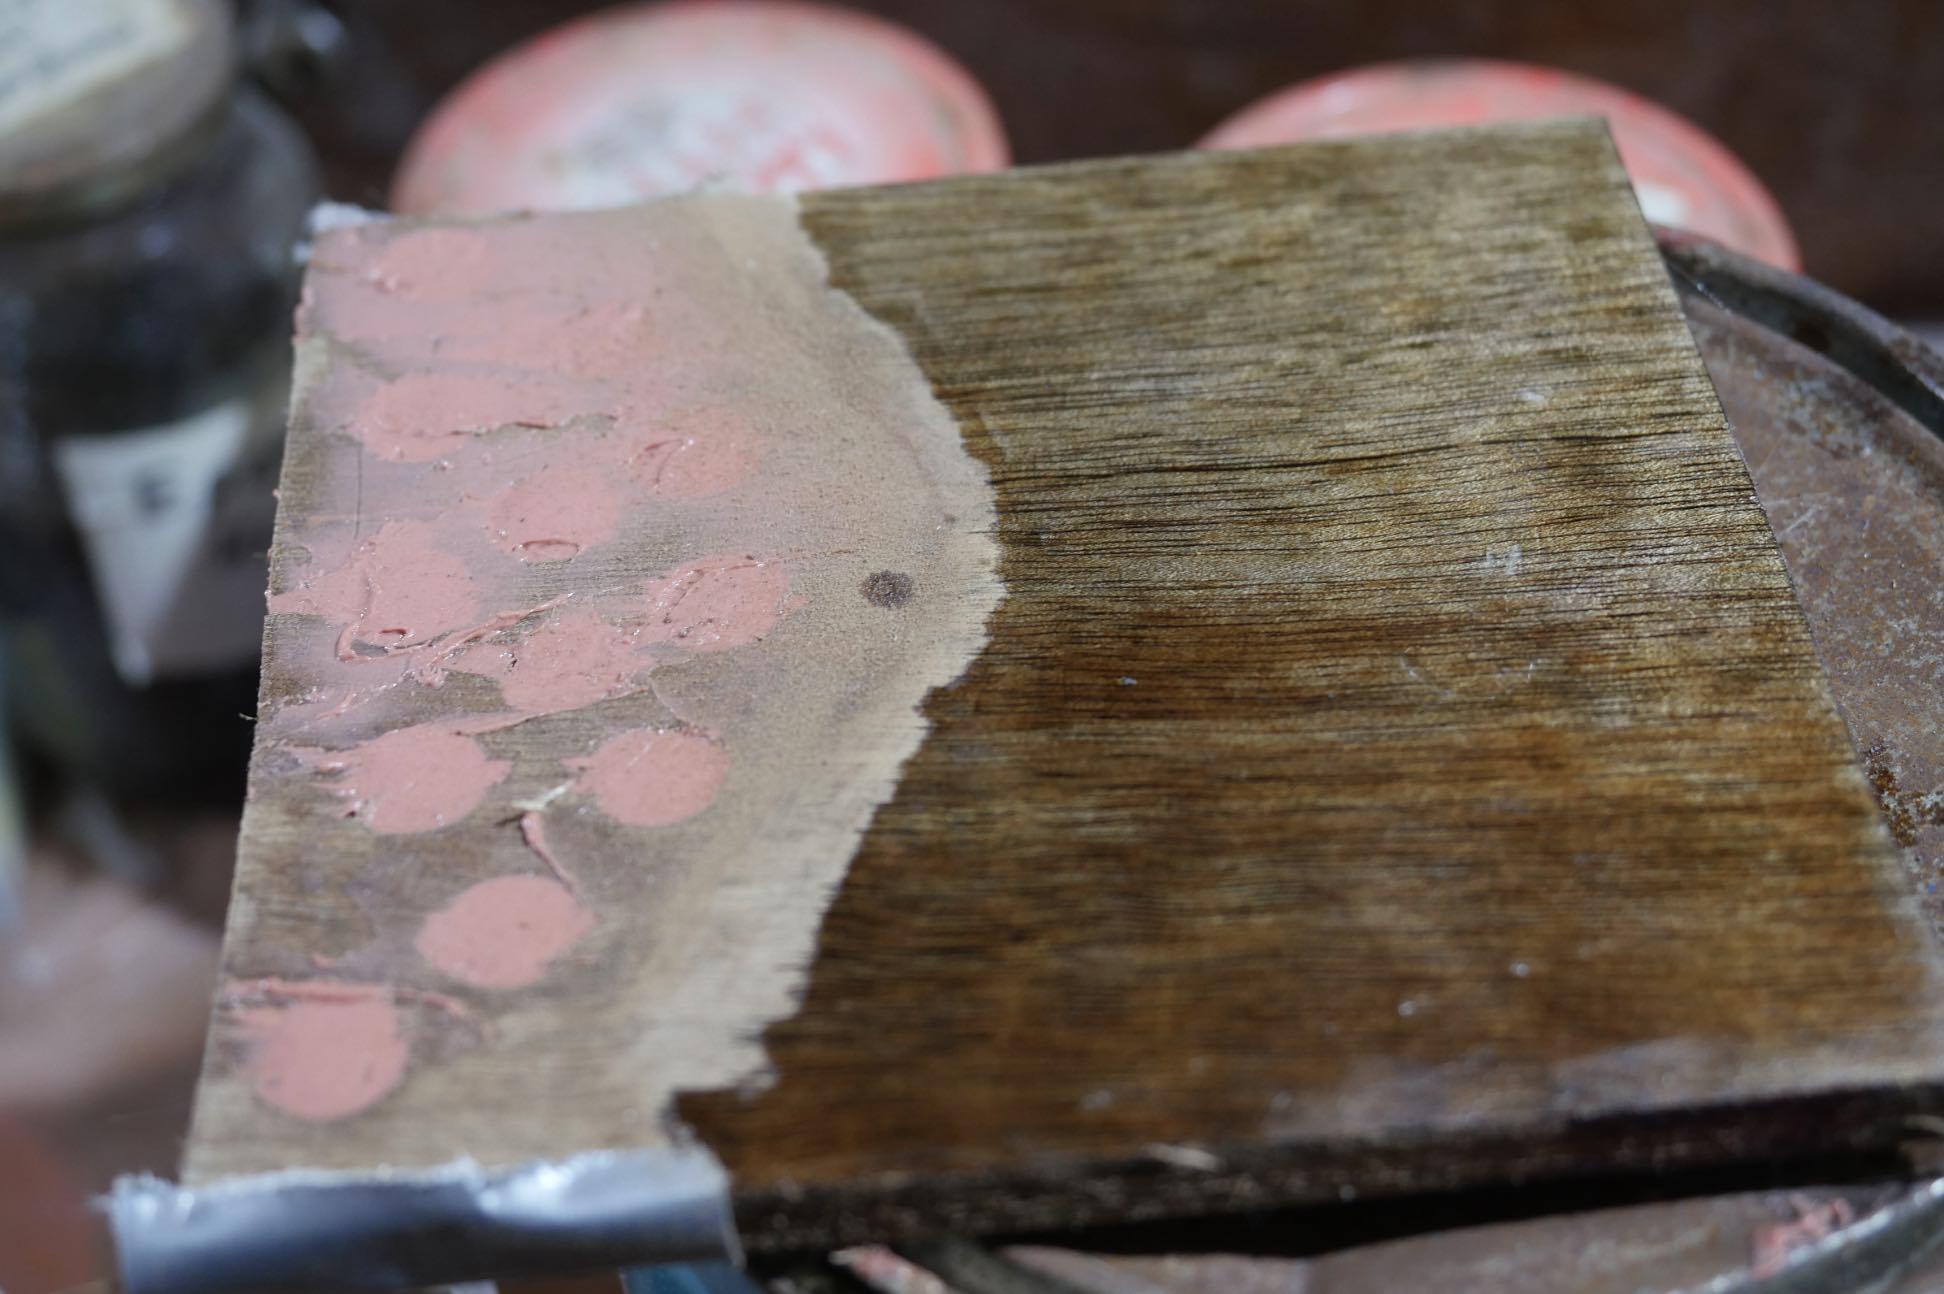
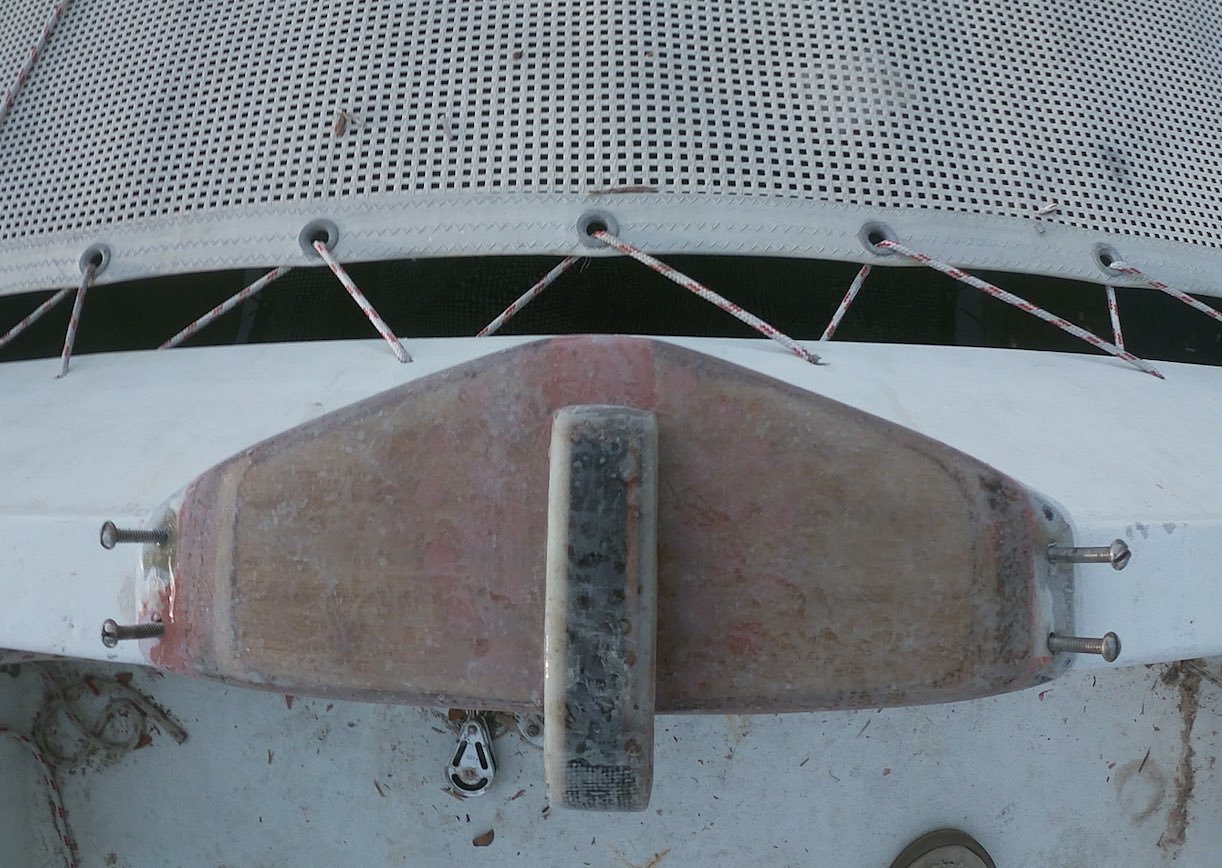
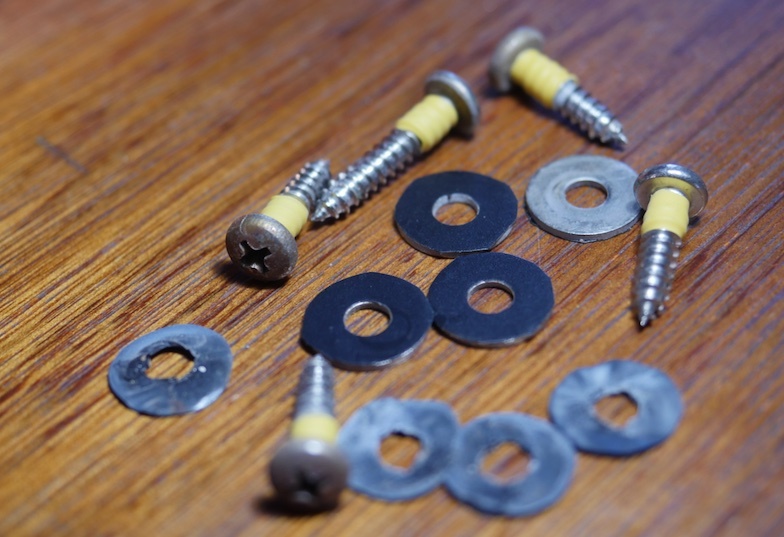
- Went to the boat on Friday to take apart the rotten mast step to check how much of the wood is damaged. It consists of two layers of 10mm marine plywood, glued together with a layer of epoxy and with four stainless steel screws. the top layer of the plywood is soft and has to be replaced. The lower layer seems to be OK, only one small spot at the left side absorbed some water, so I am thinking further stripping off the wood and removing the epoxy layer and after further inspection to repair the lower layer with marine epoxy. It started raining again so I had to stop working on the boat
- Further worked on the mast step, adding some more fiberglass layers at the sides and modeling the front with fiberglass.
September 21
Went to the boat in the morning, it is still raining frequently.
- Checked how the mast step fits into the mast foot and marked modifications needed. For this i had to climb onto the mast after securing it with more ropes, I was really worried about falling into the sewage water from the Subic River, but it went well.
- Modified the mast step, made the epoxy fillet for the securing rope, covered the top and round front with 250g/m3 fiberglass.
- Made the replacement plywood pieces for the cross beam. Dried the wood in the oven to make sure it is dry when it is sealed. Added epoxy fillets to reduce the load on the wood at the area where the mast is.
- Found out that the starboard hatch has 2 locations of water damage at the bottom. Made a temporary replacement from 6mm plywood so that I can lock the cabin when repairing the hatch.
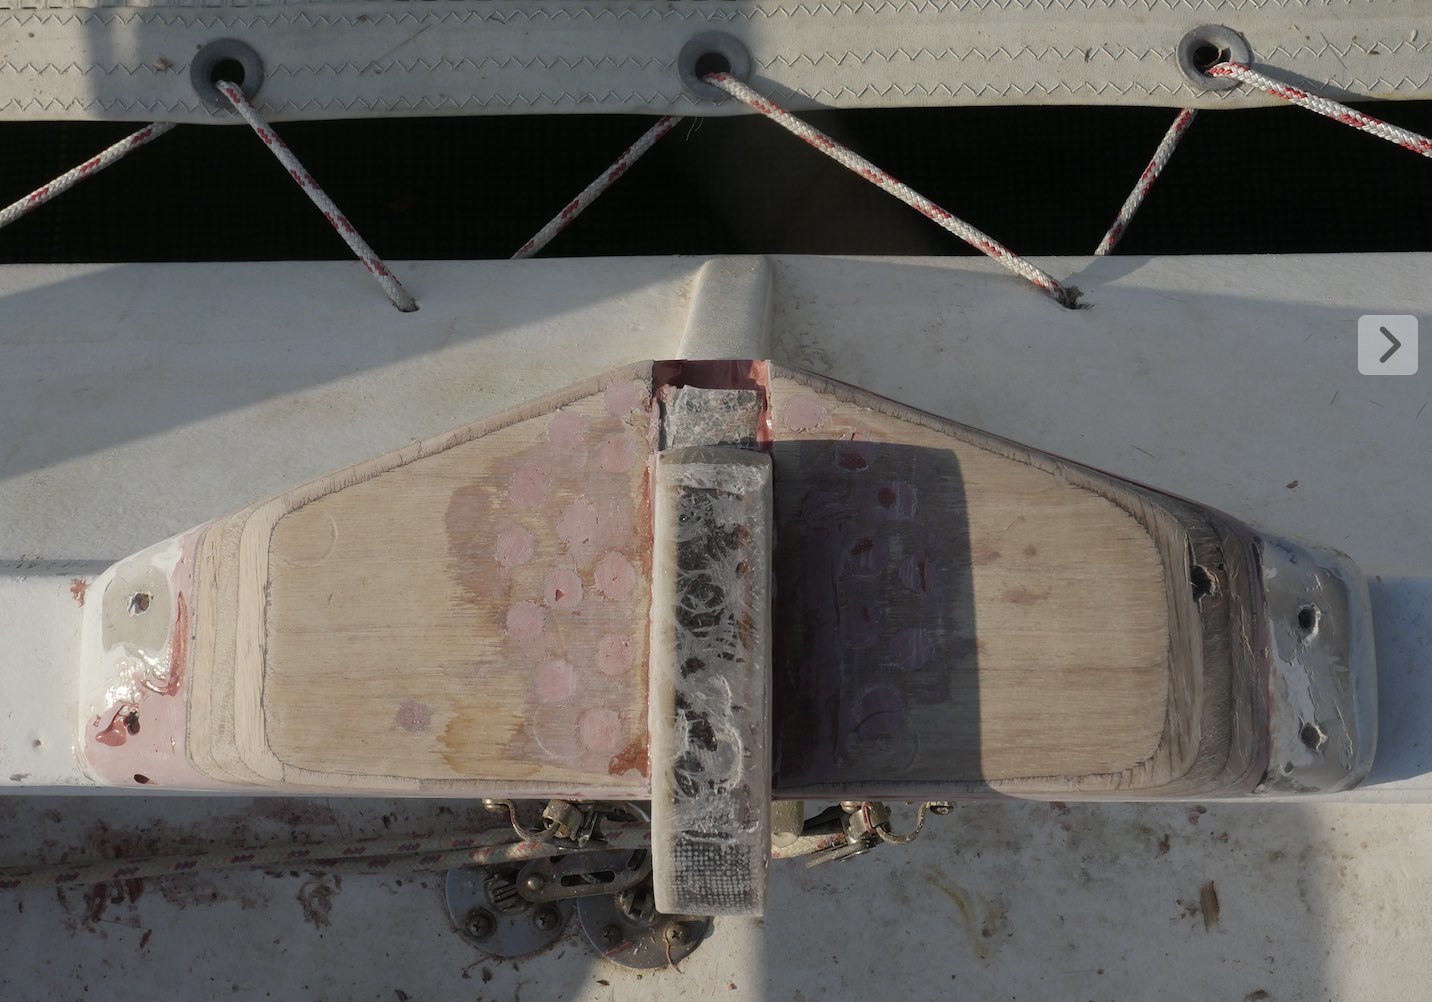
The plywood of the crossbeam top was a bit compressed, which probably caused the fiberglass to be bulged and then crack. To add some stability I added marine epoxy fillets in the area where the mast sits. The top and bottom of the board will be covered with 2mm fiberglass for additional stability. One problem here is that it is very difficult to get some good quality hardwood.
Urgently waiting for a day without rain.
September 22, Sunday
Went to the boat twice today, once in the morning and once around 15:00.
- Removed all soft wood from the crossbeam top with a strong wire brush.
- Dried the remaining intact wood with the heat gun
- Made a mold and filled the gap caused by removal of the soft wood with marine epoxy
- Fitted the tiller distance board to the port rudder with marine epoxy and 4 screws
- Sanded the distance board to shape after epoxy cured
- Sealed the wood of the mast cross beam and the tiller distance board with laminating epoxy
- Fitted the motor down holder bottom part in the motor bracket with marine epoxy, 5 screws. Made fillets and sealed the part with laminating epoxy.
- Cut the download tube to length and checked the upper part – OK
- Fitted the mast step, added 2 mm fiberglass in the front, a layer of thin Rowin mat at the round part in the back and a 1 mm fiberglass layer at one side to make it fit the mast foot
- Glassed the bottom of the two crossbeam plywood replacements with Rowin mat
I found a long crack in the top of the aft cross beam. This needs to be fixed too, it is not so urgent but better do it before the regatta too. After the Mastfoot is restored.
September 23
Sunny day, Windy did not predict much rain today, so I went to the boat three times. It was also extremely hot, I had to take a cold shower after the first time and dip in the pool of Charme Hotel after the third time. In between I also went to harbor mall to buy some cold drinks and have a coffee in the air conditioned coffee shop. Reality of climate change. On the boat I focussed on the wood parts, hoping to have them worked out and sealed before the next rain comes.
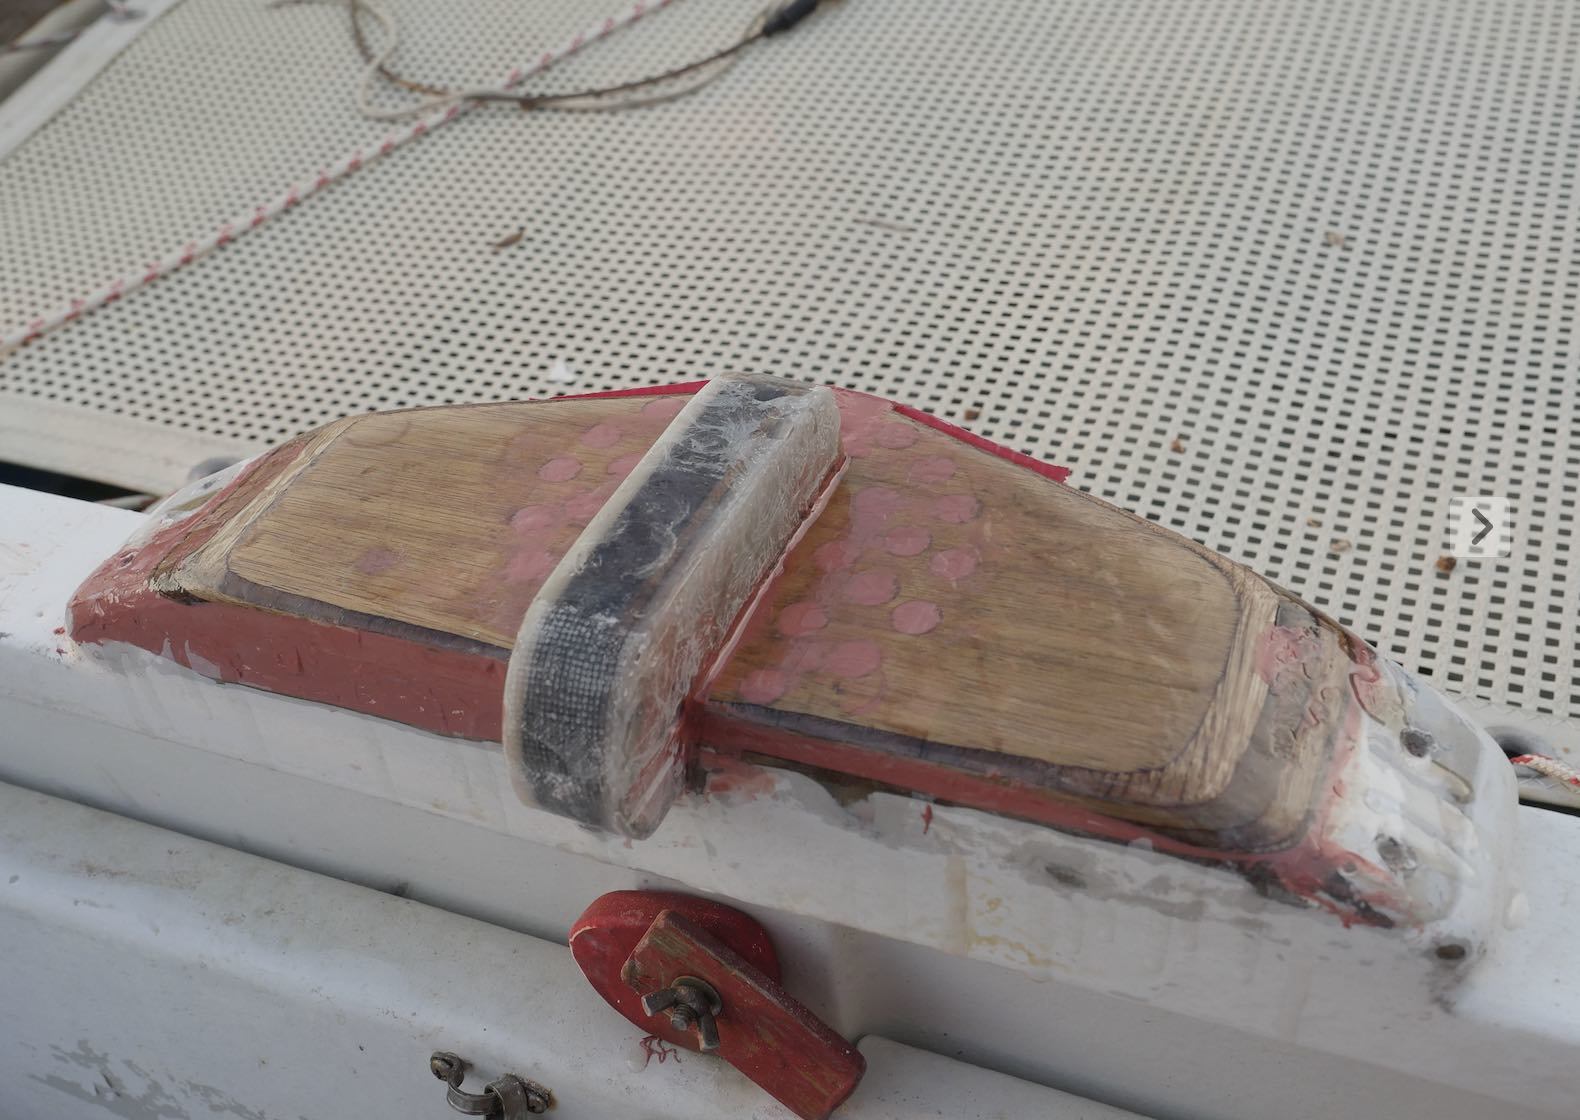
Mast cross beam: In the original version water had entered in a small crack at the front into the mast step and from there to the two top wood panels on the side and to the middle layer wood panel on the left. The objective for the restoration is to seal each piece of wood individually so that if one gets water intrusion the others don’t get damaged and only one needs to be repaired. Therefore no screws are used, everything is glued and in between the woods there is at least one layer of fiberglass or Rowin mat.
- Filled the gaps of the mast base with marine epoxy. After cutting leveled it with the power sander.
- Checked the mast step, it fits now perfectly in the mast foot.
- Glued the mast step into the mast base and the left replacement board, then the right one in a second round.
- After the marine epoxy had cured, planed and filed the replacement woods to shape, then filled remaining gaps and the front with Marine epoxy again.
- Sealed the wood with laminating epoxy in the evening to protect the bare wood from rain. will have to sand it before glassing the wood on the next work day
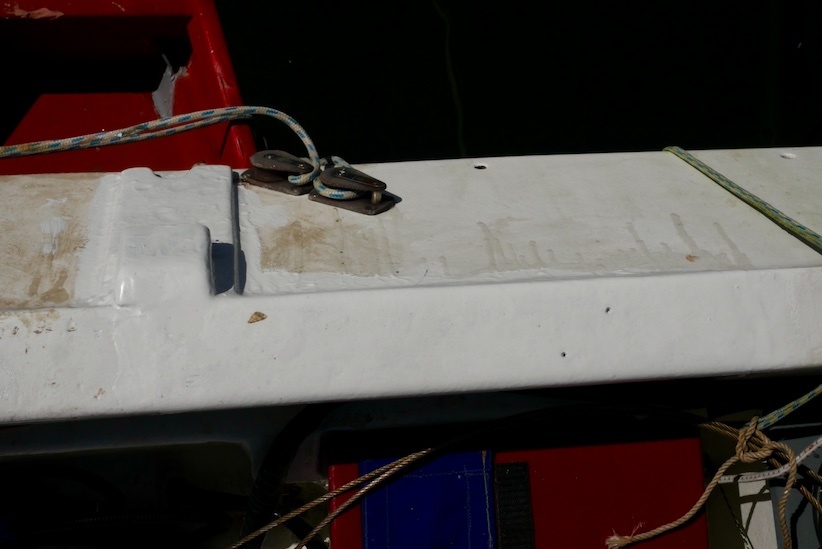
Motor download and fixing crack in aft cross beam. The crack developed after the rope that raises the motor had chaffed a small hole in the Rowin mat coating of the cross beam, that went through to the wood. It was only around 1-2 mm in diameter, but obviously enough for water to enter the top layer of the cross beam, make the wood swell and the Rown mat crack over around 30 cm length. After sanding down the paint, primer and Rowin layers in the affected area it turned out that the wood was still OK, it had just expanded a bit but was not softened. So after drying it in the sun for a day I decided to just cover it with a layer of fiberglass, reinforced with aluminium at there edge where the motor rope is running along. Or maybe I move the cleat from the top to the side of the cross beam, we’ll see tomorrow.
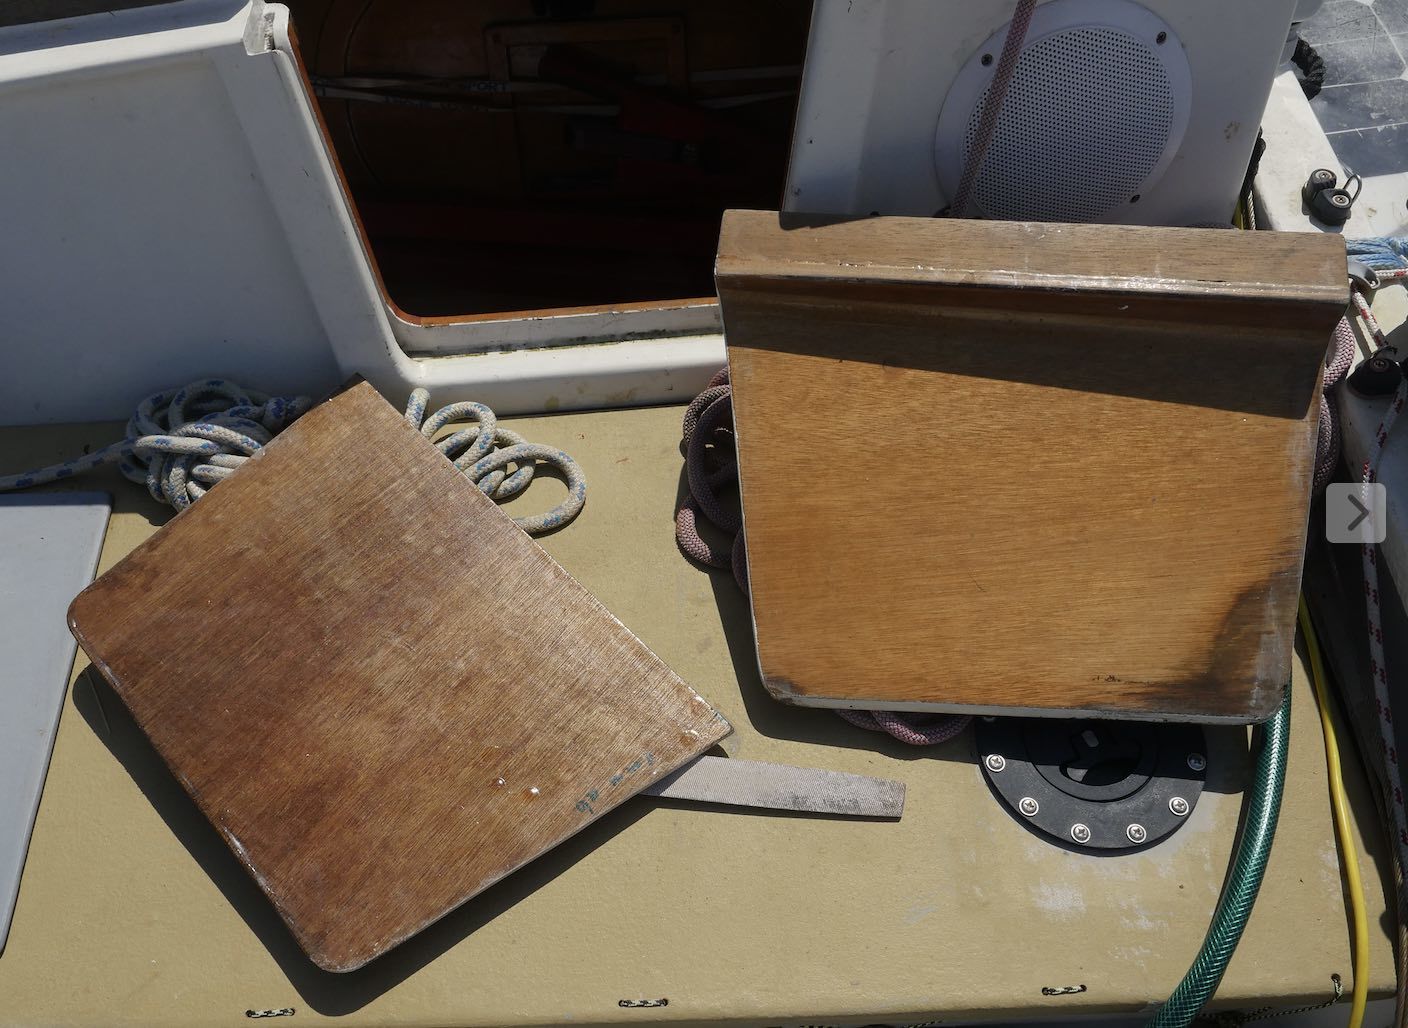
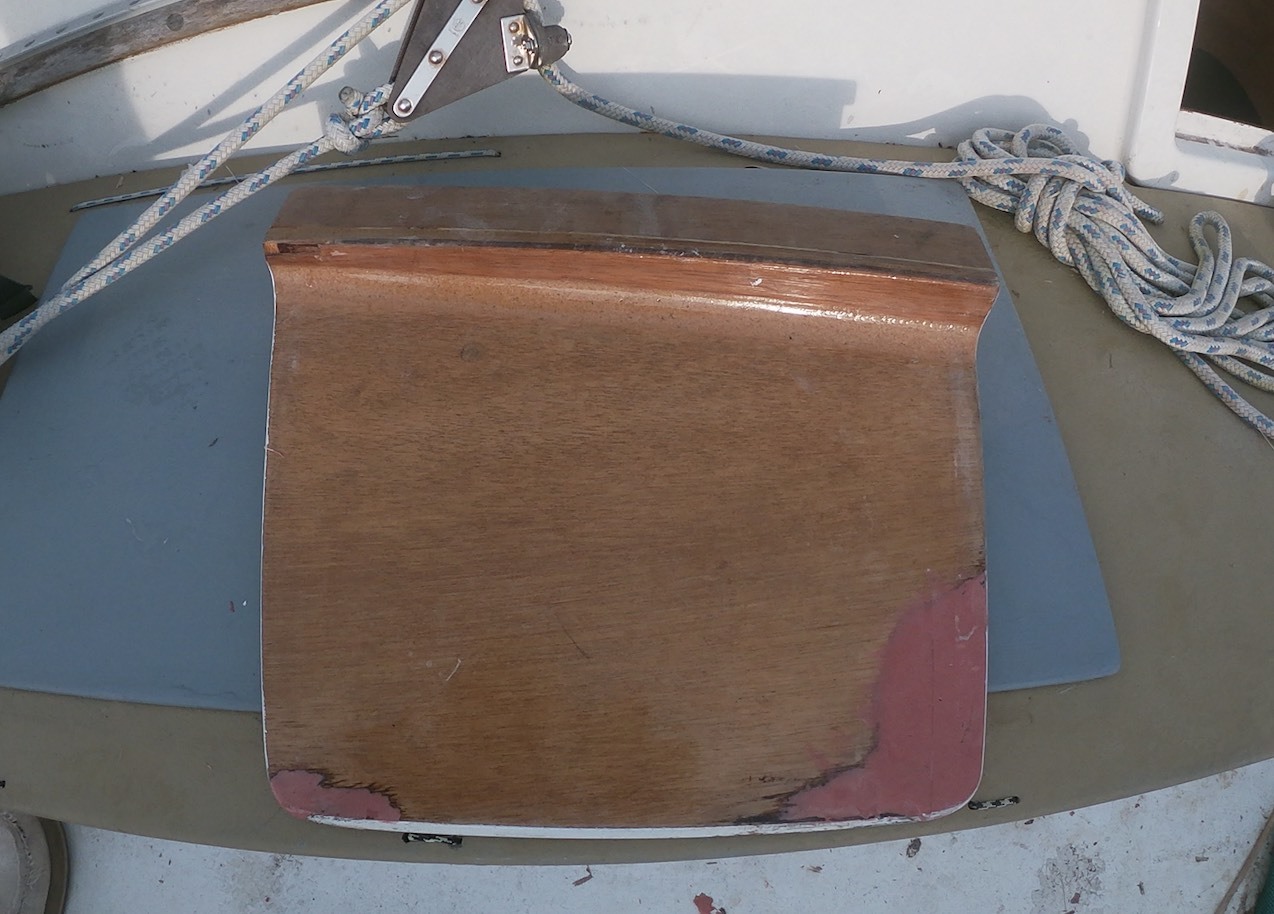
Some time ago I already found that the starboard washboard also had water intrusion at both lower edges and the wood there was soft. I had postponed the repair since it did not seem critical. Since I am at fixing now I am going to fix this too. I made a temporary wasch board from 6mm plywood to take the original home to fix it in the shade of the workshop.
September 24
Checked the fiberglass coating and went shopping for sanding paper, key duplication and other errands. Started working on repairing the washboard. Ordered a cover for the outboard motor.
September 25-28
Worked on several components.
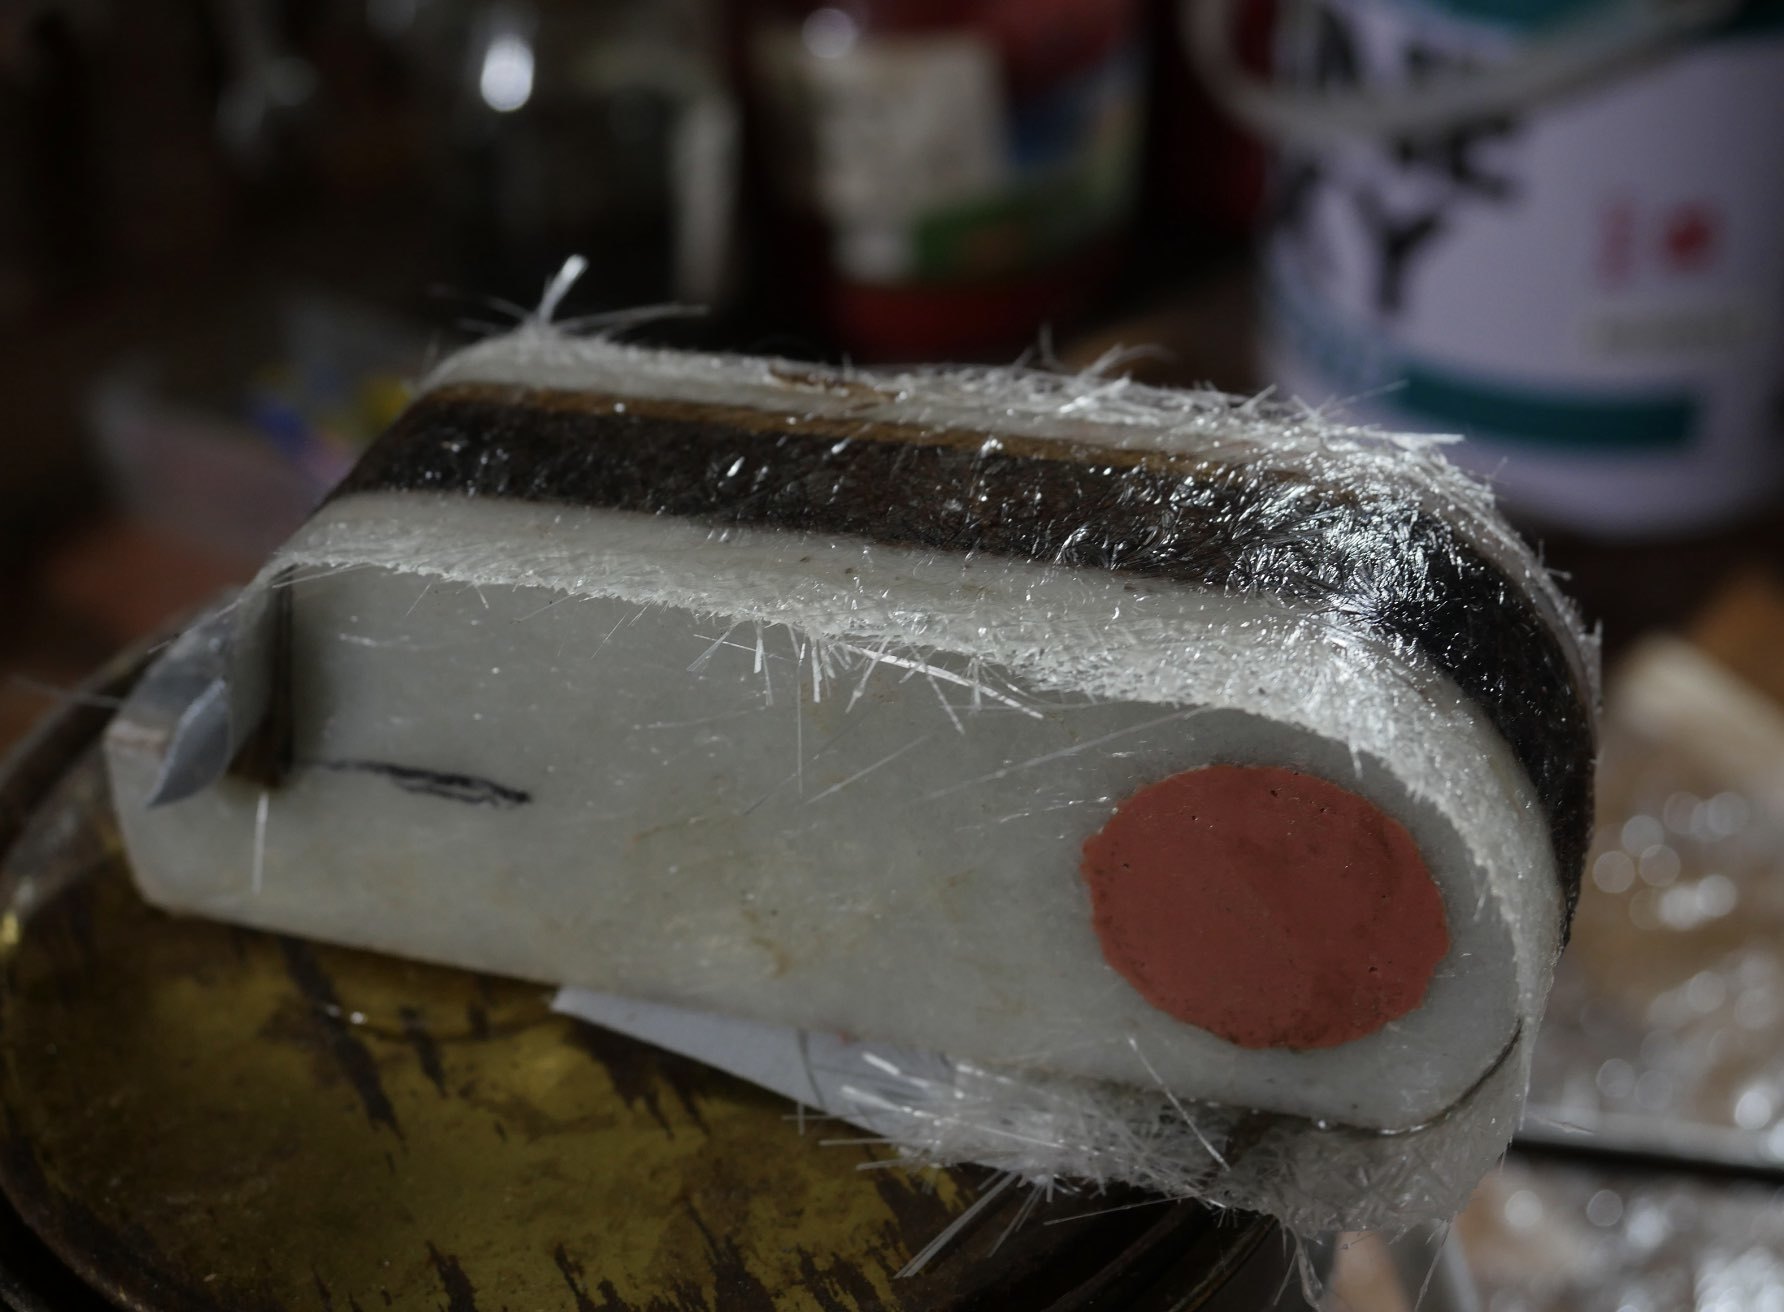
- Re-built the mast base, covered it in two layers 250g/m2 fiberglass, another layer of laminating expoxy to fill small gaps and primed it.
- Completed the the motor downhold,
- Restored the corners of the washboard
- Made some circular covers from plywood, removed the cabin ventilators and coverd the holes with the plywood, using lots of silicone to make sure it is watertight. I will design and make some better solar powered fans with humidity control, but that is currently low priority.
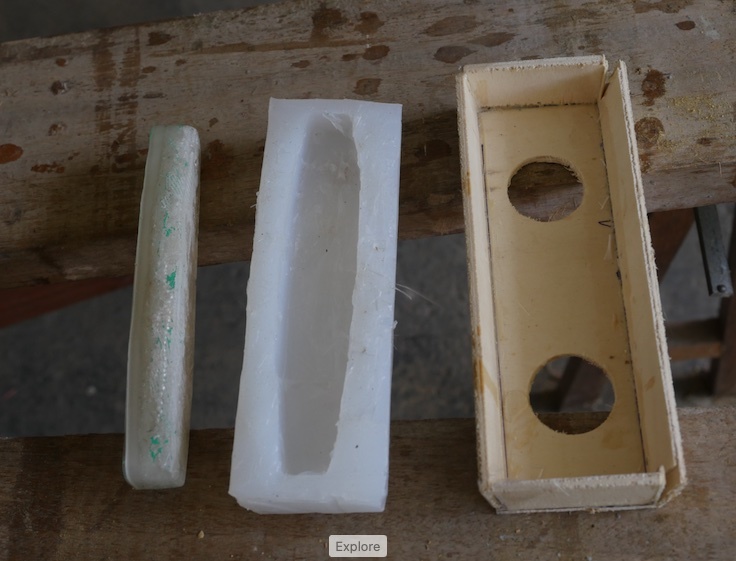
- Made a silicone mould for forming the cross beam cleats from glass fiber reinforced epoxy resin. The aluminium cleats seem to be a bit small, and also don’t fit the style of the boat.
We also talked to the owner of Princess Arietta, who had his boat at Watercraft dry dock for renewing of anti fouling, about lending his 4hp outboard motor for the regatta and he seems to be good with the idea. I will have to pick it up also after returning from Bangkok.
I wanted to paint the primed parts on September 29, but it rained the whole day. It will have to wait until I am back from Bangkok.
October 3
Painted the mast base and the motor down hold assembly white.
October 4
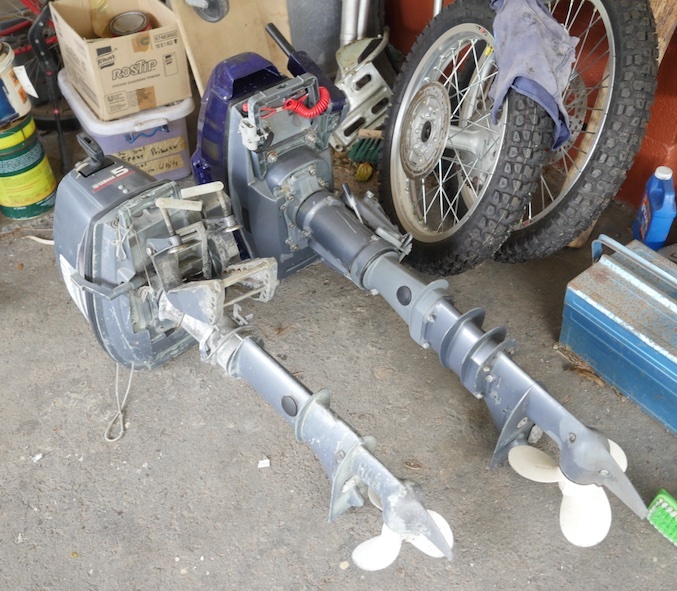
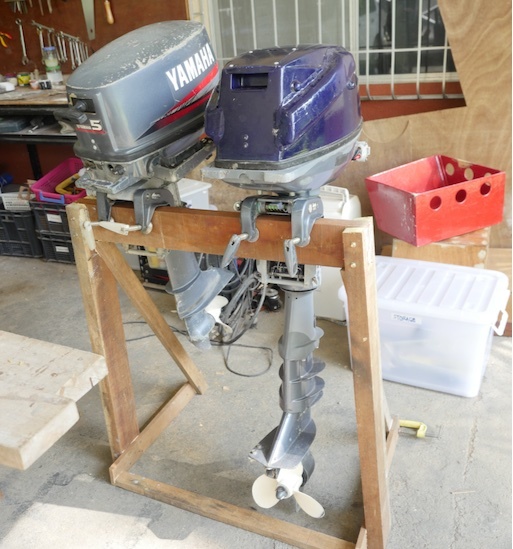
Went to Paranaque to pick up the 5hp motor from D. I combined the trip with a visit to the Embassy.
October 5
We wanted to raise the mast today while having lots of helping hands around, so I went to the marina to prepare things, but when checking the mast top lights (which worked before lowering the mast), just to make sure, I fount out that the wooden mast top also had water intrusion at one part. So having the guys around is unfortunately a missed opportunity. It will take me two days to restore it. Always have to wait for epoxy to cure between work steps, which is slowing down the work. But we are still within the plan. It also gives me the opportunity to restore the not so good contacts in the mast top light.
Since the mast top does not get mechanical stress, I had not covered to top layer it with fiberglass, only sealed the wood with epoxy, primed it and then painted it with industrial epoxy paint. This layer had been damaged somehow, water intruded, the wood expanded and cracked the epoxy layer. At some parts it was peeling off like the skin of a banana. Luckily the wood is intact, it just needed some drying to make sure that when it is re-sealed.
I use the opportunity to restore the contacts of the mast top light, and to fit a Windex on the mast top.
Re-ordered electrical cables for the starboard battery. After delivering online purchases for three months without much problems all of a sudden the delivery boys say they are refused access to SBFZ and 5 Lazada shipments were cancelled. After asking the SBFZ residents homepage for a better delivery address I re-ordered at Shopee. IMFITP.
On closer look it also turned out that the port washboard has also some water intrusion at the edges. This is probably why it gets stuck sometimes. Need to fix this too.
Finished the mould for the cleats. The wooden cleats often break, the aluminium cleats I bought as replacement are pretty much out of style and also smaller. So I decided to make some fiberglass reinforced cleats from epoxy resin. I will start with the two for the anchor ropes and if they work out good also do the six on the cross beams.

October 7-12
We went to Sundowners Beach Villas Zambales for 1 day (two nights) to collect the remaining parts of Magayon II. Unfortunately some went missing.
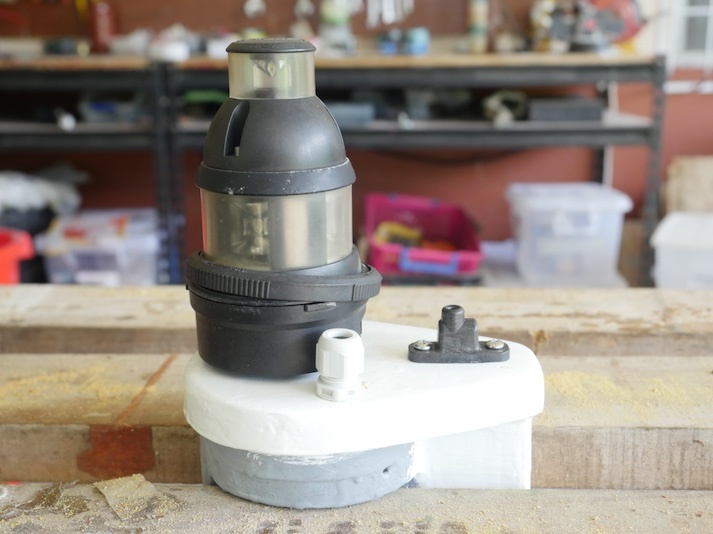
- Renovated the mast top: sanded the epoxy sealant, applied one layer of Rowin mat and another layer of epoxy. After sanding again, primed with epoxy primer and then finished with white epoxy paint.
- Restored the contacts of the mast top light and made them permanent since the plug is heavily corroded.
- Added a Windex to the mast top
- Tested the electrical connections of the mast top light. They work, the plug of the deck connector is slightly damaged.
- Renovated the electric isolations of the mast top screws to avoid the aluminum of the mast to corrode
In addition I started to remake some of the lost items and did some minor repairs
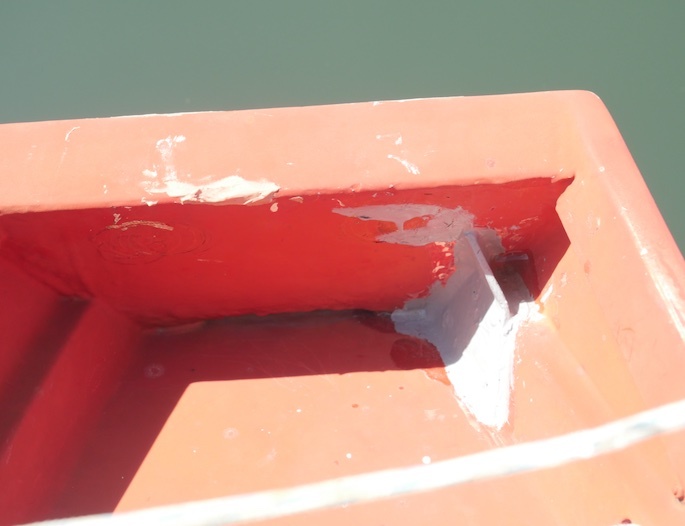
- Fixed some minor damage at the container for for the kitchen gear
- Painted the container for the tools red too
- Restored the port washboard edges
- Made a new false floor for the kitchen section
- Made the first epoxy cleat as a test
Also made a new rack for the outboard motor to replace the one gone missing
October 14
Miriam and Regis were here, so this was the opportunity to raise the mast. Some last minute work in the morning, new mast top halyard block assembly, fitting the WINDEX and the new halyards, and discussing a plan for the undertaking. We agreed on doing things without help first, and call on help if it turned out to be too difficult.
It went very well, without any problems. Two hours later the mast was up and most things cleaned up.

In the afternoon a rainbow welcomed the rejunvinated Magayon II to the new sailing season.
October 15
Now since the mast is back up, I am tackling the final high priority issues before the Regatta. We need to do some test sailing before going on the longer trip too, and I have promised some people who come to the Oktoberfest that we can go on a short cruise in Subic Bay.
Accomplished today:
- Extended the battery cable for the starboard hull, drilled the holes and sealed them with epoxy. Drilled wholes for the cable ties under the cabin floor and sealed them.
- Prepared for fixing the cabin fan, drilled the hole for the switch and sealed it.
- Cleaned up the boat a bit.
October 16-23
There was another bad weather period so work on the boat was opportunistic.
- Mounted battery on starboard and installed heavy duty cables
- Repaired switch for starboard cabin fan
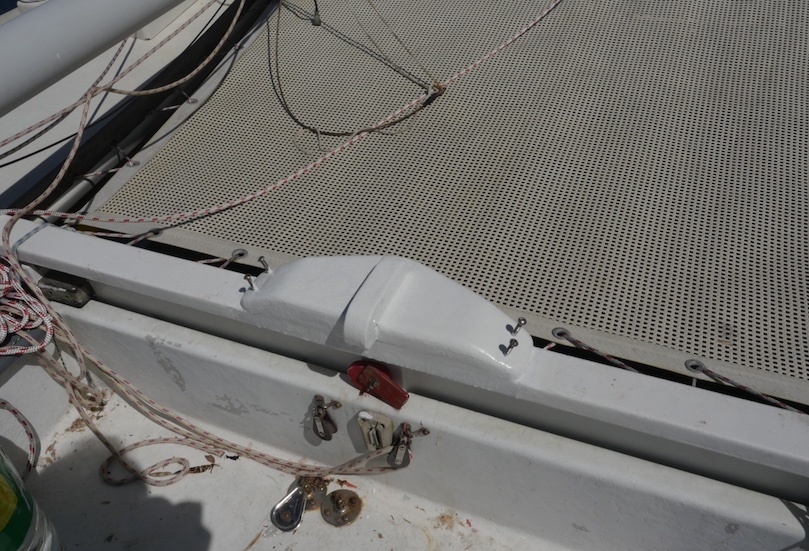
- Fitted an aluminium protection at aft crossbeam where ropes run
- Adjust the port tiller height with a lot of marine epoxy
- Swapped one screw of motor bracket
- Finished the electric 48V installation
- Designed and made a sun-shade for the topic when sails are down (not tested yet)
- Purchased a 800W two stroke generator as range extender for the electric motor.
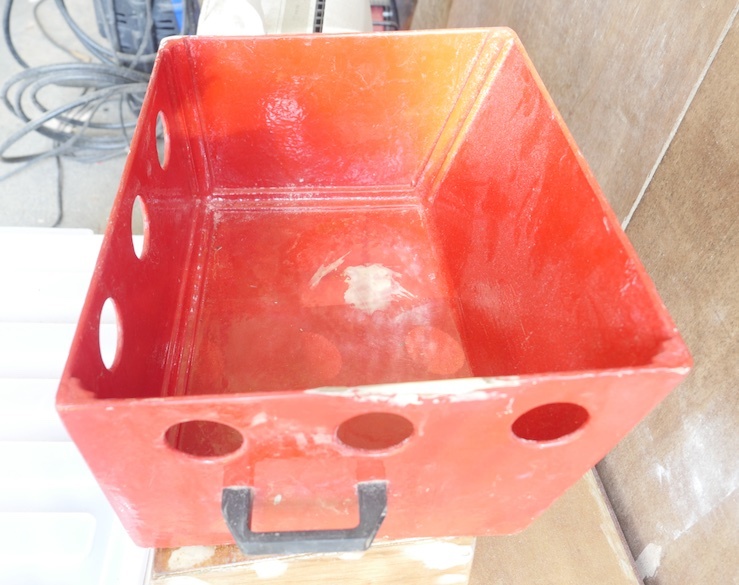
- (Mathias) made a box to protect the generator from sea water and rain.
- Made a cable to connect the generator to the 48V charger.
October 24 (date?)
Test sailed the boat with Mathias in Subic Bay. Except for some minor issues that can be sorted out during the travel, the boat works fine.
However, the voltmeters bought on Lazada already started failing.
Medium priority issues still to be addressed
- Test the water tank, seal and flush with fresh water
- Sand and seal the top of the starboard cabin where the teakwood rotted
- Make current sensor for electric motor
- Change / replace wooden cleats
Lower priority (for more comfort on cruises)
- Test solar panels
- Make a cockpit Table
- Make a new 12V main battery
- Stainless steel protection for anchor chain
- Make cushions for the cockpit seats
- Aluminium protection for jib sheet blocks
- Find a Tackimo replacement
- Make smart cabin ventilators
- Make a peltier element cooler for the drink box